Last Tuesday, I stood in my kitchen at 6:45 AM, staring at a Tupperware container that was supposed to contain a “treat” for my son’s third-grade classmates. It was back-to-school week, which means everyone is tired, the routine is still settling into place, and the lunchbox situation is chaos. I had thrown together a batch of cookies the night before because, let’s be honest, I hadn’t planned ahead. But when I opened the container this morning, they were a disaster. They were flat, crumbly, and had turned into hard little disks that looked more like coasters than cookies.
My son took one look at them, sighed, and asked, “Can we just get granola bars?” That sigh broke me a little. I didn’t want him to have just another dry, mass-produced snack. I wanted him to have something that felt special. Something that made him the cool kid in class who brings the best treats. So, I threw out the recipe I was using and pulled out my trusty, tried-and-true method for soft chocolate chip lunchbox cookies.
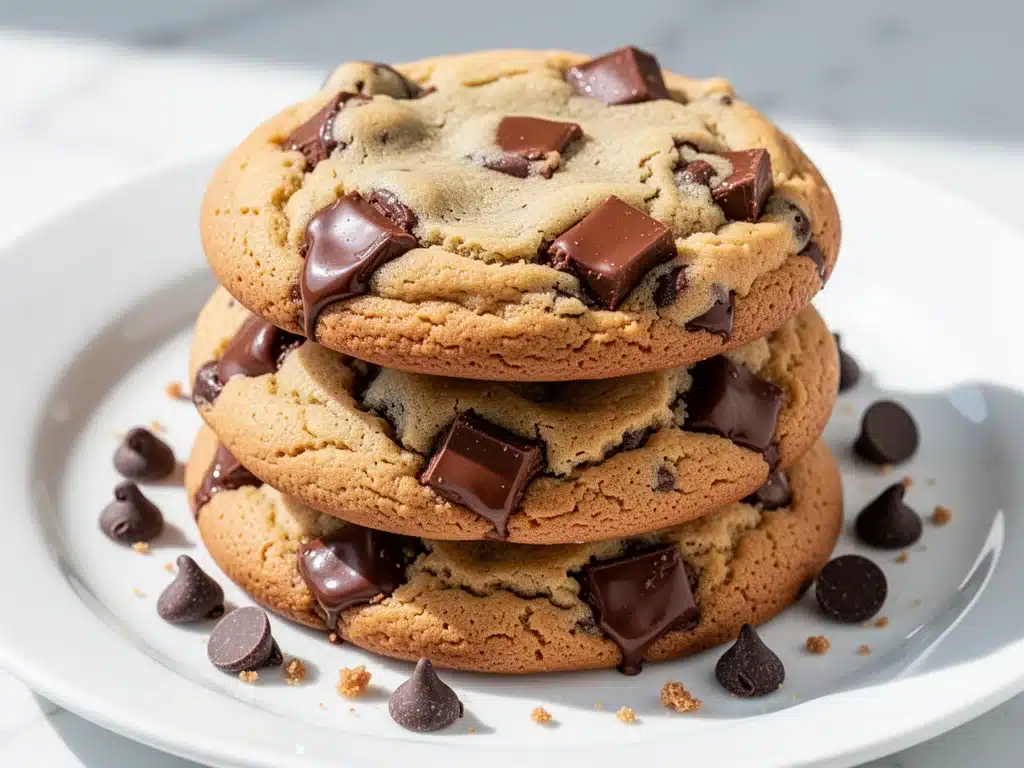
This isn’t just any chocolate chip cookie. This is the specific version I’ve perfected over the last five years of back-to-school seasons. It’s the cookie that survives the lunchbox journey—the one that doesn’t turn to mush by 2 PM and doesn’t crumble into a million pieces when your kid tries to break it in half. It’s soft, chewy, packed with chocolate, and crucially, it holds its shape. I’ve made these dozens of times now, tweaking the ratio of brown sugar to white sugar and learning exactly how long to bake them so they stay tender. And I’m sharing it with you because I know exactly how stressful lunchbox prep can be.
There is something deeply satisfying about seeing your kid’s lunchbox friend light up when they pull out a warm, soft cookie from their bag. It’s a small moment, but it matters. These cookies are my answer to “what’s for snack?” when I’m running on empty. They’re easy enough to make on a Sunday night while watching TV, and they’re good enough to keep in the pantry for random hunger strikes during movie nights. If you’re looking for a reliable, soft, and delicious treat that makes the back-to-school rush a little easier, you’ve found it. Let’s get baking.
Why You’ll Love This Recipe
I’ve tried every “healthy” cookie recipe, every gluten-free alternative, and every fancy bakery-style method. But for a simple, crowd-pleasing lunchbox treat, this soft chocolate chip lunchbox cookie recipe is the gold standard. Here’s why it has earned a permanent spot in my rotation (and hopefully, yours):
- Actually Soft — I’m not talking about “soft” like “barely baked.” I mean pillowy, chewy, melt-in-your-mouth soft. These cookies stay tender for days, even in a sealed container. My kids test this rigorously.
- Stays Intact — The biggest problem with soft cookies is they fall apart. These have the perfect structural integrity. They survive being tossed into a backpack, squeezed between a sandwich and an apple, and eaten with sticky fingers.
- Quick & Easy — You don’t need to chill the dough overnight. You don’t need a stand mixer. You can mix this by hand in one bowl in about 15 minutes. It’s perfect for last-minute requests.
- Chocolate Lover’s Dream — We use a 50/50 mix of semi-sweet chocolate chips and chocolate chunks. This gives you both the melty pockets and the substantial chocolate bites that kids (and adults) crave.
- Freezer Friendly — I make a double batch and freeze half the dough. When my kids suddenly want cookies three weeks later, I just pull out a portion. They bake perfectly from frozen.
Real talk: these cookies are my secret weapon. They make me look like a Pinterest fairy godmother, but they’re actually just simple, honest ingredients mixed together. No fancy techniques, no weird substitutions. Just butter, sugar, flour, and chocolate. It’s comfort food in cookie form.
Ingredients You’ll Need
Here’s the best part: you probably have 90% of this in your pantry already. This isn’t a recipe that requires a special trip to the store. I’m particular about a few things, but overall, this is very forgiving.
For the Dough
Unsalted Butter (1 cup / 226g) — This is the base. I use European-style butter like Kerrygold or Plugrá when I have it because it has a higher fat content and makes the cookies richer. But regular unsalted butter works fine. Make sure it’s softened to room temperature. If you microwave it, it’ll melt and make the cookies flat. Softened means you can press your finger into it and leave an indent, but it shouldn’t be greasy.
Brown Sugar (1 ½ cups / 300g) — This is the key to the soft texture. Dark brown sugar has more molasses, which keeps the cookies moist. I use dark brown sugar for these because I want that deep, caramel-like flavor. If you only have light brown, it’ll work, but the cookies might be slightly less chewy.
Granulated White Sugar (½ cup / 100g) — This helps with the edges. It gives those nice, slightly crisp edges while keeping the center soft. Don’t skip it entirely, or the cookies will spread too much and be cakey.
Eggs (2 large / 100g) — Room temperature eggs incorporate better into the butter. If you’re in a rush, just crack them into a small bowl of warm water for 5 minutes before adding them to the mix.
Vanilla Extract (2 teaspoons) — Use real vanilla, not imitation. It makes a noticeable difference in flavor. I keep a bottle of Nielsen-Massey or McCormick’s Pure Vanilla on hand.
All-Purpose Flour (2 ¼ cups / 280g) — Don’t overpack the flour! I fluff it up with a spoon before scooping. If you scoop directly from the bag, you’ll pack too much flour in, and your cookies will be dry and dense. Measure by weight if you have a kitchen scale—it’s the most accurate way.
Baking Soda (1 teaspoon) — This helps the cookies spread and brown. Make sure it’s not expired! If your baking soda is old, your cookies won’t rise properly.
Salt (1 teaspoon) — Even though these are sweet, salt is crucial. It balances the sugar and enhances the chocolate flavor. I use fine sea salt.
For the Mix-Ins
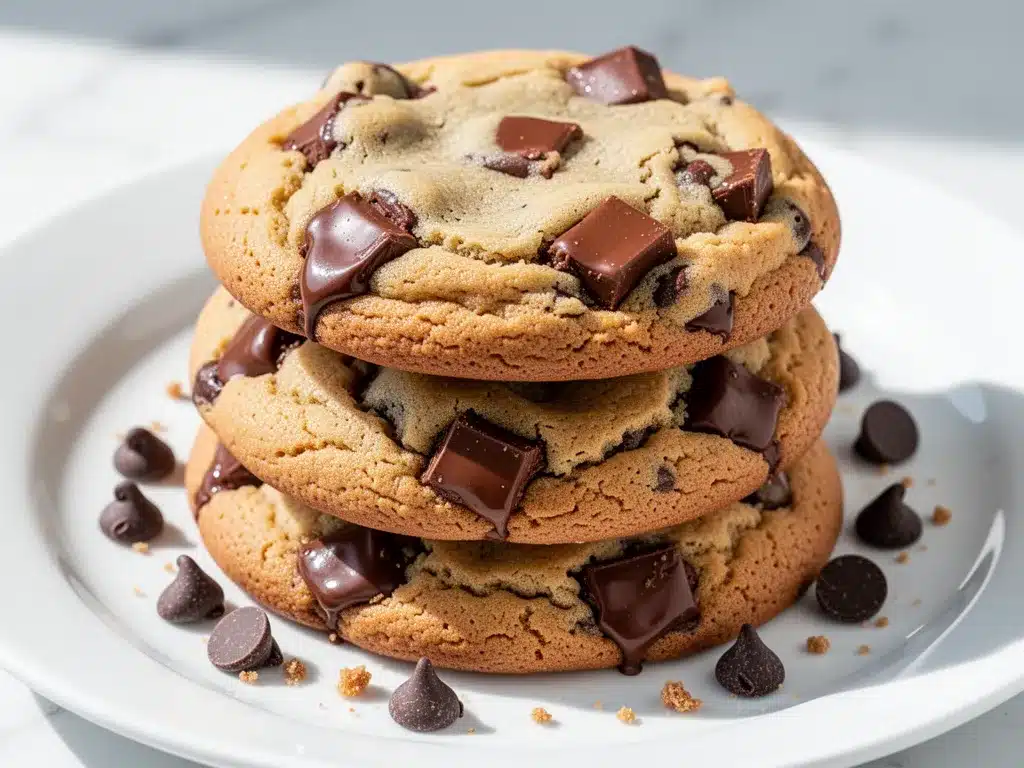
Semi-Sweet Chocolate Chips (1 cup / 170g) — I use Ghirardelli or Nestlé Toll House. They melt beautifully and are widely available.
Chocolate Chunks or Chunks (1 cup / 170g) — This is my secret weapon. Chunks give you those big, melty bites of chocolate. You can buy chocolate bars and chop them yourself, or buy pre-made chunks. I love the texture contrast.
Equipment Needed
You don’t need fancy gadgets for this. Here’s what I actually use:
Large Mixing Bowl — I use a 5-quart glass bowl. It’s big enough to mix everything without making a mess. A wooden spoon or sturdy spatula works best here.
Measuring Cups and Spoons — Standard stuff. If you have a set with clear markings, great. If not, just be careful not to pack the flour.
Parchment Paper — Line your baking sheets with parchment. This prevents sticking and makes cleanup a breeze. I never bake cookies on bare sheets anymore—trust me on this.
Cooling Rack — Essential for cooling the cookies evenly. If you don’t have one, you can use the back of a baking sheet or just let them cool on the sheet for a few minutes.
Airtight Container — For storing the finished cookies. I use a plastic container with a tight lid. It keeps them soft for days.
How to Make It: Step-by-Step
Alright, let’s make these soft chocolate chip lunchbox cookies! I’m walking you through exactly how I do it, including the little tricks I’ve picked up over the years.
Step 1: Prep Your Dry Ingredients (5 minutes)
In a medium bowl, whisk together the flour, baking soda, and salt. Set this aside. I know it seems like an extra step, but it ensures the baking soda is evenly distributed, so you don’t get any bitter bites of raw soda in your cookies. If you skip this, you might end up with a metallic taste.
Step 2: Cream the Butter and Sugars (3 minutes)
In a large bowl, beat the softened unsalted butter, brown sugar, and granulated sugar together. I do this by hand with a wooden spoon, but a hand mixer works too. Cream them until the mixture looks light, fluffy, and combined. This takes about 2-3 minutes. If you don’t cream them enough, the cookies will be dense. If you cream them too much, they might spread too thin. Aim for a smooth, creamy texture.
Step 3: Add Eggs and Vanilla (2 minutes)
Add the eggs one at a time, beating well after each addition. Then add the vanilla extract. Mix until just combined. Don’t overmix here. You want the eggs to be incorporated, but you don’t want to develop too much gluten. The mixture should look glossy and smooth.
Step 4: Combine Wet and Dry (2 minutes)
Add the dry ingredients to the wet ingredients. Mix on low speed or by hand until just combined. Stop as soon as you no longer see streaks of flour. Overmixing at this stage is the #1 reason cookies turn out tough. You want a soft, slightly sticky dough. If it looks too dry, add a tablespoon of milk. If it’s too wet, add a tablespoon of flour.
Step 5: Fold in the Chocolate (2 minutes)
Stir in the chocolate chips and chocolate chunks by hand. Use a spatula or wooden spoon. Distribute them evenly throughout the dough. You want every cookie to have a good amount of chocolate. I usually save a few extra chunks to press on top of the cookies before baking for that bakery look.
Step 6: Scoop and Chill (Optional but Recommended)
Scoop the dough into balls (about 2 tablespoons each) and place them on a parchment-lined baking sheet. If you have time, chill the dough in the fridge for 30 minutes. This helps the flavors meld and prevents the cookies from spreading too much. If you’re in a rush, you can skip this step, but the cookies will be slightly thinner.
Step 7: Bake (10-12 minutes)
Preheat your oven to 350°F (175°C). Bake the cookies for 10-12 minutes. They should be golden brown on the edges but still soft and slightly underdone in the center. This is crucial. They will continue to cook on the hot baking sheet after you take them out. If you bake them until they’re fully firm in the center, they’ll be dry and crumbly.
Step 8: Cool and Store
Let the cookies cool on the baking sheet for 5 minutes, then transfer them to a cooling rack. Once completely cool, store them in an airtight container. They’ll stay soft for up to 5 days at room temperature.
Expert Tips & Tricks
Here’s everything I’ve learned from making these dozens of times. These tips will save you from my mistakes.
Don’t Overbake — This is the most important tip. Take the cookies out when they look slightly underdone. They will firm up as they cool. If you wait until they look perfectly done in the oven, they’ll be hard when they cool.
Chill the Dough — If you have time, chill the dough for at least 30 minutes. This prevents spreading and deepens the flavor. I often make the dough the night before and bake in the morning. It’s a game-changer.
Use Room Temperature Butter — If your butter is too cold, it won’t cream properly. If it’s too warm, the cookies will spread too much. Aim for a texture like thick peanut butter.
Measure Flour Correctly — Spoon the flour into the measuring cup and level it off. Don’t scoop directly from the bag. Too much flour = dry, tough cookies.
Press Extra Chocolate on Top — Before baking, press a few extra chocolate chips or chunks onto the top of each cookie dough ball. It looks professional and ensures every bite has chocolate.
Variations & Substitutions
Once you’ve nailed the basic version, here’s how you can mix it up. I’ve tried all of these.
White Chocolate Macadamia — Swap the chocolate chips for white chocolate chips and add 1 cup of chopped macadamia nuts. It’s sweet, nutty, and delicious.
Peanut Butter Chip — Swap the chocolate chips for peanut butter chips. Add ½ cup of creamy peanut butter to the dough for extra richness. My husband loves this version.
Double Chocolate — Add 2 tablespoons of cocoa powder to the dry ingredients. Use dark chocolate chips for an intense chocolate flavor.
Gluten-Free — Use a 1:1 gluten-free flour blend. Add ½ teaspoon of xanthan gum if the blend doesn’t include it. The texture will be slightly more tender.
Vegan — Use vegan butter and eggs (or flax eggs). Use vegan chocolate chips. The cookies will be slightly more cakey but still delicious.
Serving & Storage
How to Serve: I usually serve these warm, right out of the oven, with a glass of cold milk. But they’re also perfect at room temperature for lunchboxes. I pack them in a single layer in a container to prevent crushing.
Side Dishes: These go great with apple slices, yogurt, or a smoothie. They’re a perfect snack or dessert.
Storage Instructions: Store in an airtight container at room temperature for up to 5 days. For longer storage, freeze the cookies for up to 3 months. Thaw at room temperature before serving.
Reheating: To get that fresh-baked taste, microwave a cookie for 10-15 seconds. It’ll be soft and warm. Don’t overheat it, or it’ll get tough.
Nutrition Information
I’m not a nutritionist, but here’s the breakdown if you’re tracking. Per cookie (makes about 24 cookies):
- Calories: 180
- Protein: 2g
- Carbs: 24g
- Fiber: 1g
- Sugar: 16g
- Fat: 9g
- Saturated Fat: 5g
- Cholesterol: 25mg
- Sodium: 120mg
What’s good? It’s a reasonable treat. Not a health food, but not a sugar bomb. What to know? It contains dairy and gluten. Can be made gluten-free or vegan with substitutions. My take? Enjoy it as a special treat. Balance it with a healthy meal, and you’re good.
Final Thoughts
So that’s my go-to soft chocolate chip lunchbox cookie recipe! I’ve probably talked your ear off at this point, but when you make a recipe this often, you have a lot to say about it. These cookies have saved me more times than I can count. They’re my answer to “what’s for snack?” when I’m tired, don’t want to buy processed stuff, and still want something that tastes really good. My kids are happy, my husband’s happy, and I’m happy because I’m not stressed about cooking.
Make it yours! Try different mix-ins, adjust the chocolate, or change the sugar ratio. The best recipes are the ones you adapt to your family’s tastes. If you make this, drop a comment and let me know what you think! I love hearing how recipes turn out in your kitchen. And if something doesn’t work, tell me that too—I’m here to help troubleshoot.
Happy baking! And I hope your kitchen smells half as good as mine does right now.
Frequently Asked Questions
Q: Can I use margarine instead of butter?
A: You can, but the flavor and texture won’t be as good. Butter has a higher fat content and a better flavor than most margarines. If you must use margarine, choose a stick-style margarine, not the spread in a tub. The tub spreads are too high in water and will make the cookies flat and greasy.
Q: Why did my cookies spread too much?
A: This usually means your butter was too warm, or you didn’t chill the dough. If your butter is melted, the cookies will spread before they have a chance to set. Always use softened butter, not melted. Chilling the dough for 30 minutes helps the cookies hold their shape.
Q: Can I freeze the cookie dough?
A: Absolutely! Scoop the dough into balls and freeze them on a baking sheet. Once frozen, transfer them to an airtight container or freezer bag. You can bake them straight from frozen. Just add 1-2 minutes to the baking time. This is my favorite meal prep hack.
Q: Can I use dark chocolate chips instead of semi-sweet?
A: Yes! Dark chocolate chips will give the cookies a more intense, less sweet flavor. I like to use a mix of semi-sweet and dark chocolate for balance. If you use all dark chocolate, the cookies might be slightly less sweet, which some people prefer.
Q: How do I keep the cookies soft for days?
A: The key is to underbake them slightly and store them in an airtight container. If you want extra insurance, add a slice of bread to the container. The cookies will absorb the moisture from the bread and stay soft. It sounds weird, but it works.
Q: Can I make these cookies gluten-free?
A: Yes! Use a 1:1 gluten-free flour blend. Make sure the blend includes xanthan gum, or add ½ teaspoon yourself. The texture will be slightly more tender, but they’ll still be delicious. Just be careful not to overmix the dough.
Q: Can I double this recipe?
A: Yes, you can double everything. Just make sure you have a large enough bowl to mix the dough. You might need to mix in batches if your bowl is small. The baking time stays the same.
Pin This Recipe!


Soft Chocolate Chip Lunchbox Cookies: 5-Step Snack
- Total Time: 25 minutes
- Yield: 24 cookies 1x
Description
A reliable, soft, and chewy chocolate chip cookie recipe designed to survive the lunchbox journey without crumbling or going stale. Perfect for back-to-school snacks or any time you need a quick, crowd-pleasing treat.
Ingredients
- 1 cup (226g) unsalted butter, softened to room temperature
- 1 ½ cups (300g) dark brown sugar
- ½ cup (100g) granulated white sugar
- 2 large eggs, room temperature
- 2 teaspoons pure vanilla extract
- 2 ¼ cups (280g) all-purpose flour
- 1 teaspoon baking soda
- 1 teaspoon fine sea salt
- 1 cup (170g) semi-sweet chocolate chips
- 1 cup (170g) chocolate chunks
Instructions
- Preheat oven to 350°F (175°C) and line baking sheets with parchment paper.
- In a medium bowl, whisk together the flour, baking soda, and salt. Set aside.
- In a large bowl, cream the softened butter, brown sugar, and granulated sugar together until light, fluffy, and combined (about 2-3 minutes).
- Add the eggs one at a time, beating well after each addition, then mix in the vanilla extract until just combined.
- Add the dry ingredients to the wet ingredients and mix on low speed or by hand until just combined. Do not overmix.
- Fold in the chocolate chips and chocolate chunks by hand until evenly distributed.
- Scoop dough into balls (about 2 tablespoons each) and place on prepared baking sheets. For best results, chill dough for 30 minutes.
- Bake for 10-12 minutes, or until edges are golden brown but centers are still soft and slightly underdone.
- Let cookies cool on the baking sheet for 5 minutes, then transfer to a cooling rack to cool completely.
- Store in an airtight container at room temperature for up to 5 days.
Notes
Ensure butter is softened, not melted, to prevent flat cookies. Do not overbake; cookies will firm up as they cool. For extra softness, store with a slice of bread in the airtight container. Dough can be frozen for up to 3 months.
- Prep Time: 15 minutes
- Cook Time: 10-12 minutes
- Category: Dessert
- Cuisine: American
Nutrition
- Serving Size: 1 cookie
- Calories: 180
- Sugar: 16
- Sodium: 120
- Fat: 9
- Saturated Fat: 5
- Carbohydrates: 24
- Fiber: 1
- Protein: 2
Keywords: soft chocolate chip cookies, lunchbox cookies, back to school snacks, easy cookie recipe, chewy cookies, school treats


