I still remember the first time I tried to make a New York style cheesecake. I was twenty-four, living in a tiny apartment with a oven that ran way too hot, and I was convinced I was a decent cook. I followed a “simple” online recipe, poured in the batter, and walked away feeling proud. Thirty minutes later, I heard a sound like a bomb going off in the kitchen. My cheesecake had cracked down the middle so badly it looked like a topographical map of disappointment.
I scraped it into the trash. I ordered pizza. I swore I’d never bake again.
Fast forward twelve years. I’ve made this New York style cheesecake probably forty times now. I’ve cracked it, I’ve underbaked it, I’ve overbaked it, and I’ve finally nailed the version that makes people stop mid-bite and close their eyes. It’s dense, it’s creamy, it has that signature tang that cuts through the sweetness, and it holds its shape perfectly when sliced. This isn’t that fluffy, mousse-like cheesecake you get at some trendy brunch spots. This is the real deal. The kind you get in a classic New York deli or a high-end patisserie.
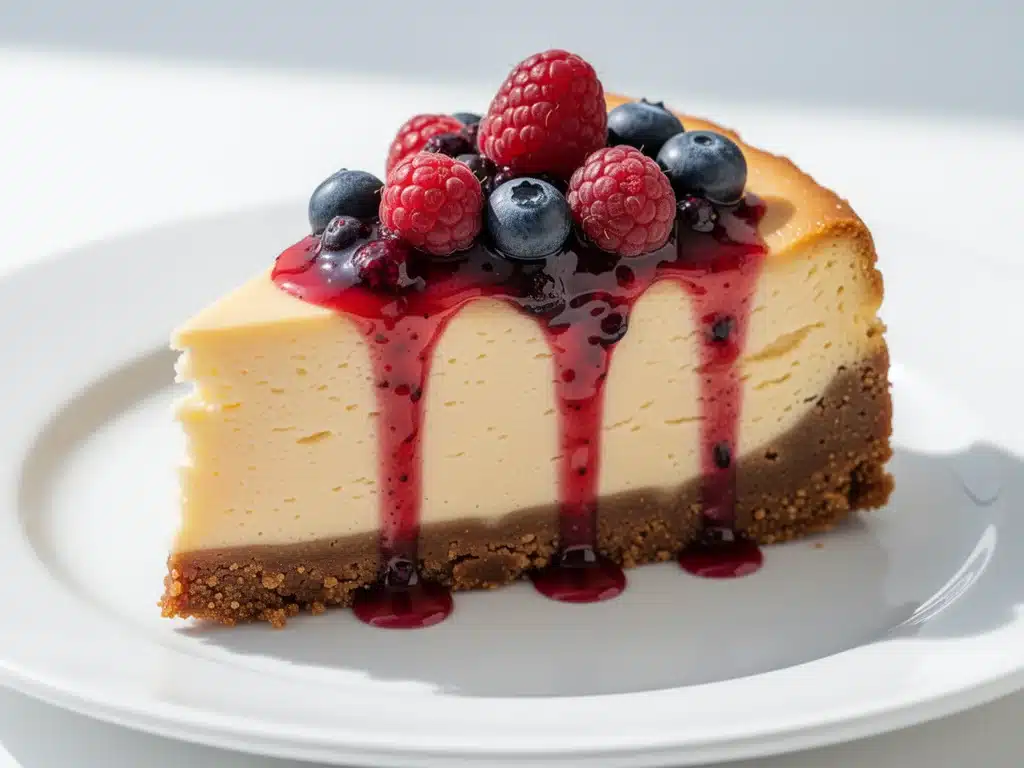
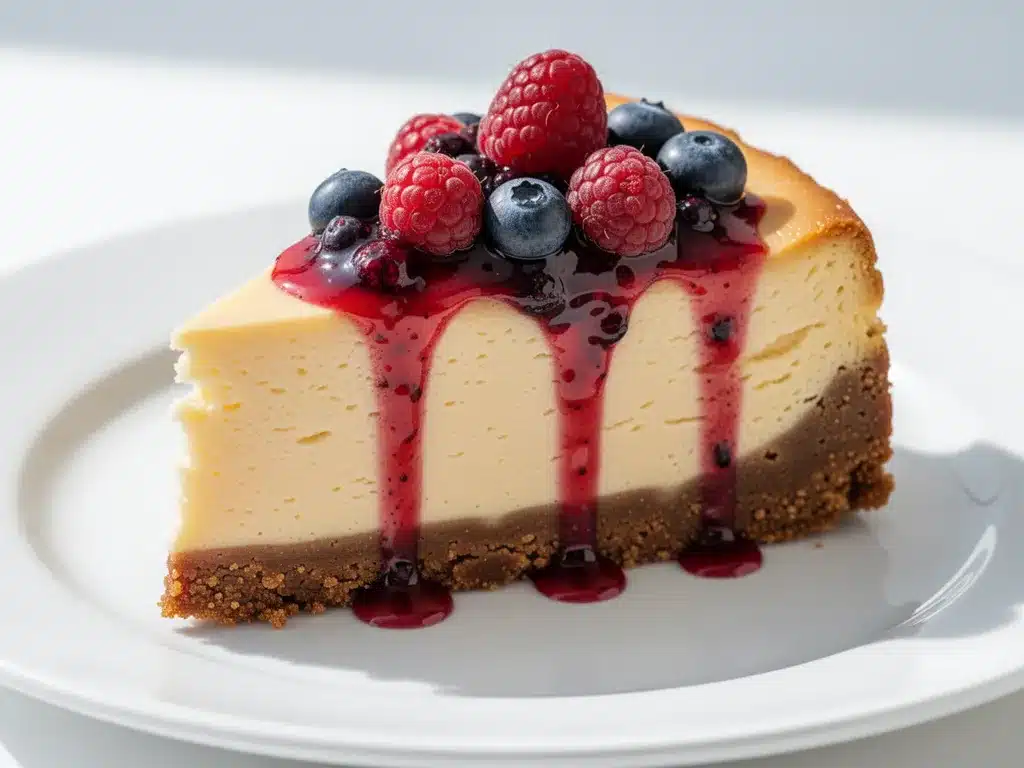
And the classic berry dessert topping? It’s not just an afterthought. That combination of tart raspberries, sweet blueberries, and a hint of lemon zest balances the richness of the cheese so perfectly that one slice feels like enough (even though we all know it’s not).
Why You’ll Love This Recipe
There are a hundred cheesecake recipes out there. Why this one? Because it respects your time while delivering restaurant-quality results. Here’s what makes it special:
- Actually Creamy, Not Grainy — I’ve tested this batter multiple times to get the texture just right. It’s smooth as silk, not dense like a brick or airy like a cloud. The secret is in how you mix it.
- Classic NY Density — This isn’t a light, whipped cream-filled dessert. It’s substantial. It’s the kind of cheesecake that feels like a hug on a plate.
- Make-Ahead Friendly — You can’t rush cheesecake. It needs time to set. I love making this 24 hours before I need it. The flavor deepens overnight, and it takes the pressure off.
- Perfect Berry Topping — The berry sauce isn’t just jam. It’s a fresh, vibrant compote that adds acidity and brightness, cutting through the heavy cream cheese.
- Crust That Stays Put — No soggy bottoms here. The graham cracker crust is baked briefly first, then filled, ensuring a crisp base every time.
This is my go-to recipe for holidays, birthdays, or when I need to impress a date without looking like I tried too hard. It’s elegant, but it’s also comforting.
Ingredients You’ll Need
Let’s talk about what goes into this New York style cheesecake. You don’t need fancy, hard-to-find items, but you do need to get the quality right on a few key things.
For The Crust
Graham cracker crumbs (1 ½ cups / 150g) — Use real graham crackers, not those pre-crushed boxes if you can help it. They taste stale. Crush them in a food processor for the perfect texture. You want fine crumbs, not chunks.
Unsalted butter (6 tablespoons / 85g) — Melted. This is what holds the crust together. Don’t skimp on butter, or your crust will crumble apart.
Granulated sugar (2 tablespoons / 25g) — Just a little bit to sweeten the crust. It shouldn’t taste like candy.
Salt (¼ teaspoon) — Crucial. It balances the sweetness and brings out the buttery flavor.
For The Filling
Cream cheese (32 ounces / 900g) — This is the big one. You need four 8-ounce blocks. Not the tub stuff. Not the low-fat stuff. Full-fat, brick-style cream cheese. If it’s not in a foil-wrapped block, it’s not right for this recipe.
Granulated sugar (1 cup / 200g) — Yes, a full cup. Don’t reduce this. The sugar tenderizes the cheesecake. If you’re worried about sweetness, the berry topping helps balance it.
Sour cream (1 cup / 240g) — This is the secret ingredient for that tangy NY flavor. It also adds fat, which keeps the texture rich and creamy. Use full-fat sour cream.
Vanilla extract (2 teaspoons) — Use real vanilla, not imitation. It makes a noticeable difference in flavor.
Eggs (4 large) — Room temperature. This is non-negotiable. Cold eggs will seize your cream cheese. Take them out of the fridge an hour before you start.
For The Classic Berry Topping
Raspberries (1 ½ cups / 200g) — Fresh or frozen. If frozen, don’t thaw them completely; just toss them in.
Blueberries (1 cup / 150g) — Adds color and a different burst of flavor.
Granulated sugar (¼ cup / 50g) — To draw out the juices.
Lemon juice (1 tablespoon) — Brightens the berries and prevents browning.
Water (2 tablespoons) — Helps create the sauce consistency.
Cornstarch (1 teaspoon mixed with 1 tbsp water) — To thicken the sauce so it coats the spoon, not the plate.
Equipment Needed
You don’t need a lot of fancy gear, but having the right tools makes a huge difference.
9-inch Springform Pan — This is essential. The sides pop off for easy removal. Make sure it’s in good condition so the batter doesn’t leak. I wrap the outside in heavy-duty foil just to be safe.
Food Processor — For crushing graham crackers evenly. If you don’t have one, put them in a ziplock bag and crush with a rolling pin. It takes more elbow grease but works.
Electric Mixer — Handheld or stand mixer. You need to beat the cream cheese until it’s perfectly smooth. Doing this by hand is possible but painful and likely to leave lumps.
Rubber Spatula — For scraping down the sides of the bowl. You want every bit of batter.
Saucepan — Small to medium, for cooking the berry topping.
How To Make It: Step-by-Step
Alright, let’s get baking. This process is straightforward, but patience is key. I’m walking you through exactly how I do it, including the little tricks I’ve picked up over the years.
Step 1: Prep Your Pan and Oven
Preheat your oven to 325°F (160°C). It’s important to use a moderate temperature. High heat causes cracks. Grease the bottom of your springform pan lightly with butter. You don’t need to grease the sides; the crust will stick to those.
Step 2: Make The Crust
In a medium bowl, mix the graham cracker crumbs, 2 tablespoons of sugar, and salt. Pour in the melted butter and stir until it looks like wet sand. Press this mixture firmly into the bottom of the springform pan. Use the bottom of a measuring cup to pack it down tight. You want an even layer.
Bake the crust for 8 minutes. This pre-bakes it, ensuring it stays crisp even after sitting in the wet batter. Remove from oven and let it cool while you make the filling. Leave the oven on.
Step 3: Beat The Cream Cheese
In a large bowl, beat the 32 ounces of room-temperature cream cheese on medium-low speed. This is the most critical step. You need to beat it for at least 3-4 minutes until it is completely smooth, creamy, and no lumps remain. Scrape down the sides and bottom of the bowl frequently. If you rush this, you’ll have lumpy cheesecake.
Step 4: Add Sugar and Sour Cream
Reduce the mixer speed to low. Add the 1 cup of sugar and the 1 cup of sour cream. Beat just until combined. Do not overmix here. You’re incorporating air, and too much air can cause cracking later. Scrape the bowl again.
Step 5: Mix In Eggs
Add the eggs one at a time, mixing on low speed just until the yellow disappears. Again, do not overmix. Once the egg is incorporated, stop. Overbeating eggs creates too much air, which expands in the oven and then collapses, causing cracks.
Stir in the vanilla extract by hand with your spatula. Give it one final gentle fold to ensure everything is homogenous.
Step 6: Pour and Bake
Pour the batter over the cooled crust. Smooth the top with a spatula. Place the springform pan in the oven. Bake for 60-70 minutes.
How do you know it’s done? The edges should be set and slightly jiggly, but the center (about a 2-inch circle) should still have a slight jiggle when you gently shake the pan. It will continue to set as it cools. If the center is liquidy, it needs more time. If it’s firm all the way through, you’ve overbaked it.
Step 7: The Cool Down
Turn off the oven and crack the door open slightly. Let the cheesecake sit in the cooling oven for 1 hour. This gradual cooling prevents thermal shock, which is a major cause of cracking. After an hour, remove it from the oven and run a thin knife around the edge to loosen it from the pan. This helps it contract without sticking.
Let it cool completely on a wire rack (about 2 hours), then refrigerate for at least 6 hours, preferably overnight. This is when the magic happens. The flavors meld, and the texture firms up.
Step 8: Make The Berry Topping
While the cheesecake chills, make the topping. In a small saucepan, combine raspberries, blueberries, sugar, lemon juice, and water. Cook over medium heat, stirring occasionally, for about 5-7 minutes until the berries break down and release their juices.
Mix the cornstarch with 1 tablespoon of water to make a slurry. Stir this into the berry mixture. Cook for another 1-2 minutes until the sauce thickens enough to coat the back of a spoon. Remove from heat and let it cool completely. It will thicken further as it cools.
Expert Tips & Tricks
Here’s everything I’ve learned from making this dozens of times. These tips will save you from my mistakes.
Room Temperature Is Non-Negotiable
I cannot stress this enough. Your cream cheese and eggs must be room temperature. Cold cream cheese creates lumps that you can’t beat out. Cold eggs can cause the batter to seize. Take everything out of the fridge the night before, or at least an hour before you start.
Don’t Overmix
Once you add the eggs, stop beating. You want to incorporate them, not whip air into the batter. Air is the enemy of a dense, crack-free cheesecake. If you see bubbles on the surface, tap the pan on the counter a few times to pop them before baking.
Water Bath? Maybe.
Many recipes call for a water bath (placing the springform pan in a larger pan filled with hot water). I’ve tried it both ways. For this recipe, I actually prefer skipping it because it can make the crust soggy if not done perfectly. The gradual cooling in the turned-off oven works just as well for preventing cracks. If you live in a humid climate or are very anxious, you can try a water bath, but wrap the pan in foil twice to prevent leaks.
Knife Around The Edge
As soon as you take the cheesecake out of the oven, run a knife around the edge. Cheesecake contracts as it cools. If it’s stuck to the pan, it will crack on the sides as it shrinks. Loosening it early prevents this.
Chill Overnight
I know it’s tempting to eat it right away. Don’t. The cheesecake needs time to set. If you cut it too soon, it will be mushy. Overnight chilling is the key to clean slices.
Variations & Substitutions
Once you’ve nailed the basic version, here’s how you can mix it up. I’ve tried all of these.
Chocolate Chip Cheesecake
Add 1 cup of semi-sweet chocolate chips to the batter after mixing in the eggs. Fold them in gently. My kids love this version.
Strawberry Swirl
Instead of the berry topping, make a strawberry puree (blend fresh strawberries with sugar) and swirl it into the batter before baking. Use a knife to create a marble effect.
Gluten-Free Crust
Use gluten-free graham crackers or almond flour for the crust. Everything else is naturally gluten-free. I use almond flour sometimes for a nuttier, richer crust.
Dairy-Free Option
This is trickier because cream cheese is the star. You can use a high-quality vegan cream cheese block (like Kite Hill or Miyoko’s), but the texture will be slightly different. You may need to add a bit more sour cream (or coconut yogurt) to get the right consistency. It’s good, but not quite the same as the dairy version.
Other Berries
Love blackberries? Use them. Mixed berries? Go for it. The recipe is flexible. Just adjust the sugar slightly if your berries are very tart.
Serving & Storage
How to Serve
I usually serve this straight from the fridge. The cold temperature contrasts nicely with the creamy texture. Use a sharp, thin-bladed knife. Dip it in hot water and wipe it dry between each cut for clean, professional slices. Top with a generous spoonful of the berry compote.
Side Dishes
This cheesecake is rich enough to stand alone, but if you want sides, try:
- Fresh mint leaves for garnish
- A dollop of whipped cream (if you want to go overboard)
- A simple arugula salad on the side to cut the richness
Storage Instructions
Refrigerator: Store in the springform pan or transfer to an airtight container. It will keep for up to 5 days. It actually tastes better on day 2 or 3 as the flavors meld.
Freezer: Yes, you can freeze cheesecake! Wrap the whole pan (or individual slices) tightly in plastic wrap, then in aluminum foil. Freeze for up to 2 months. Thaw overnight in the fridge. The texture might be slightly softer, but it’s still delicious.
Reheating: Do not reheat. Cheesecake is best cold or room temperature. Heating it will make the texture greasy and separated.
Nutrition Information
I’m not a nutritionist, but here’s the breakdown if you’re tracking. This is a rich dessert, so portions matter.
Per Serving (based on 12 slices):
- Calories: 480
- Protein: 8g
- Carbs: 35g
- Fiber: 1g
- Sugar: 24g
- Fat: 34g
What’s Good:
- High in protein from the cream cheese and eggs
- Calcium-rich
What to Know:
- High in saturated fat and calories
- Contains dairy and gluten
My Take:
Look, this is a indulgent dessert. It’s not a health food. But it’s far better than store-bought versions loaded with preservatives. When I make this, I enjoy a small slice with the berry topping and feel satisfied. It’s about quality over quantity.
Final Thoughts
So that’s my New York style cheesecake! I know I’ve talked a lot about cracks and temperature, but when you make a recipe this classic, the details matter. This recipe has saved me during holidays and impressed guests who thought I was a professional baker.
It’s worth the wait. The patience required to let it cool and chill is part of the process. But that first slice, with the creamy cheese and the tart berry topping? It’s worth every minute.
Make it yours! Try different berries, add chocolate, or keep it classic. The best recipes are the ones you adapt to your family’s tastes. If you make this, drop a comment and let me know what you think! I love hearing how recipes turn out in your kitchen. And if something doesn’t work, tell me that too—I’m here to help troubleshoot.
Happy baking! And I hope your kitchen smells half as good as mine does right now.
Frequently Asked Questions
Why did my cheesecake crack?
Cracking is usually caused by overmixing (which incorporates too much air) or baking at too high a temperature. It can also happen if the cheesecake cools too quickly. Follow my tips: mix gently, bake at 325°F, and let it cool gradually in the turned-off oven. Run a knife around the edge immediately after baking to relieve tension.
Can I use low-fat cream cheese?
I strongly advise against it. Low-fat cream cheese has more water and less fat, which changes the texture. It can become grainy or watery. For a true New York style cheesecake, you need full-fat, brick-style cream cheese. It’s the foundation of the recipe.
How long does the berry topping last?
The berry compote will last in the refrigerator for up to 5 days in an airtight container. It thickens as it cools, so you may need to stir in a little water or lemon juice if it gets too thick before serving.
Can I make this without a springform pan?
It’s difficult but possible. You can use a regular round cake pan, but you’ll need to line it with parchment paper and flip the cheesecake out to slice it. The springform pan is really designed for this specific type of dessert, so I recommend getting one if you plan to make cheesecake often.
Why is my cheesecake watery?
This usually happens if you underbaked it. The center should still jiggle slightly, but it shouldn’t be liquid. If it’s watery after cooling, you may have overmixed the eggs, causing them to separate. Next time, mix less and bake a few minutes longer.
Can I freeze the whole cheesecake?
Yes! Wrap the entire springform pan tightly in plastic wrap and then aluminum foil. Freeze for up to 2 months. Thaw overnight in the fridge. You can add the berry topping after thawing. The texture might be slightly softer, but it’s still delicious.
What if I don’t have a food processor?
You can crush the graham crackers in a ziplock bag using a rolling pin or a heavy pan. It takes more effort, but it works. Just make sure you get them fine enough so the crust isn’t chunky.
Pin This Recipe!
New York Style Cheesecake: Best Classic Berry Dessert
- Total Time: 8 hours 40 minutes
- Yield: 12 servings 1x
Description
A dense, creamy, and tangy classic New York style cheesecake with a crisp graham cracker crust and a vibrant fresh berry compote topping. This recipe ensures a crack-free result with professional-quality texture.
Ingredients
- 1 ½ cups (150g) graham cracker crumbs
- 6 tablespoons (85g) unsalted butter, melted
- 2 tablespoons (25g) granulated sugar
- ¼ teaspoon salt
- 32 ounces (900g) full-fat brick-style cream cheese, room temperature
- 1 cup (200g) granulated sugar
- 1 cup (240g) full-fat sour cream
- 2 teaspoons vanilla extract
- 4 large eggs, room temperature
- 1 ½ cups (200g) raspberries
- 1 cup (150g) blueberries
- ¼ cup (50g) granulated sugar
- 1 tablespoon lemon juice
- 2 tablespoons water
- 1 teaspoon cornstarch mixed with 1 tablespoon water
Instructions
- Preheat oven to 325°F (160°C). Lightly grease the bottom of a 9-inch springform pan.
- In a medium bowl, mix graham cracker crumbs, 2 tablespoons sugar, and salt. Stir in melted butter until it resembles wet sand.
- Press the crust mixture firmly into the bottom of the pan. Bake for 8 minutes, then remove and let cool. Leave oven on.
- In a large bowl, beat cream cheese on medium-low speed for 3-4 minutes until completely smooth and lump-free. Scrape down sides frequently.
- Reduce mixer to low. Add 1 cup sugar and sour cream. Beat just until combined. Do not overmix.
- Add eggs one at a time on low speed, mixing only until the yellow disappears. Stir in vanilla extract by hand.
- Pour batter over the cooled crust and smooth the top.
- Bake for 60-70 minutes. The edges should be set but the center (2-inch circle) should still jiggle slightly.
- Turn off oven and crack the door open. Let cheesecake sit in the oven for 1 hour to cool gradually.
- Remove from oven and run a thin knife around the edge to loosen. Cool completely on a wire rack (about 2 hours).
- Refrigerate for at least 6 hours, preferably overnight.
- For the topping, combine raspberries, blueberries, ¼ cup sugar, lemon juice, and water in a saucepan. Cook over medium heat for 5-7 minutes until berries break down.
- Stir in cornstarch slurry and cook for 1-2 minutes until thickened. Let cool completely before serving.
Notes
Ensure all dairy ingredients (cream cheese, eggs, sour cream) are at room temperature to prevent lumps and seizing. Do not overmix the batter after adding eggs to avoid incorporating air, which causes cracking. The cheesecake must be chilled overnight for the best texture and clean slicing. Do not reheat; serve cold or at room temperature.
- Prep Time: 30 minutes
- Cook Time: 70 minutes
- Category: Dessert
- Cuisine: American
Nutrition
- Serving Size: 1 slice
- Calories: 480
- Sugar: 24
- Sodium: 350
- Fat: 34
- Saturated Fat: 20
- Carbohydrates: 35
- Fiber: 1
- Protein: 8
Keywords: New York cheesecake, classic cheesecake, berry topping, graham cracker crust, creamy cheesecake, dessert recipe


