It was last Saturday morning, the kind where the sun is streaming through the kitchen window and the house is quiet enough to hear the refrigerator hum. I had promised my six-year-old, Leo, that we would make something “special.” Not cereal. Not toast. Something that felt like a weekend treat. He wanted pancakes, but not just any pancakes. He wanted the kind he sees on Instagram—the ones that look like clouds, the ones that wobble when you poke them. I’ve been there before. I’ve stood over a griddle with a bowl of batter, watching my hopes deflate right along with the pancakes. They were flat. They were dense. They tasted like disappointment.
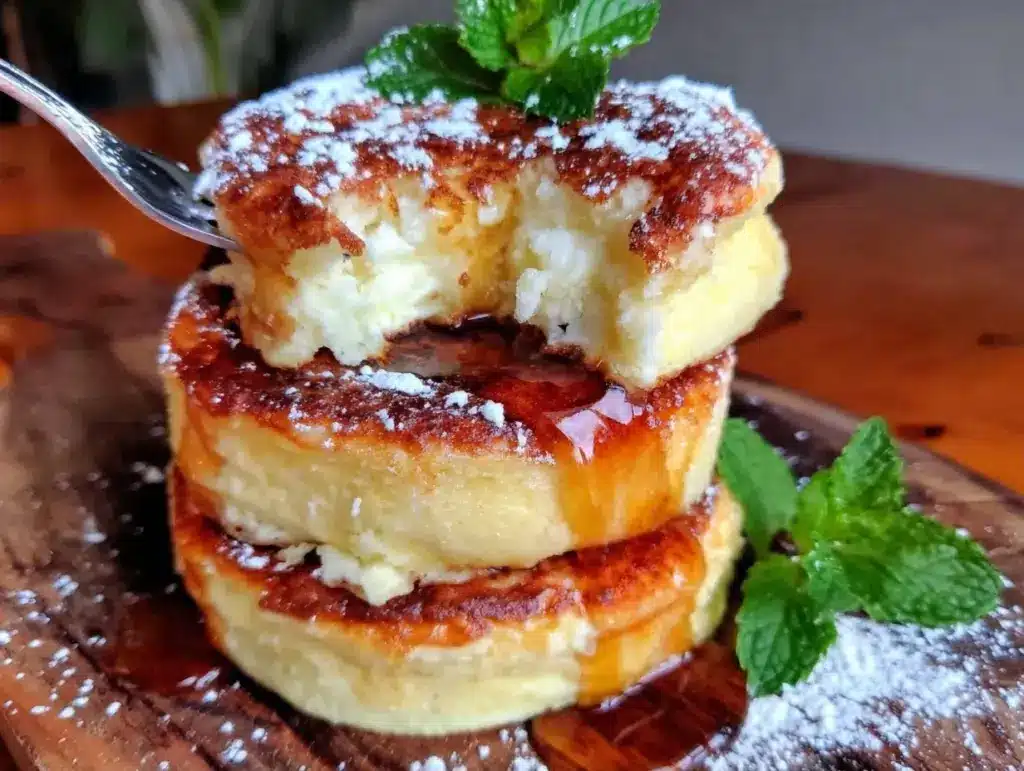
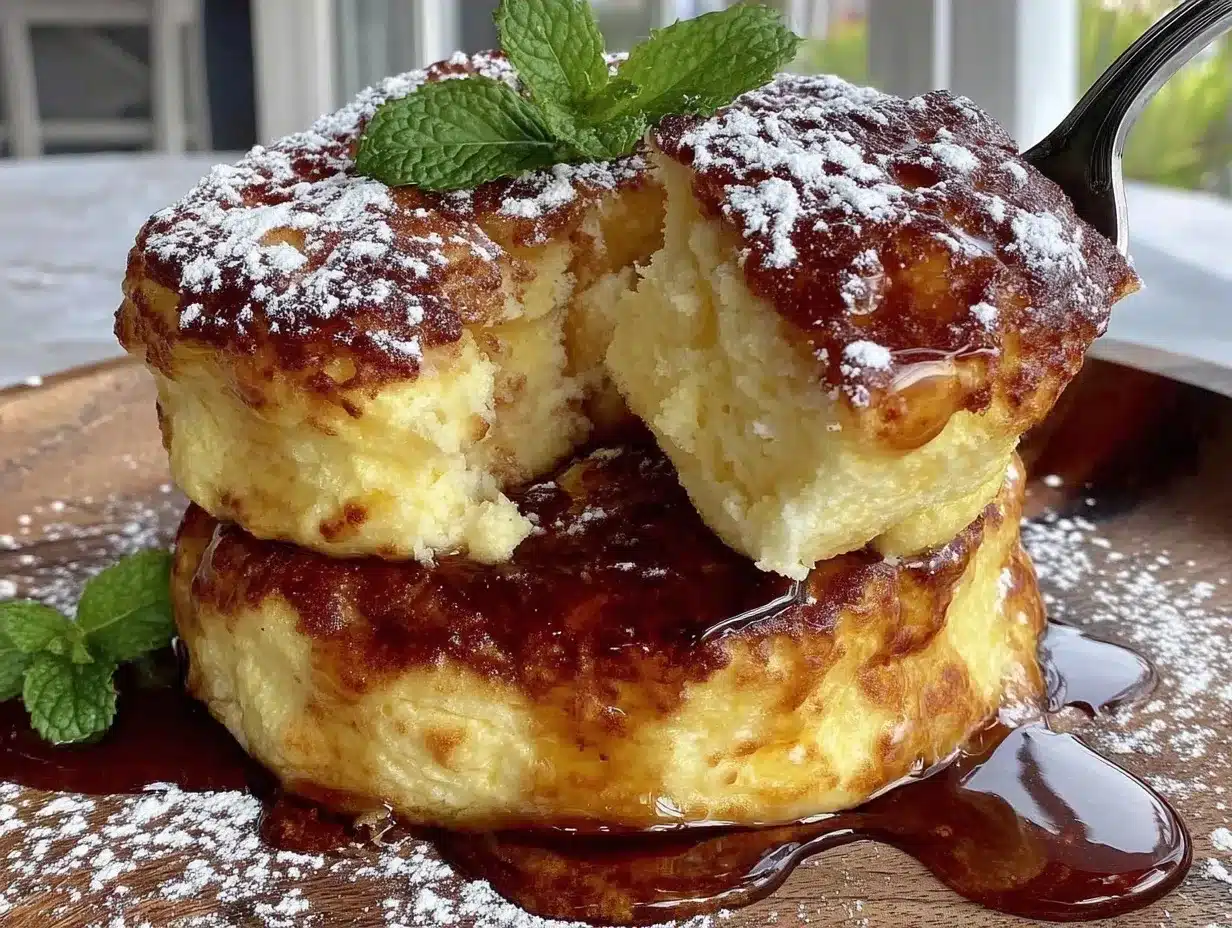
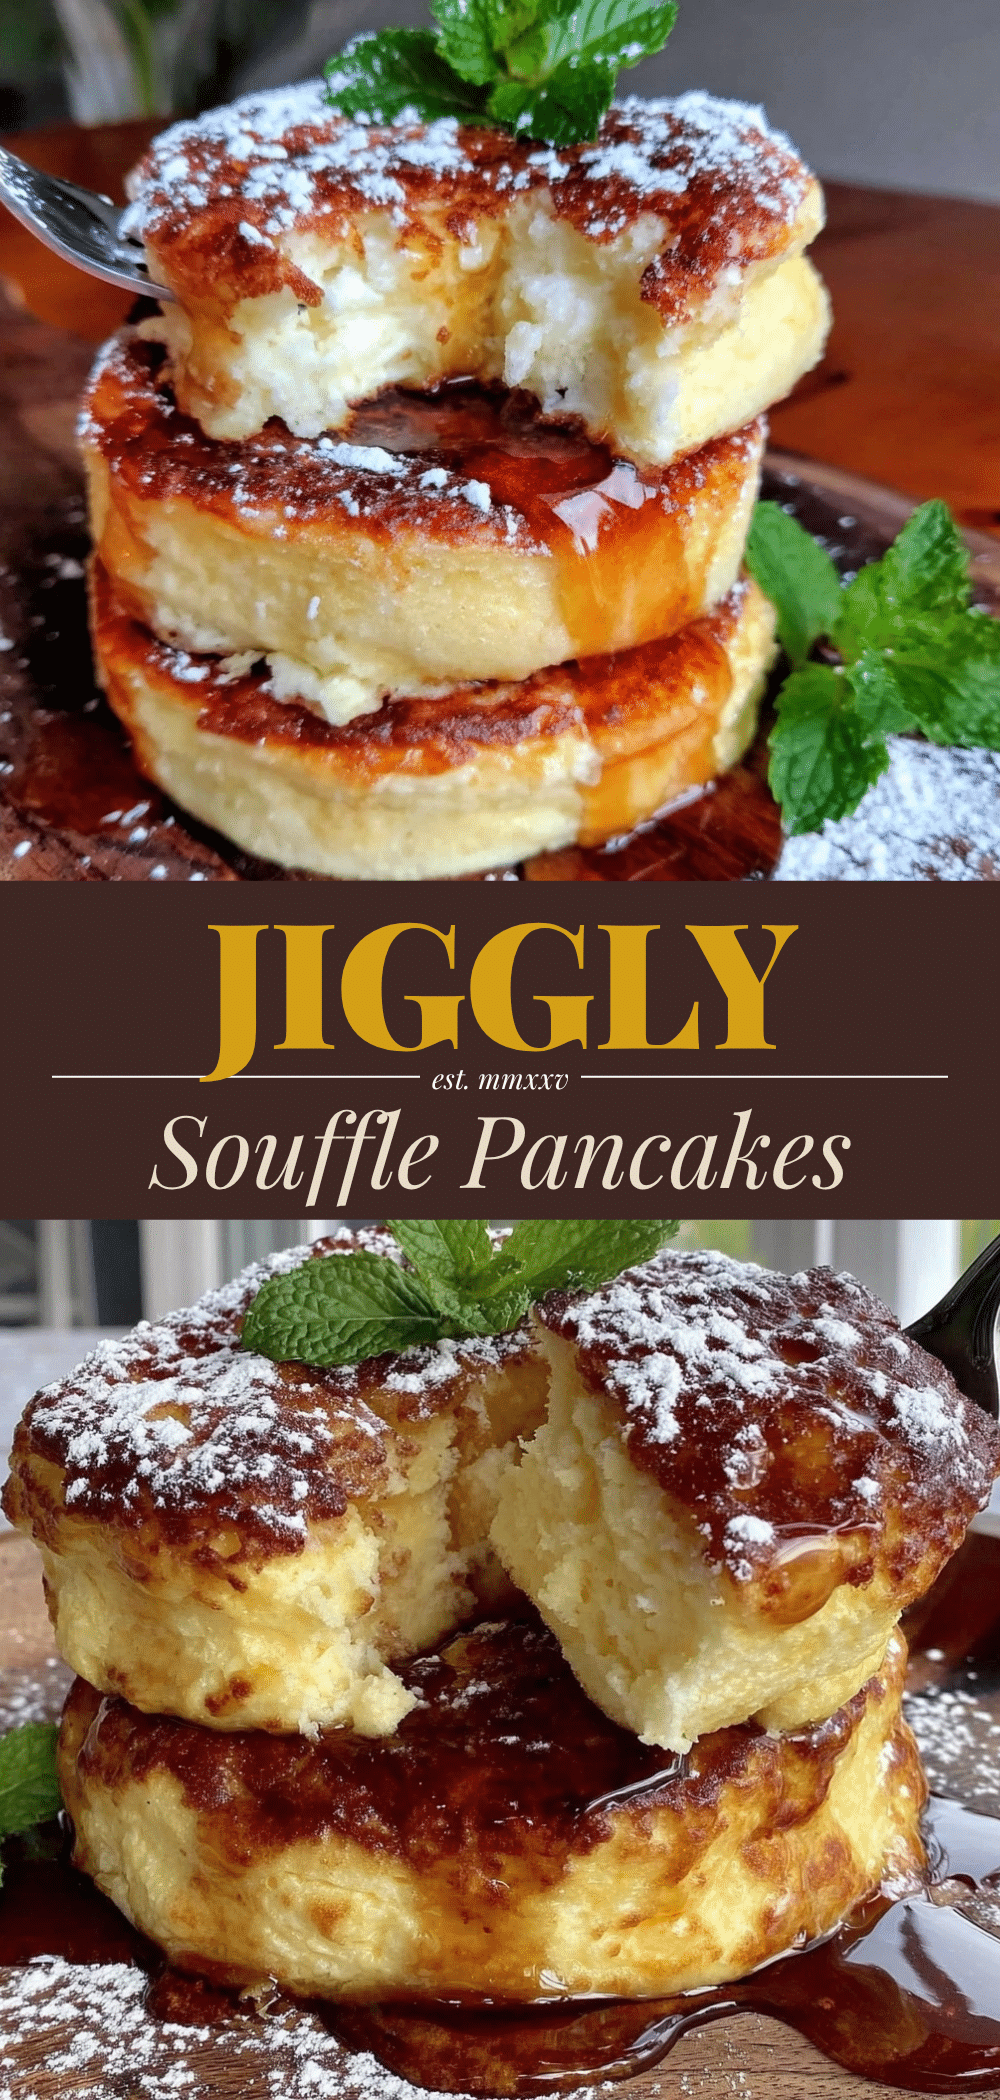
But after three failed attempts and a lot of extra scrubbing, I finally cracked the code. These Fluffy Japanese Souffle Pancakes Kids Love are different. They are tall, jiggly, and impossibly soft. The first time I got them right, Leo didn’t just eat them; he stared at them. He poked the stack with his finger, giggled when it bounced, and then took a bite that made his eyes go wide. “Mom,” he said, “they’re like marshmallows.” That moment, sticky with syrup and filled with his delight, is why I keep making this recipe. It’s not just about breakfast. It’s about that shared time, that quiet morning connection, and the pride on their faces when they help create something magical.
I’ve tested this Fluffy Japanese Souffle Pancakes Kids Love recipe over a dozen times now. I’ve tweaked the heat, the mixing technique, and the resting time until it’s foolproof. This isn’t a quick weeknight scramble. It requires patience. It requires you to slow down. But the payoff? It’s worth every second. These pancakes have become our Saturday ritual. And honestly, once you see how easy it is for kids to help with the meringue (spoiler: it’s just whipping egg whites), you’ll wonder why you ever bought boxed mix again.
Why You’ll Love This
There is something deeply satisfying about cooking with your children, especially when the result is this impressive. Here is why this recipe has taken over our weekend mornings:
- Interactive Fun for Little Hands — The best part? Kids can do almost everything. They can crack the eggs, whisk the milk, and most importantly, watch the egg whites turn into stiff peaks. Leo loves holding the whisk (with supervision) and seeing the volume double. It turns cooking into a science experiment they actually enjoy.
- The “Wobble” Factor — I’ve never seen a kid turn down food that jiggles. These pancakes have a unique texture—lighter than air but substantial enough to satisfy a hungry appetite. The visual appeal alone is a win. They look like something you’d buy at a fancy cafe, but you made them in your pajamas.
- Mild and Kid-Friendly Flavor — Unlike some traditional Japanese pancakes that can be overly sweet or eggy, this version is balanced. It’s subtly sweet with a hint of vanilla. It’s a perfect blank canvas for maple syrup, fresh berries, or even a dusting of powdered sugar. It’s not too heavy, so kids don’t feel sluggish afterward.
- No Fancy Equipment Needed — You don’t need a stand mixer or a specialized soufflé pan. A hand mixer (or a strong arm and a balloon whisk) and a non-stick skillet are all you need. This makes it accessible for any kitchen, anywhere.
- A Moment of Calm — Cooking these pancakes forces you to slow down. You have to wait for the batter to rest. You have to tend to the low heat. It’s a mindful activity. In a house full of noise, this 45-minute process is our quiet time together.
This is my go-to when I want to create a memory, not just a meal. It’s the Fluffy Japanese Souffle Pancakes Kids Love that turns a regular Saturday into a special occasion.
Key Ingredients
Let’s talk about what goes into these cloud-like beauties. The ingredient list is short, which is great for minimizing mess, but the technique is what makes the magic happen. Here is what you need and why each part matters.
The Wet Base
Large Egg Yolks (4 yolks / approx. 60g) — These provide richness and structure without the airiness of the whites. I use large eggs from a local farm. The yolks should be bright orange if possible; it adds a lovely color to the final pancake. Room temperature yolks mix more easily into the batter.
Milk (60ml / 1/4 cup) — I use whole milk for the best flavor and tenderness. Buttermilk works too, but it can make the batter slightly tangier. If you’re out of milk, water works in a pinch, but you lose some richness. Keep it at room temperature.
Vegetable Oil (30ml / 2 tbsp) — Neutral oil is key. I use a light vegetable or canola oil. Butter adds flavor but can burn more easily at the low heat required for these pancakes. Oil ensures a tender crumb without browning the outside too fast.
Vanilla Extract (5ml / 1 tsp) — Pure vanilla is non-negotiable here. It cuts through the eggy smell and adds that cozy breakfast aroma. I’ve tried imitation vanilla, and it just tastes chemical. Don’t skip the real stuff.
The Dry Mix
All-Purpose Flour (60g / 1/2 cup) — Standard flour is perfect. You don’t need cake flour, though it can make them slightly softer. If you swap in cake flour, reduce the amount by a tablespoon or two. Sifting is crucial here to avoid lumps.
Cornstarch (15g / 2 tbsp) — This is the secret weapon. Cornstarch weakens the gluten structure, making the pancakes incredibly tender and fluffy instead of chewy. It’s what gives them that soufflé-like texture. Do not skip this or swap it for more flour.
Caster Sugar (30g / 2 tbsp) — Fine sugar dissolves better in the yolk mixture. Regular granulated sugar works, but you might get tiny gritty bits if you don’t whisk thoroughly. Caster sugar (superfine) is ideal, but regular works if you’re diligent.
The Magic: The Meringue
Egg Whites (4 whites / approx. 120g) — These are the engine. They must be free of any yolk. Even a tiny drop of yolk can prevent them from whipping up properly. They should be at room temperature for maximum volume.
Cream of Tartar (1/4 tsp) — This stabilizes the egg whites. It helps them hold their shape longer, which is vital when you’re folding them into the batter. It also helps prevent over-beating. If you don’t have cream of tartar, a few drops of lemon juice works, but cream of tartar is more reliable.
Caster Sugar (30g / 2 tbsp) — We use half of our sugar here. It goes into the egg whites to create a stable, glossy meringue. This sweetness balances the mild flavor of the pancakes.
Tools Needed
You don’t need a fancy kitchen to make these. Here is what I actually use, and what you can swap out.
Two Medium Bowls — One for the yolks, one for the whites. Make sure the bowl for the whites is completely clean and dry. Any grease will kill your meringue.
Hand Mixer or Whisk — I use a hand mixer because it’s faster and gives more consistent results. But if you have strong arms, a balloon whisk works. It’s actually a great workout and a fun challenge for older kids.
Non-Stick Skillet — This is critical. I use a 8-inch non-stick skillet. If your pan is too big, the pancakes will spread too thin. If it’s too small, they won’t fit. A heavy-bottomed pan helps distribute heat evenly, preventing hot spots.
Silicone Spatula — You need a flexible spatula to fold the meringue into the batter without deflating it. A rigid spoon will knock the air out. Look for one with a thin, flexible edge.
Lid — Your skillet needs a lid. This traps steam, which cooks the inside of the pancake without burning the outside. If your pan doesn’t have a tight-fitting lid, you can use foil, but a glass lid lets you peek without losing heat.
Piping Bag or Ziploc Bag — For neat, round pancakes, a piping bag is helpful. But honestly, I just snip the corner off a Ziploc bag. It’s cheaper and easier to clean. Kids can help squeeze the batter out if you guide their hands.
Cooking Instructions
Here is the step-by-step process. Take your time. Rushing is the enemy of fluffy pancakes.
Step 1: Prep the Yolk Batter (10 minutes)
Start by separating your eggs. Place the yolks in one bowl and the whites in another. Make sure no yolk gets into the whites. In the yolk bowl, whisk the egg yolks until they are pale and slightly fluffy. This takes about 1-2 minutes. Add the milk, oil, and vanilla extract. Whisk until fully combined. The mixture should look like thin, creamy custard.
Next, sift in the flour, cornstarch, and the remaining 2 tablespoons of sugar. Sifting is important to avoid lumps. Whisk gently until just combined. It’s okay if there are a few tiny lumps; we don’t want to overmix. Set this batter aside. It needs to rest for 10 minutes. This allows the flour to hydrate, which helps with the texture.
Step 2: Whip the Meringue (5-7 minutes)
This is the fun part. Add the cream of tartar to the egg whites. Using your hand mixer on medium-high speed, beat the whites until they form soft peaks. This means when you lift the beaters, the peaks droop over. Add the 2 tablespoons of sugar slowly, one tablespoon at a time, while continuing to beat.
Keep beating until you reach stiff peaks. The whites should be glossy, white, and hold their shape firmly when you lift the beaters. The bowl should be invertible without the meringue falling out. This is crucial. If the peaks are droopy, your pancakes will be flat. Don’t overbeat until it looks like dry coconut, though; you want it moist and glossy.
Step 3: Fold the Batter (3 minutes)
Add about one-third of the meringue to the yolk batter. Whisk gently to lighten the batter. This makes it easier to incorporate the rest without deflating everything.
Now, add the remaining meringue. Using your silicone spatula, fold the mixture. Cut down through the center, scrape the bottom, and fold over the top. Rotate the bowl. Do this gently and slowly. You want to keep as much air as possible. Stop when you see no more white streaks, but the batter is still airy and voluminous. It should look like a thick, fluffy mousse. If it looks dense, you’ve overmixed.
Step 4: Cook the Pancakes (15-20 minutes)
Heat your non-stick skillet over very low heat. This is the hardest part to master. If the heat is too high, the outside burns before the inside cooks. Test the heat by sprinkling a few drops of water on the pan. If they sizzle and evaporate quickly, it’s too hot. If they sit there and bubble slowly, it’s perfect.
Do not add oil to the pan. The batter has enough oil. If your pan is not truly non-stick, you might need a tiny brush of oil, but usually, it’s not needed.
Squeeze the batter into the pan using your piping bag or Ziploc bag. Aim for 3-inch circles. You can make two at a time if your pan is large enough, but I usually do one at a time to control them better.
Immediately cover the pan with a lid. Cook for 2-3 minutes. You will see bubbles forming on the surface. The edges will look set. Then, carefully flip the pancake. This is the scary part for beginners. Use a spatula to gently slide under, and flip. It should be pale golden on the bottom.
Cover the pan again and cook for another 2-3 minutes. The second side needs less time. Check for doneness by pressing the center gently; it should spring back. If it feels jiggly or wet, cook for another minute. Total cook time per pancake is about 4-6 minutes.
Total Time Breakdown: Prep: 10 mins | Rest: 10 mins | Whip: 5 mins | Fold: 3 mins | Cook: 15-20 mins. Total: ~45-50 minutes.
Expert Tips
Here is everything I learned from making these too many times. Trust me, you want to know these.
The Game-Changers
Temperature is Everything
I learned this the hard way. The first time I made these, I cranked the heat up to “medium-low” because I was impatient. The result? Burnt bottoms and raw centers. You need low. If your stove runs hot, use the lowest setting possible. Some stoves have a “simmer” setting. Use it. Patience pays off in fluffiness.
Don’t Deflate the Meringue
The air in the egg whites is what makes these pancakes tall. When folding, be gentle. I used to rush this step and end up with dense, flat cakes. Take your time. It’s like folding a cloud. If you see white streaks, keep folding. If you see the batter shrinking, stop. You’ve overmixed.
Use a Lid
You cannot skip the lid. The steam trapped inside cooks the thick center. Without it, you’re just frying a pancake, not baking a soufflé. If your lid doesn’t fit tightly, wrap a kitchen towel around the edge to seal the steam in.
Common Problems & Solutions
Pancakes are flat?
Your meringue was under-whipped or you overmixed the batter. Make sure you have stiff peaks, and fold gently.
Pancakes are burnt on the outside?
Heat is too high. Lower it. Next batch, start with even lower heat.
Pancakes are gummy inside?
They weren’t cooked long enough. Check the center. It should be set, not jiggly. Cover and cook 1-2 minutes longer.
Pro Tricks
Rest the Batter
Letting the yolk batter rest for 10 minutes allows the flour to fully hydrate. This results in a smoother, more tender pancake. Don’t skip this.
Keep Them Warm
As you finish each pancake, place it on a wire rack in a 200°F (95°C) oven. This keeps them warm without steaming them, which would make them soggy. They stay warm and fluffy until you serve the whole batch.
Recipe Variations
Once you’ve nailed the basic version, here is how to mix it up. These pancakes are a great vehicle for flavors.
Berry Swirl
Add fresh blueberries or raspberries to the batter right before cooking. Or, swirl a spoonful of jam into the center of the pancake before flipping. Leo loves blueberry. The berries burst and create little pockets of sweetness.
Chocolate Chip
Fold in a handful of mini chocolate chips into the yolk batter. It’s like a dessert pancake. The chocolate melts into gooey pockets. Warning: These are harder to flip because the chips can stick to the pan. Use a good non-stick surface.
Pandan Flavor
For an authentic Japanese twist, add 1/2 teaspoon of pandan extract to the yolk batter. It gives a beautiful green color and a unique, grassy vanilla flavor. It’s subtle but impressive.
Dairy-Free Option
Swap the milk for oat milk or almond milk. The oil is already dairy-free, so this works perfectly. The texture remains fluffy because the structure comes from the eggs and cornstarch.
Gluten-Free Option
Swap the all-purpose flour for a 1:1 gluten-free flour blend. Make sure the blend includes xanthan gum, or add 1/4 teaspoon. The cornstarch helps mimic the lack of gluten, so it works well.
Serving & Storage
Serving
These pancakes are best served immediately. They are a tower of fluffiness. I serve them stacked high on a plate. Top them with whipped cream, fresh strawberries, or a drizzle of pure maple syrup. A dusting of powdered sugar makes them look extra special. For kids, I sometimes serve them with a side of yogurt and fruit to balance the sweetness.
They pair well with a hot cup of coffee or tea for you, and warm milk or juice for the kids. It’s a complete, comforting breakfast experience.
Storage
Honest talk? These Fluffy Japanese Souffle Pancakes Kids Love do not store well. They are best fresh. If you must store them, let them cool completely and place them in an airtight container in the refrigerator for up to 2 days.
To reheat, use a toaster oven or an air fryer at 300°F for 2-3 minutes. This helps restore some crispness to the edges. Do not microwave them; they will become rubbery and dense. They also do not freeze well. The texture changes too much upon thawing. Make them when you’re ready to eat them.
Nutrition Informtions
I’m not a nutritionist, but here’s the breakdown for one large pancake (makes about 6-8 pancakes total).
| Nutrient | Amount per Pancake |
|---|---|
| Calories | ~120 kcal |
| Protein | 4g |
| Carbs | 12g |
| Fiber | 0.5g |
| Fat | 5g |
| Sodium | 25mg |
My Take: These are a treat. They have sugar and carbs. But they are also high in protein from the eggs. They are much better than processed boxed mixes because you control the ingredients. Just be mindful of the syrup and toppings. I usually limit syrup to one tablespoon per serving. It’s a indulgent breakfast, perfect for weekends, not every day.
Final Thoughts
Making Fluffy Japanese Souffle Pancakes Kids Love is more than just cooking. It’s a ritual. It’s about slowing down, engaging your kids in the process, and creating something beautiful together. I remember the frustration of my first few tries, but now, I look forward to the wobble. I look forward to Leo’s giggle when he pokes the stack. I look forward to that quiet morning connection.
Don’t be afraid to fail. If your first batch is flat, it’s still delicious. Try again with lower heat and stiffer peaks. You’ve got this. And if you need a break from cooking, check out my no-bake peanut butter oat granola bars for a quick snack, or these soft chocolate chip lunchbox cookies for a sweet treat later.
If you make this, drop a comment! I love hearing how it turns out in your kitchen. Did your kids help? What toppings did you use? Happy cooking!
FAQs
Q: Can I make these ahead of time?
A: I don’t recommend it. The magic of soufflé pancakes is their immediate fluffiness. They deflate quickly as they cool. If you must, you can prep the batter and meringue separately, but fold them together right before cooking. The best experience is fresh from the pan.
Q: Why did my pancakes collapse?
A: This usually happens if the meringue was under-whipped or if the pancakes were moved too much while cooking. Make sure you have stiff, glossy peaks. Also, avoid opening the lid too often while they are cooking. The steam is essential for structure.
Q: Can I use a cast iron skillet?
A: Yes, but cast iron retains heat differently. It might run hotter than you think. Use the lowest setting and preheat it very slowly. Non-stick is easier for beginners because you can see the color change clearly.
Q: How do I know when the heat is right?
A: The water drop test is your friend. If the water sizzles and vanishes instantly, it’s too hot. If it sits and bubbles gently, it’s perfect. Start low. You can always increase heat slightly, but you can’t decrease it if it’s burning.
Q: Can I freeze the batter?
A: No. The meringue will deflate if you freeze and thaw it. The texture will be ruined. Always make fresh meringue for the best results.
Q: Are these safe for kids to help with?
A: Yes, with supervision. Kids can crack eggs, whisk the yolks, and watch the meringue whip. They can also help squeeze the batter from the Ziploc bag. Just keep them away from the hot stove. It’s a great way to teach them kitchen safety and basic cooking skills.
Pin This Recipe!
Fluffy Japanese Souffle Pancakes Kids Love
- Total Time: 45 minutes
- Yield: 6-8 pancakes 1x
Description
Tall, jiggly, and impossibly soft pancakes that are perfect for weekend family fun. This foolproof recipe uses a meringue technique to create cloud-like textures that kids adore.
Ingredients
- 4 large egg yolks
- 60ml (1/4 cup) whole milk, room temperature
- 30ml (2 tbsp) vegetable oil
- 5ml (1 tsp) vanilla extract
- 60g (1/2 cup) all-purpose flour
- 15g (2 tbsp) cornstarch
- 30g (2 tbsp) caster sugar (divided)
- 4 large egg whites
- 1/4 tsp cream of tartar
Instructions
- Separate eggs, ensuring no yolk gets into the whites. Whisk egg yolks until pale and fluffy (1-2 minutes).
- Add milk, oil, and vanilla extract to the yolks and whisk until combined.
- Sift in flour, cornstarch, and 2 tablespoons of sugar. Whisk gently until just combined. Let batter rest for 10 minutes.
- Add cream of tartar to egg whites. Beat with a hand mixer on medium-high speed until soft peaks form.
- Slowly add the remaining 2 tablespoons of sugar while beating. Continue until stiff, glossy peaks form.
- Whisk one-third of the meringue into the yolk batter to lighten it.
- Gently fold in the remaining meringue using a silicone spatula until no white streaks remain. Do not overmix.
- Heat a non-stick skillet over very low heat. Do not add oil to the pan.
- Pipe batter into 3-inch circles in the pan. Cover immediately with a lid.
- Cook for 2-3 minutes until bubbles form and edges look set.
- Carefully flip the pancakes. Cover and cook for another 2-3 minutes until the center springs back when pressed.
- Serve immediately with toppings of choice.
Notes
Ensure the bowl for egg whites is completely clean and dry to ensure proper whipping. Keep heat very low to prevent burning the outside before the inside cooks. Use a lid to trap steam, which is essential for cooking the center. These pancakes are best served fresh and do not store or freeze well.
- Prep Time: 10 minutes
- Cook Time: 15-20 minutes
- Category: Breakfast
- Cuisine: Japanese
Nutrition
- Serving Size: 1 large pancake
- Calories: 120
- Sugar: 8
- Sodium: 25
- Fat: 5
- Saturated Fat: 1
- Carbohydrates: 12
- Fiber: 0.5
- Protein: 4
Keywords: Japanese pancakes, souffle pancakes, fluffy pancakes, kid-friendly breakfast, weekend cooking, easy pancakes, meringue pancakes


