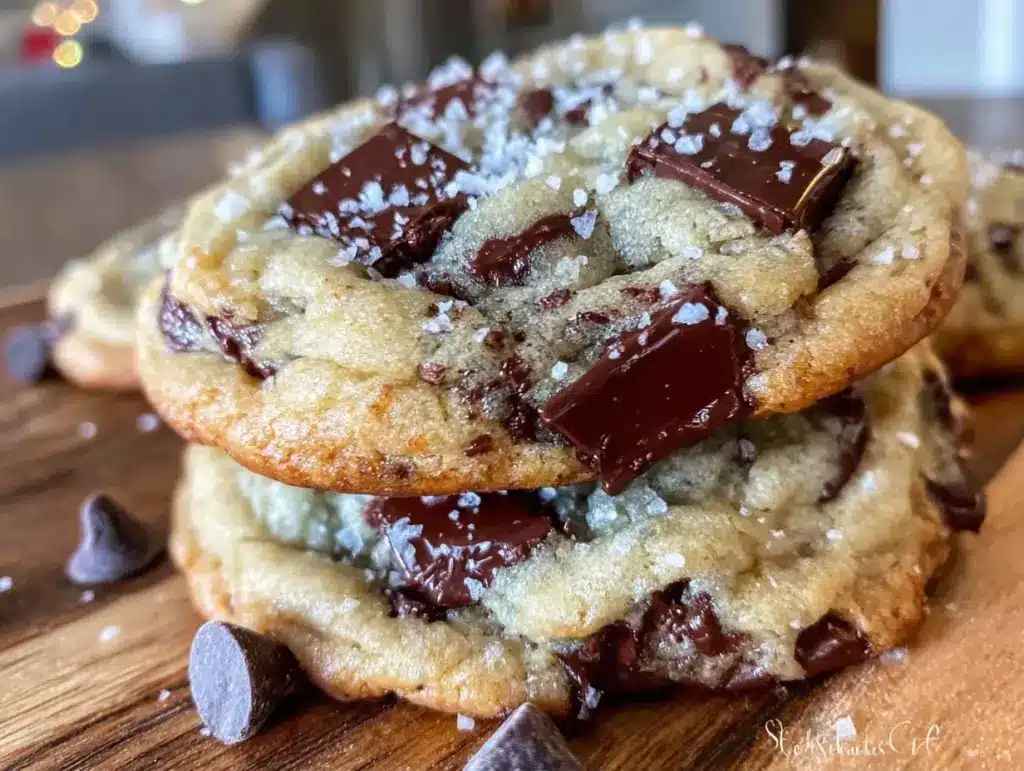
Last Saturday, my kitchen looked like a flour bomb went off. There was dough on the ceiling fan (don’t ask), chocolate chips in my hair, and my six-year-old was using a spoon to lick the bowl with the intensity of a professional sommelier tasting wine. It was messy. It was chaotic. And it was the best Saturday morning we’ve had in months.
We’ve tried baking together before. Oh, we’ve tried. But usually, it ends with me taking over because the kids get bored of measuring, or the recipe is too finicky for little hands. That’s why I’m so obsessed with this bakery-style chocolate chip cookie recipe. It’s forgiving. It’s delicious. And honestly? It’s the one where my kids feel like actual chefs, not just helpers.
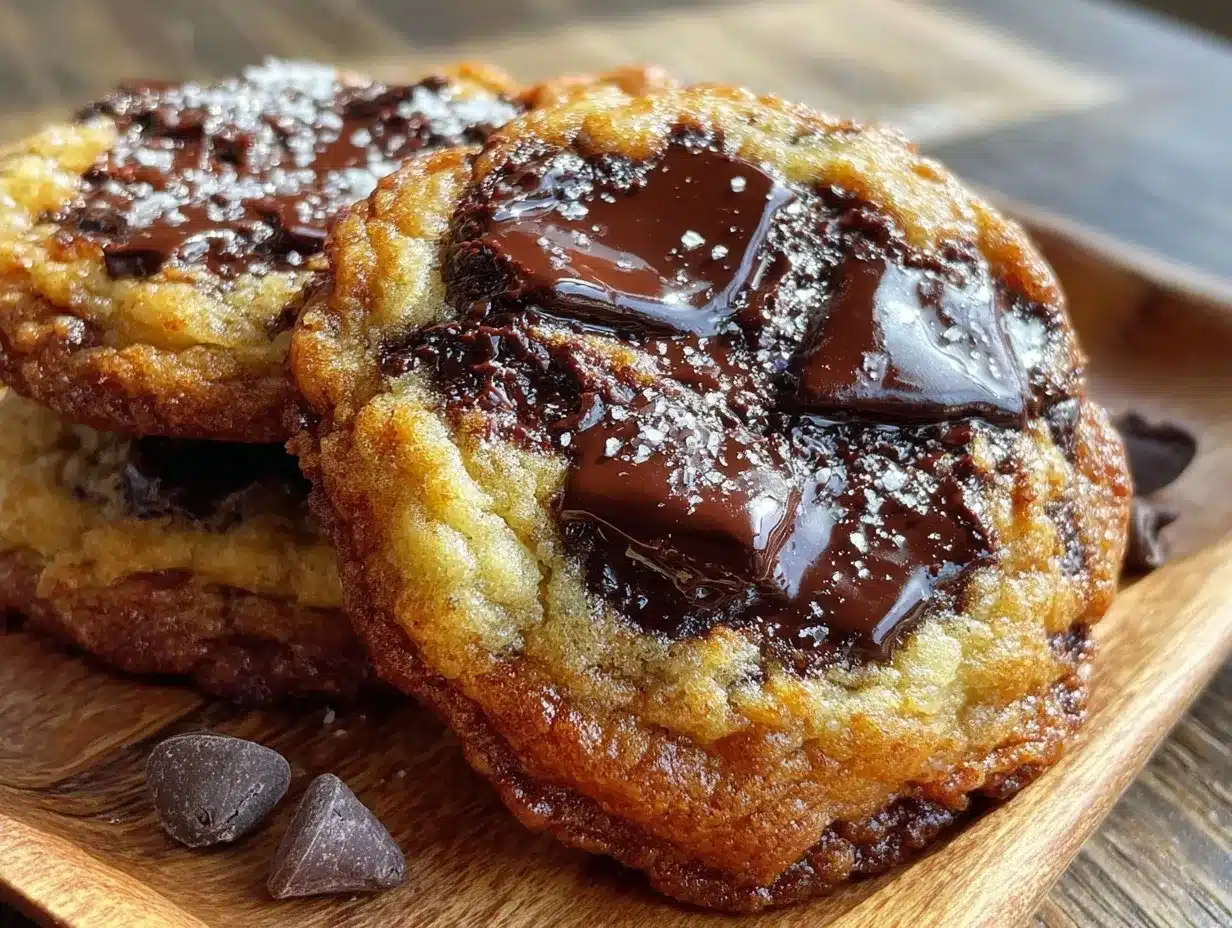
I’ve made these soft chocolate chip cookies with my kids at least a dozen times since we started this baking journey. Each time, the dynamic shifts slightly. Sometimes they want to mix everything. Sometimes they just want to press the chocolate chips in with their thumbs. But the result is always the same: a warm, gooey, chewy cookie that tastes like a bakery window display. These aren’t just cookies; they’re memories. They’re the recipe that turns a boring afternoon into a shared adventure.
If you’re looking for a way to connect with your little ones without stressing over perfection, this is it. It’s simple enough for a beginner baker but impressive enough that your kids will brag about making them at school. Let’s get into why this specific method works so well for family baking, and how you can make these bakery-style chocolate chip cookies together without losing your mind.
Why You’ll Love Baking This With Your Kids
There is something magical about watching a child’s eyes light up when they realize they helped create something delicious. This recipe is designed specifically for that moment. It’s not just about the taste, though those chewy edges and soft centers are undeniable. It’s about the process. Here’s why this is our go-to for family baking time:
- Zero Fancy Equipment Needed — You don’t need a stand mixer or a marble countertop. A large bowl, a wooden spoon, and a baking sheet are all you need. My kids can handle all of these tools safely, which means less rescuing and more doing.
- Forgiving Dough — Cookie dough is unlike cake batter. It doesn’t care if you add an extra tablespoon of flour or if the chocolate chips are unevenly distributed. This lack of precision anxiety is perfect for kids who are still learning that cooking is a science, not an art exam.
- Short Wait Time, High Reward — While chilling is recommended, these cookies don’t require days of planning. You can mix, bake, and eat in about 45 minutes. That’s the sweet spot for young attention spans.
- Sensory Play Included — From the smell of melting butter to the tactile joy of rolling dough balls, this recipe engages all the senses. It keeps kids engaged longer than recipes that require precise piping or delicate assembly.
- Leftovers Are a Win — Unlike a complex dinner where leftovers might go to waste, cookie dough balls freeze perfectly. You can make a double batch, freeze half, and have a fresh snack ready for when the craving hits next week.
This is the recipe that turns your kitchen into a playground. It’s not about speed; it’s about shared time. And let’s be real, if it means your kids are eating chocolate chip cookies for breakfast, that’s a victory in my book.
Key Ingredients for Perfect Bakery-Style Cookies
Before we start mixing, let’s talk about what goes into the bowl. I know it’s just cookies, but the difference between a flat, greasy cookie and a bakery-style masterpiece comes down to a few specific choices. I’ve tested this recipe with substitutions, and trust me, some of these are non-negotiable for that specific texture.
Unsalted Butter (1 cup / 226g)
I use unsalted butter so I can control the saltiness. Melted butter is the secret weapon here. It creates those chewy, dense edges. I melt it in the microwave in 30-second bursts, stirring in between, until it’s just liquid. Let it cool slightly before adding to the eggs so you don’t scramble them. It’s a small step, but it changes everything.
Granulated Sugar (3/4 cup / 150g)
This provides the crisp edges. Granulated sugar doesn’t hold moisture like brown sugar does, which helps create that slight crunch on the outside while keeping the inside soft. My kids love helping me scoop this; it’s like playing with tiny white sand.
Brown Sugar (1 1/2 cups / 300g)
Light or dark brown sugar works, but I prefer light for a milder molasses flavor. This is the moisture keeper. It’s what makes the cookies chewy. Pack it down tightly in the measuring cup. If you’re baking with kids, let them pack it—it’s great for hand-eye coordination and they get a good workout.
Eggs (2 large)
Room temperature eggs mix in more easily. If you’re in a rush, crack them into a small bowl and microwave for 10 seconds. Don’t cook them, just warm them up. Two eggs provide structure without making the cookies cakey.
All-Purpose Flour (2 1/4 cups / 280g)
Standard all-purpose flour is perfect here. Too much protein (like bread flour) makes them tough. Too little (like cake flour) makes them spread too much. Spoon the flour into your measuring cup and level it off. Don’t scoop directly from the bag, or you’ll end up with a dense brick. My rule: spoon and level, always.
Baking Soda (1 tsp)
This is your leavening agent. It helps the cookies spread and brown. Make sure it’s not old! If your baking soda is more than six months old, it might not work. Test it by dropping a little vinegar on it—if it doesn’t fizz, toss it.
Salt (1 tsp)
Yes, salt in cookies. It enhances the chocolate flavor. Without it, the cookies taste flat. I use fine sea salt, but table salt works fine too.
Vanilla Extract (2 tsp)
Use real vanilla, not imitation. The flavor is so much deeper. It’s a small cost for a big payoff in aroma.
Semi-Sweet Chocolate Chips (2 cups / 340g)
I buy the big bag. Yes, two cups is a lot of chocolate, but that’s what makes them “bakery-style.” If you want to mix it up, chop up a chocolate bar for irregular chunks. Kids love the surprise of finding a big chunk of chocolate in every bite. You can also add white chocolate chips for variety.
Tools Needed for Easy Baking
You don’t need a fancy kitchen to make these. Here’s what I actually use:
Large Mixing Bowl — I use a 5-quart stainless steel bowl. It’s heavy enough that it doesn’t slide around when my kids are mixing vigorously. Glass is fine too, just be careful with hot butter.
Wooden Spoon or Silicone Spatula — A sturdy spoon is best for the initial mixing. Kids love the weight of a wooden spoon. It feels like a real tool.
Baking Sheets — Two large sheets. I line them with parchment paper. It’s the easiest cleanup method ever. No scrubbing stuck-on cookies for me.
Cookie Scoop (Optional but Recommended) — I have a medium ice cream scoop. It ensures all cookies are the same size, so they bake evenly. If you don’t have one, a tablespoon works, but the results might vary slightly.
Cooling Rack — Not strictly necessary, but it stops the cookies from getting soggy from residual heat. If you don’t have one, just let them cool on the pan for 5 minutes, then move them.
How to Make Bakery-Style Chocolate Chip Cookies
Here is the step-by-step. I’ve broken it down so you can delegate tasks to your kids as they get older. For younger kids (4-6), focus on mixing and pressing. For older kids (7+), let them measure and handle the dough.
Step 1: Prep and Melt Butter (10 minutes)
Preheat your oven to 350°F (175°C). Line two baking sheets with parchment paper. In a large microwave-safe bowl, melt the butter. I do this in 30-second intervals, stirring in between. It should be fully liquid but not hot. If it’s too hot, it will cook the eggs. Let it sit for 5 minutes to cool slightly.
Kid Task: Have your child stir the melting butter. It’s satisfying to watch it turn from solid to liquid.
Step 2: Mix Sugars and Wet Ingredients (5 minutes)
Add the granulated sugar and brown sugar to the melted butter. Whisk this together vigorously for about 2 minutes. This step is crucial. You want the sugar to dissolve slightly into the butter. This creates that shiny, crackly top. Your kids can take over the whisking here—it’s a good arm workout.
Once mixed, add the eggs and vanilla extract. Whisk until the mixture is smooth and pale yellow. It should look glossy.
Step 3: Add Dry Ingredients (3 minutes)
Add the flour, baking soda, and salt to the wet mixture. Switch to a wooden spoon or spatula. Mix on low speed or by hand until *just* combined. Stop as soon as you no longer see streaks of flour. Overmixing develops gluten, which makes cookies tough. We want tender, chewy cookies, not bread.
Kid Task: This is a great time for kids to help add the dry ingredients. Let them pour the flour in slowly while you mix.
Step 4: Fold in Chocolate Chips (2 minutes)
Stir in the chocolate chips by hand. Use a spatula to scrape the bottom of the bowl so all the chips are incorporated. The dough will look thick and slightly sticky. This is normal.
Kid Task: Let your child fold the chips in. They can pick out any bits of unmixed flour they see. It’s a fun scavenger hunt.
Step 5: Chill the Dough (30 minutes – Optional but Recommended)
If you have time, chill the dough in the refrigerator for 30 minutes. This solidifies the fat, which means the cookies won’t spread too much. They’ll stay thick and chewy. If you’re in a rush, you can skip this, but the texture will be cakier. I usually chill it while I clean up the mess (because there will be a mess).
Step 6: Scoop and Bake (15-18 minutes)
Portion the dough onto the baking sheets. I use a medium cookie scoop for uniformity. Leave 2 inches between cookies because they will spread. Bake for 12-15 minutes. You want the edges to be golden brown, but the centers to still look slightly underbaked and soft.
Do not overbake! They continue to cook on the hot pan after you take them out. If you bake them until they look firm in the oven, they will be dry by the time they cool.
Kid Task: Let your child scoop the dough balls. They can even press a few extra chocolate chips on top for that bakery look.
Step 7: Cool and Enjoy
Let the cookies sit on the baking sheet for 5 minutes. Then, transfer them to a wire rack to cool completely. Or, if patience is low (which it always is), eat one warm. It’s dangerous, but delicious.
Total Time: 45 minutes (including chill time). Yield: About 24-30 cookies.
Expert Tips for Success
I’ve made these cookies enough times to know where things can go wrong. Here’s how to avoid the pitfalls.
Don’t Skip the Chill
I know you’re excited to bake. But chilling the dough prevents spreading. If you skip it, you’ll get flat cookies. If you chill for 24 hours, the flavor deepens. The sugars ferment slightly, creating a richer, caramel-like taste. If you’re planning ahead, make the dough the night before.
Measure Flour Correctly
This is the #1 mistake. Scooping flour directly from the bag packs it down, leading to dry, crumbly cookies. Always spoon the flour into the measuring cup and level it off. It’s a small habit, but it makes a huge difference in texture.
Use a Cookie Scoop
I know it’s an extra tool, but it’s worth it. Uniform cookies bake evenly. If one is big and one is small, the small one burns before the big one is done. A scoop saves you from having to eat the burnt ones.
Underbake Slightly
Take them out when the edges are golden but the centers look soft. They will firm up as they cool. If you wait until they look firm in the oven, they will be hard. We want chewy, not crunchy (unless you prefer crunchy, then bake longer!).
Recipe Variations and Dietary Mods
Once you’ve mastered the basic version, here’s how to mix it up. My kids love trying new combinations.
Double Chocolate
Add 1/4 cup of unsweetened cocoa powder to the dry ingredients. Use semi-sweet and white chocolate chips. It’s rich and intense. Perfect for chocolate lovers.
Red Velvet
Add 1 tablespoon of cocoa powder and 1 teaspoon of red food coloring to the wet ingredients. Use white chocolate chips. It’s festive and fun.
Peanut Butter Swirl
After scooping the dough balls, add a dollop of peanut butter on top and swirl it in with a fork. It adds a salty-sweet contrast that is addictive.
Gluten-Free Option
Substitute the all-purpose flour with a 1:1 gluten-free flour blend (like Bob’s Red Mill). Make sure it contains xanthan gum, or add 1/2 teaspoon. The texture might be slightly more delicate, but it still tastes great.
Dairy-Free Option
Use vegan butter sticks (not tub margarine) and dairy-free chocolate chips. The texture will be similar, but the flavor might be slightly less rich. It’s a good option for friends with allergies.
Serving and Storage
Serving
These cookies are best served warm. I like to serve them with a cold glass of milk. It’s a classic combo for a reason. They’re also great for lunchboxes—see my soft chocolate chip lunchbox cookies for a smaller version. They travel well in airtight containers.
Storage
Room Temperature: Store in an airtight container for up to 5 days. Add a slice of bread to the container to keep them soft. The bread dries out, and the cookies absorb the moisture. It’s a trick my grandmother taught me.
Refrigerator: Not recommended. The cold dries them out. If you must refrigerate, wrap them tightly in plastic wrap.
Freezer: Yes! Cookie dough balls freeze perfectly. Scoop them onto a baking sheet, freeze solid, then transfer to a freezer bag. They last for 3 months. Bake straight from frozen, adding 1-2 minutes to the bake time. It’s like having fresh cookies on demand.
Nutrition Information
I’m not a nutritionist, but here’s the breakdown per cookie (assuming 24 cookies):
| Nutrient | Amount |
|---|---|
| Calories | 220 |
| Fat | 12g |
| Carbs | 28g |
| Fiber | 1g |
| Sugar | 18g |
| Protein | 3g |
My Take: These are indulgent treats. They’re high in sugar and fat, which is expected for a bakery-style cookie. But they’re made with real ingredients, no preservatives. I consider them a special occasion treat or a weekend baking project, not a daily snack. Balance is key.
Final Thoughts
Baking with kids isn’t about the perfect cookie. It’s about the flour on their noses, the laughter in the kitchen, and the pride they feel when they say, “I made this.” This bakery-style chocolate chip cookie recipe is my favorite because it’s forgiving, delicious, and creates beautiful memories. So roll up your sleeves, get messy, and enjoy the process. Your kids will remember the time you baked together long after the cookies are gone.
If you make this, I’d love to hear how it goes! Drop a comment below and tell me what your kids thought. Did they eat the whole batch? Did they help clean up? Happy cooking!
FAQs
Can I use brown sugar instead of white sugar?
You can, but the ratio matters. This recipe uses a mix of both for the right texture. If you only have brown sugar, you can use all brown sugar, but the cookies will be softer and cakier, less chewy. I recommend sticking to the ratio for the best results.
Why did my cookies spread too much?
This usually happens if the butter was too hot when you mixed it, or if you didn’t chill the dough. Make sure your butter is melted but cooled, and don’t skip the 30-minute chill. Also, check your baking soda—it might be old.
Can I make the dough ahead of time?
Yes! You can refrigerate the dough for up to 3 days or freeze it for up to 3 months. If freezing, let it thaw in the fridge overnight before scooping and baking.
What kind of chocolate chips should I use?
Semi-sweet is my go-to because it’s not too sweet. But you can use milk chocolate, dark chocolate, or a mix. Chopping up a chocolate bar creates irregular chunks that melt in pockets, which I love. Kids enjoy the variety.
How do I store leftover cookies?
Store them in an airtight container at room temperature for up to 5 days. If they start to get soft, add a slice of bread to the container to restore crispness. For longer storage, freeze them in a freezer-safe bag.
Can I substitute the butter with oil?
I don’t recommend it. Butter adds flavor and structure. Oil will make the cookies greasy and flat. If you need a dairy-free option, use a high-quality vegan butter stick, not oil.
Why are my cookies hard?
You likely overbaked them. Remember, they should look soft in the center when you take them out. They firm up as they cool. Also, check your flour measurement—if you packed the flour, you used too much, which dries out the cookie.
Pin This Recipe!
Bakery-Style Chocolate Chip Cookies: Easy Baking with Kids
- Total Time: 45 minutes
- Yield: 24-30 cookies 1x
Description
A forgiving, chewy, and gooey chocolate chip cookie recipe designed for family baking. Perfect for kids, this bakery-style treat requires minimal equipment and creates delicious memories in the kitchen.
Ingredients
- 1 cup (226g) unsalted butter, melted and cooled slightly
- 3/4 cup (150g) granulated sugar
- 1 1/2 cups (300g) light or dark brown sugar, packed
- 2 large eggs, room temperature
- 2 tsp vanilla extract
- 2 1/4 cups (280g) all-purpose flour
- 1 tsp baking soda
- 1 tsp fine sea salt
- 2 cups (340g) semi-sweet chocolate chips
Instructions
- Preheat oven to 350°F (175°C). Line two baking sheets with parchment paper.
- Melt butter in a microwave-safe bowl in 30-second intervals, stirring until liquid but not hot. Let cool for 5 minutes.
- Whisk melted butter, granulated sugar, and brown sugar together vigorously for 2 minutes until glossy.
- Add eggs and vanilla extract; whisk until smooth and pale yellow.
- Add flour, baking soda, and salt. Mix with a wooden spoon or spatula until just combined (do not overmix).
- Fold in chocolate chips by hand until evenly distributed.
- Chill dough in the refrigerator for 30 minutes (optional but recommended for chewy texture).
- Scoop dough balls onto baking sheets, leaving 2 inches between them.
- Bake for 12-15 minutes until edges are golden brown but centers look soft.
- Let cookies cool on the baking sheet for 5 minutes, then transfer to a wire rack to cool completely.
Notes
For best results, spoon and level the flour rather than scooping directly from the bag. Do not overbake; cookies continue to cook on the hot pan. Dough can be frozen for up to 3 months or refrigerated for up to 3 days. Store cookies in an airtight container with a slice of bread to maintain softness.
- Prep Time: 15 minutes
- Cook Time: 15 minutes
- Category: Dessert
- Cuisine: American
Nutrition
- Serving Size: 1 cookie
- Calories: 220
- Sugar: 18
- Sodium: 150
- Fat: 12
- Saturated Fat: 7
- Carbohydrates: 28
- Fiber: 1
- Protein: 3
Keywords: chocolate chip cookies, bakery style, baking with kids, easy cookies, chewy cookies, family baking, dessert


