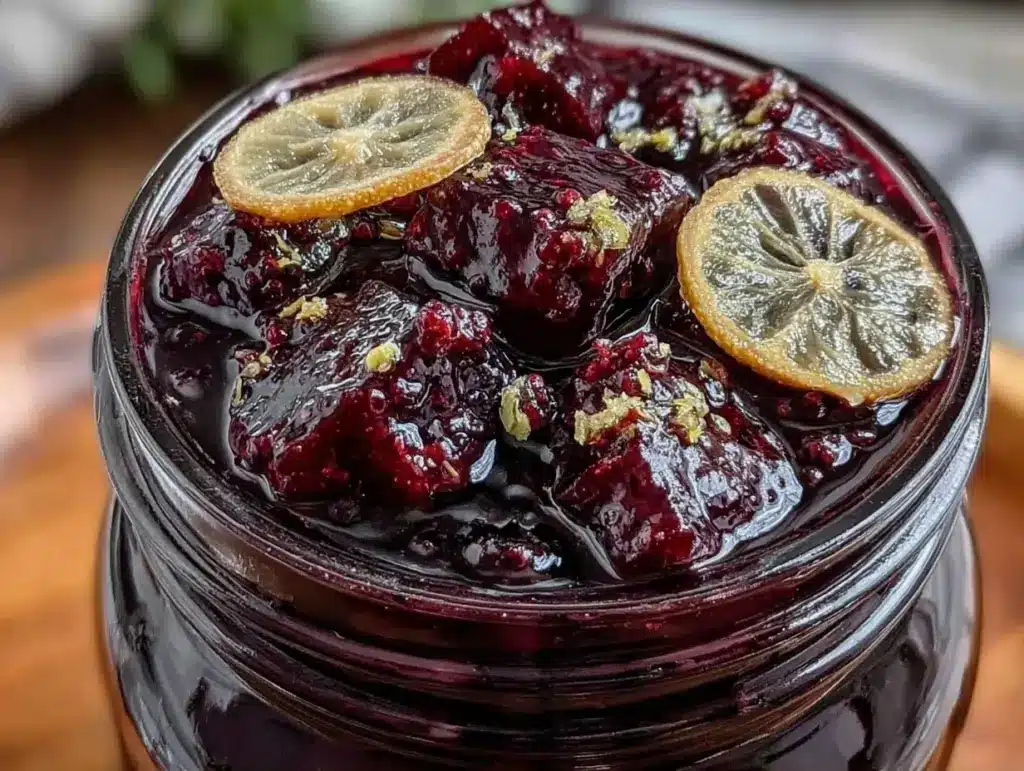
Last November, I stared at a thermometer reading 101.4°F and felt that familiar panic. It was three days before a major work presentation, and my husband had just come down with something nasty. I was determined not to get sick, but I also refused to run to the pharmacy for syrup that tasted like chemical cherry juice. I needed something real. Something I could trust. So, I spent the next two hours simmering dried elderberries, fresh ginger, and honey on my stove. By the time the jar cooled, my throat felt soothed, and my nose had cleared enough to breathe. That batch lasted me six weeks. Now, every time autumn hits, I make my Immune-Boosting Elderberry Syrup with Ginger in big batches. It’s my secret weapon against the seasonal sniffles, and it’s surprisingly easy to prep ahead.
I’ve made this syrup over twenty times now. I’ve tested different ratios of honey to fruit, tried fresh versus dried berries, and even experimented with adding cloves and cinnamon. The version below is the winner. It’s thick, tart, spicy, and potent. I keep a jar in the fridge and a jar in the freezer, so I’m never caught off guard when a cold starts creeping around the office. This isn’t just a drink; it’s a health strategy. I treat it like I do my meal prep for lunches—something I make once so I don’t have to worry about it later. If you’re looking for a natural way to support your immune system, especially during the colder months, this Immune-Boosting Elderberry Syrup with Ginger is exactly what you need. It’s simple, effective, and tastes good enough that my kids actually ask for it.
Why You’ll Love This Syrup
There are a few reasons why this Immune-Boosting Elderberry Syrup with Ginger has replaced every bottle of store-bought medicine in my cabinet. Here’s why it’s become a staple in my kitchen:
- It’s a Time-Saver — I spend about 20 minutes active, then let it simmer for an hour. I can chop vegetables for my chicken broccoli rice meal prep bowls while it reduces. It fits seamlessly into a busy prep day without demanding your full attention.
- Long-Lasting Potency — A single batch yields five 8-ounce jars. That means I have two weeks’ worth of immune support ready to go. I love that I don’t have to make a decision every morning; I just grab a spoonful.
- Real Ingredients Only — No artificial dyes, no high-fructose corn syrup. Just elderberries, ginger, honey, and spices. It’s clean fuel for your body. Unlike the easy game day brownie footballs which are fun for parties, this is serious nutrition.
- Customizable Heat — The ginger kick is adjustable. I like it spicy because it really clears sinuses, but if you’re making it for little ones, you can dial it back. It’s flexible enough for the whole family.
- Versatile Usage — You can take it straight from the spoon, mix it into warm water, stir it into oatmeal, or even drizzle it over yogurt. It’s not just for sick days; I take a teaspoon every morning in the winter just to stay ahead of things.
- Freezes Perfectly — This syrup freezes incredibly well. I batch cook it in October and freeze half the jars. Thawing one jar in the fridge takes minutes, so I’m always prepared.
This syrup is my go-to when I want to feel proactive about my health. It’s not magic, but it’s consistent. And in my house, consistency is everything.
Key Ingredients for Immune-Boosting Elderberry Syrup with Ginger
Let’s talk about what goes into this potent mix. I’ve been picky about sourcing these ingredients because quality matters when you’re using them medicinally. Here’s what you need for one big batch:
- Dried Elderberries (1 cup / 115g) — Always use dried, not fresh. Fresh elderberries contain cyanogenic glycosides which are toxic. Dried berries are safe and more concentrated in flavor. I buy mine from a bulk spice shop or a reputable health food brand. Avoid the ones with stems still attached if you can; it saves straining time.
- Raw Honey (1 cup / 340g) — Honey is a natural preservative and has antimicrobial properties. Raw, unfiltered honey is best because it contains beneficial enzymes. Manuka is great but expensive. Local wildflower or clover honey works perfectly. Do not use processed honey; it lacks the enzymes we want.
- Fresh Ginger Root (3 inches / approx. 60g) — Fresh ginger is non-negotiable. It provides that spicy kick and anti-inflammatory benefits. Pre-grated ginger in a tube doesn’t have the same potency. Peel it with a spoon and chop it roughly before adding to the pot.
- Water (4 cups / 960ml) — Filtered water is ideal to avoid any chlorine taste interfering with the delicate berry flavor. You need enough to cover the berries and create a strong concentrate.
- Black Peppercorns (1 tsp / 2g) — This is my secret weapon. Piperine in black pepper increases the bioavailability of the antioxidants in elderberries. It’s a small detail that makes a big difference in absorption.
- Cinnamon Stick (1 large / approx. 5g) — Adds warmth and helps regulate blood sugar. I prefer a whole stick over powder because it’s easier to strain out later.
- Whole Cloves (5-6 cloves / 1g) — Just a few. Cloves have strong antimicrobial properties. Too many will overpower the elderberry taste. Keep it subtle.
I also keep overnight oats with peanut butter and banana on hand, and I love stirring a spoonful of this syrup into them in the morning. It adds a nice tartness that cuts through the sweetness of the oats.
Tools Needed
You don’t need fancy equipment to make this. I keep it simple so I can make it anywhere.
- Large Saucepan — I use a 4-quart stainless steel pot. It needs to be big enough to hold 4 cups of water plus the berries without boiling over.
- Mesh Strainer or Cheesecloth — A fine-mesh strainer works well, but if you want crystal-clear syrup, line it with cheesecloth or a nut milk bag. The berry skins and pulp can be tricky to get out.
- Mashing Spoon — You’ll need a sturdy spoon to crush the berries after cooking to release all their juices.
- Glass Jars — Five 8-ounce mason jars or similar glass containers with tight-fitting lids. Glass is essential because the acidity in the berries can react with metal over time.
- Measuring Cups and Spoons — Standard set. Precision helps with the honey ratio for preservation.
How to Make Immune-Boosting Elderberry Syrup with Ginger
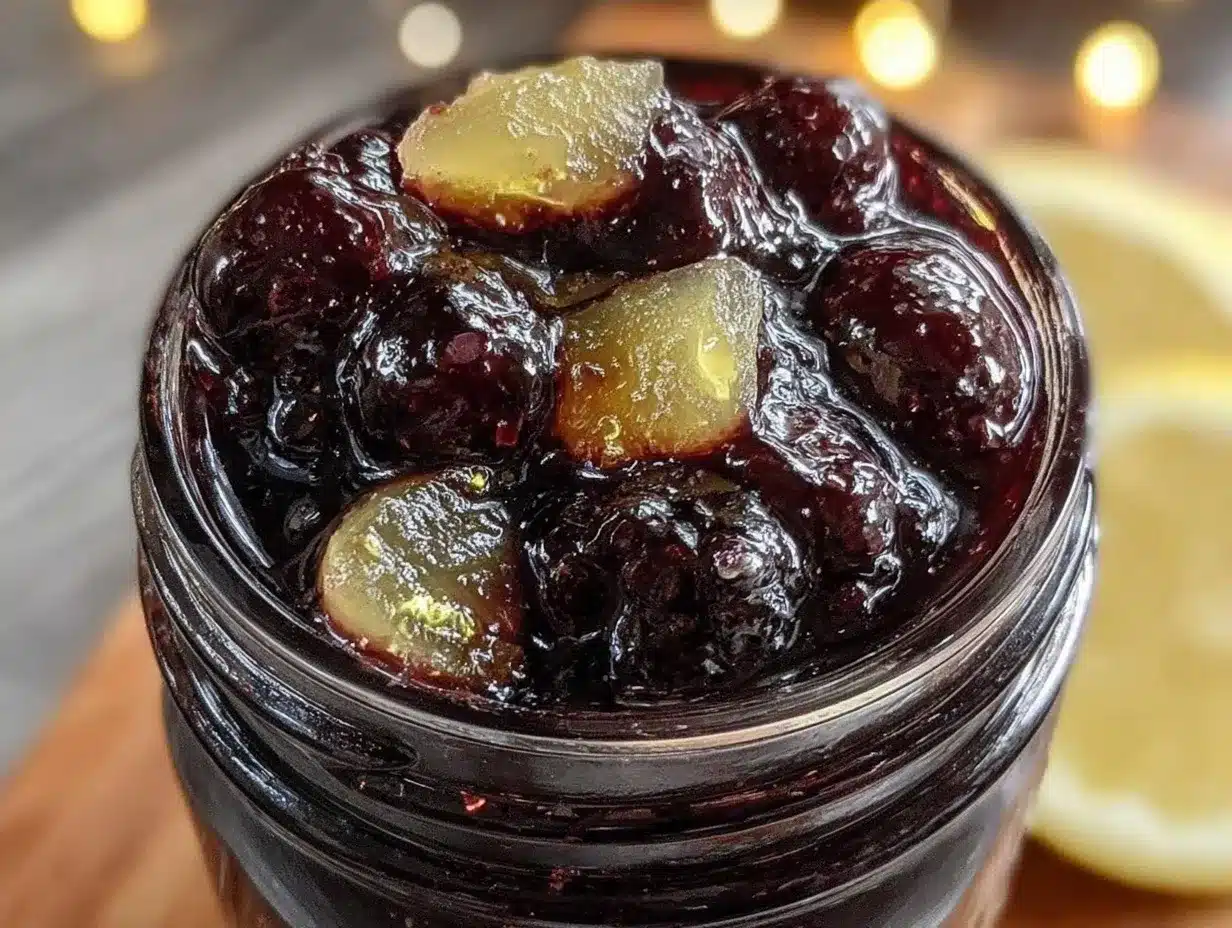
Here is the step-by-step process. I’ve timed this out so you can plan your kitchen workflow efficiently.
Step 1: Combine and Simmer (10 minutes active, 1 hour simmer)
Add the dried elderberries, chopped ginger, peppercorns, cinnamon stick, and cloves to your large saucepan. Pour in the 4 cups of water. Stir everything together to ensure the berries are submerged. Turn the heat to high and bring the mixture to a boil. Once it hits a rolling boil, immediately reduce the heat to low. Let it simmer gently for 45-60 minutes. You’ll notice the water turning a deep purple and reducing slightly. The kitchen will smell earthy and spicy. This slow cooking extracts the nutrients and flavors from the herbs. Don’t rush this step; high heat can destroy some of the delicate compounds.
Step 2: Mash and Steep (20 minutes)
After the simmering time is up, turn off the heat. Use your wooden spoon to press down on the berries and ginger against the side of the pot. You want to crush the berries to release their juices. This is messy but necessary. Once mashed, cover the pot with a lid and let it steep for another 20 minutes. This allows the flavors to infuse further and the berries to soften completely. While it steeps, you can sterilize your glass jars by rinsing them with hot water.
Step 3: Strain the Mixture (10 minutes)
Set your fine-mesh strainer (lined with cheesecloth if using) over a large bowl or measuring cup. Pour the berry mixture into the strainer. Let it drip through naturally. Do not press hard on the solids yet, as this can make the syrup cloudy. Once most of the liquid has drained, use the back of a spoon to gently press the remaining liquid out of the pulp. You want as much juice as possible. Discard the solids. You should have about 2 to 2.5 cups of concentrated liquid.
Step 4: Add Honey (5 minutes)
Let the strained liquid cool to room temperature. This is crucial. If you add honey to hot liquid, you kill the beneficial enzymes in the raw honey. Once it’s cool to the touch, stir in the 1 cup of raw honey. Whisk until it’s completely dissolved and combined. The mixture will thicken as it cools further. Taste it. It should be tart and spicy. If it’s too strong, you can add a bit more water, but usually, the ratio is perfect.
Step 5: Bottle and Store
Pour the finished syrup into your clean glass jars. Label them with the date. This Immune-Boosting Elderberry Syrup with Ginger makes 5 jars. Store 2 in the fridge for immediate use and freeze the other 3. It keeps in the fridge for up to 6 months and in the freezer for up to a year.
Total time: About 1 hour 45 minutes, mostly passive.
Expert Tips for Success
Here’s everything I learned from making this too many times. These tips will save you from common pitfalls.
Don’t Skip the Peppercorns
I used to skip the pepper, thinking it was just for flavor. Then I read about bioavailability. The piperine helps your body absorb the anthocyanins in the elderberries. It adds a tiny bit of heat, but it’s worth it for the health benefits. It’s a small step that makes the syrup more effective.
Cool Before Adding Honey
I once added honey to the hot liquid because I was impatient. The syrup was fine, but I lost the enzymatic benefits of the raw honey. It’s a small sacrifice, but if you’re making this for health, let it cool. It’s worth the wait. I usually add the honey while the jars are warming up from the sterilization rinse.
Strain Twice for Clarity
If you want a smooth syrup that doesn’t have little bits of berry skin floating in it, strain it twice. Once through a mesh strainer, then again through a coffee filter or nut milk bag. It takes longer, but the texture is much nicer. I do this when I’m making gifts or when I’m being fancy.
Watch for Mold
Even with honey, mold can happen if water gets in the jar. Always use clean, dry spoons to serve it. If you see any fuzz or smell off odors, toss it. Better safe than sorry. This is why I freeze most of the batch; the frozen jar stays pristine for months.
Adjust Ginger for Taste
Ginger varies in heat. If you have a very spicy root, use less. If it’s mild, use more. I like it hot, but my husband prefers a milder version. Adjusting the ginger amount is the easiest way to customize this for different palates.
Recipe Variations
Once you’ve nailed the basic version, here’s how to mix it up to keep things interesting.
Elderberry with Orange
Add the zest of one orange to the simmering pot. The citrus notes brighten the tartness of the berries. It’s great for winter blues. I add this when I’m making it for holiday gifts.
Elderberry with Echinacea
Add 1 tablespoon of dried echinacea flowers to the simmering pot. This is a classic immune-boosting combo. It adds an earthy, slightly bitter note that balances the sweetness of the honey.
Elderberry with Turmeric
Add 1 tablespoon of fresh turmeric root (peeled and chopped) to the pot. This makes it anti-inflammatory powerhouse. The color turns orange-brown, which is striking. It’s a bit more pungent but very effective.
Stevia-Sweetened Version
For a sugar-free option, replace the honey with stevia drops to taste. Note that honey is a preservative, so this version will have a shorter shelf life. Keep it strictly in the fridge and use within 2-3 weeks.
Serving & Storage
Serving:
I take 1 tablespoon daily during cold and flu season. If I feel a tickle in my throat, I increase it to 1 tablespoon every 4 hours. Mix it with warm water for a soothing tea, or take it straight from the spoon for a quick hit. It’s also delicious drizzled over soft chocolate chip lunchbox cookies for a healthy-ish treat, though that’s more of a rare indulgence!
Storage:
Refrigerator: Up to 6 months. Keep it in a cool, dark spot.
Freezer: Up to 1 year. Freeze in ice cube trays for easy portioning, then transfer cubes to a bag. Or freeze in small jars, leaving headspace for expansion.
Don’t freeze it in the jar you’re using daily. Thaw one jar at a time to maintain freshness for the rest.
Nutrition Information
I’m not a nutritionist, but here’s the breakdown per 1 tablespoon serving (based on 16 servings per batch, using 1 cup honey):
| Nutrient | Amount |
|---|---|
| Calories | 60 |
| Carbohydrates | 15g |
| Sugar | 14g |
| Protein | 0g |
| Fat | 0g |
| Sodium | 0mg |
My Take:
This is not a diet food. It’s sweetened with honey. But it’s nutrient-dense. The elderberries are packed with antioxidants. Think of it as a supplement in syrup form. It’s far better than taking synthetic pills, in my opinion. It’s a whole-food approach to health.
Final Thoughts
Making your own Immune-Boosting Elderberry Syrup with Ginger is one of the most satisfying kitchen tasks. It connects you to traditional remedies and gives you control over what you put in your body. I love that I can batch-prep this once a month and feel secure knowing I have protection against seasonal bugs. It’s efficient, it’s healthy, and it tastes great. Give it a try this season. Your immune system will thank you. And if you need more meal prep ideas, check out my chickpea Greek salad jars for a quick lunch to go with your healthy routine.
Happy cooking!
FAQs
Can I use fresh elderberries?
No. Fresh elderberries contain cyanogenic glycosides which can be toxic. They must be cooked thoroughly, and even then, it’s safer to use dried elderberries which are standardized for safety. Always buy dried from a reputable source.
How long does this syrup last?
In the fridge, it lasts up to 6 months. In the freezer, it lasts up to a year. The honey acts as a natural preservative, but the berries are perishable, so cold storage is key.
Can I give this to children?
Yes, but skip it for infants under 1 year old due to the honey content. For older kids, reduce the ginger amount if they don’t like the spice. Start with 1/2 teaspoon daily.
Can I substitute the honey?
You can use maple syrup or agave, but they don’t preserve as well. The syrup will have a shorter shelf life and may need to be kept strictly in the fridge and used within 1 month.
Does it work for colds?
Many studies suggest elderberry can reduce the duration and severity of cold and flu symptoms. It’s best taken at the first sign of symptoms. It’s not a cure, but a supportive treatment.
Why is my syrup cloudy?
Cloudiness usually comes from not straining it thoroughly enough or pressing the pulp too hard. For clear syrup, strain twice through a fine mesh or coffee filter. It’s still safe to drink, just less pretty.
Can I make this in a slow cooker?
Yes. Add all ingredients except honey to a slow cooker. Cook on low for 6-8 hours. Then mash, strain, and add honey once cooled. It’s a great hands-off method.
Pin This Recipe!
Immune-Boosting Elderberry Syrup with Ginger
- Total Time: 1 hour 45 minutes
- Yield: 5 servings (5 jars) 1x
Description
A homemade, natural immune-support syrup made with dried elderberries, fresh ginger, and raw honey. This batch-prep recipe yields five 8-ounce jars, offering a potent, tart, and spicy remedy for seasonal sniffles that is easy to store and customize.
Ingredients
- 1 cup (115g) dried elderberries
- 1 cup (340g) raw honey
- 3 inches (approx. 60g) fresh ginger root, peeled and chopped
- 4 cups (960ml) filtered water
- 1 tsp black peppercorns
- 1 large cinnamon stick
- 5–6 whole cloves
Instructions
- Add dried elderberries, chopped ginger, peppercorns, cinnamon stick, and cloves to a large saucepan. Pour in 4 cups of water and stir to submerge the berries.
- Bring the mixture to a rolling boil over high heat, then immediately reduce heat to low. Simmer gently for 45-60 minutes until the liquid turns deep purple and reduces slightly.
- Turn off the heat and mash the berries and ginger against the side of the pot with a wooden spoon to release juices. Cover and let steep for 20 minutes.
- Strain the mixture through a fine-mesh strainer lined with cheesecloth into a bowl. Let it drip naturally, then gently press the pulp to extract remaining liquid. Discard solids.
- Allow the strained liquid to cool to room temperature. Stir in the raw honey until completely dissolved. Do not add honey to hot liquid to preserve enzymes.
- Pour the finished syrup into clean glass jars. Store 2 jars in the fridge for immediate use and freeze the remaining 3 jars.
Notes
Do not use fresh elderberries as they contain toxic cyanogenic glycosides; always use dried. Cool the liquid completely before adding honey to preserve its beneficial enzymes. For a clearer syrup, strain twice. Adjust ginger amount based on desired spice level. Safe for children over 1 year old.
- Prep Time: 20 minutes
- Cook Time: 1 hour
- Category: Condiments
- Cuisine: American
Nutrition
- Serving Size: 1 tablespoon
- Calories: 60
- Sugar: 14
- Carbohydrates: 15
Keywords: elderberry syrup, immune boost, ginger syrup, natural cold remedy, honey syrup, batch prep, healthy winter drink, elderberry recipe


