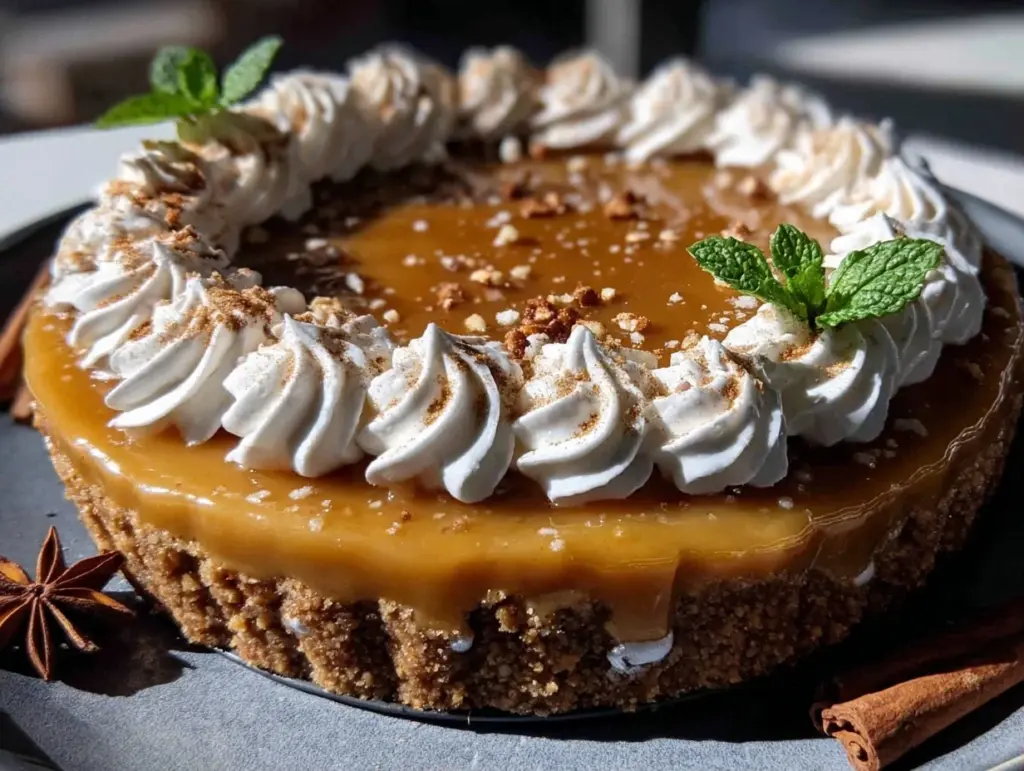
Last November, I was standing in my kitchen at 6:45 PM, staring at a half-empty fridge and a panic rising in my chest. My in-laws were arriving in fifteen minutes for what was supposed to be a casual Thanksgiving-adjacent dinner. I had grilled salmon ready (which I’m pairing with my baked salmon with lemon butter if you need a main course idea), but I had absolutely no dessert. I had considered ordering a pie from the grocery store, but let’s be honest: store-bought pie crusts taste like cardboard and sadness. I needed something that looked impressive, tasted like autumn, and didn’t require me to turn my oven on and heat up the entire house.
So, I threw together a hasty mixture of canned pumpkin, heavy cream, and some crushed cookies I had hiding in the back of the pantry. I didn’t have graham crackers, but I did have a stale box of gingersnaps from a holiday bake sale months ago. I crushed them up, mixed them with butter, pressed them into a pie dish, and dumped the pumpkin filling on top. I stuck it in the freezer for twenty minutes to set while I set the table.
When I pulled it out, it looked gorgeous. The dark, spiced crust contrasted beautifully with the pale orange filling. My mother-in-law took one bite and said, “Is this from that fancy bakery downtown?” I had to bite my tongue to keep from laughing. It wasn’t fancy. It wasn’t baked. It was the No-Bake Fall Pumpkin Pie with Gingersnap Crust, and it was the hero of the evening.
I’ve made this No-Bake Fall Pumpkin Pie with Gingersnap Crust at least ten times since that night. I’ve tweaked the spice ratios, tested different types of pumpkin puree, and even tried making it in mini glass jars for gift-giving. Every single time, it gets compliments. Every single time, people ask for the recipe. And every single time, I’m reminded that you don’t need to be a pastry chef to make something that feels luxurious and comforting. This dessert is my secret weapon for holiday gatherings, cozy weekend nights, or when you just want a slice of pumpkin pie without the hassle.
Why You’ll Love This No-Bake Fall Pumpkin Pie with Gingersnap Crust
Let’s be real for a second. Pumpkin pie is the king of fall desserts. But making it from scratch? It’s a commitment. You need to make a crust, blind bake it, worry about a soggy bottom, mix a custard filling that might crack in the oven, and then wait for it to cool. With this No-Bake Fall Pumpkin Pie with Gingersnap Crust, you skip all that drama. Here’s why this version has taken over my holiday rotation:
- Zero Oven Heat Required — This is the biggest selling point for me. In November and December, my kitchen is already a sauna. Using the oven feels like a punishment. This No-Bake Fall Pumpkin Pie with Gingersnap Crust stays cool, keeping your kitchen comfortable and your AC bill lower.
- The Crust is Actually Good — Most no-bake pies use a bland graham cracker crust. But gingersnaps? They bring warmth, spice, and a slight crunch that pairs perfectly with the smooth filling. It’s not just a vessel; it’s a flavor partner.
- It Tastes Like Dessert, Not Diet Food — I’m not going to pretend this is a health food. It’s rich, creamy, and sweet. But it’s the good kind of rich. The heavy cream and pumpkin puree create a texture that’s almost like a mousse. It feels indulgent, which is exactly what you want on a chilly night.
- Make-Ahead Friendly — You can make this No-Bake Fall Pumpkin Pie with Gingersnap Crust two days in advance. In fact, I recommend it. The flavors meld together overnight, and the texture firms up perfectly in the fridge. It’s the ultimate stress-free make-ahead dessert.
- Minimal Cleanup — You’re basically just blending and pressing. No pie dishes to scrub, no oven racks to clean, no burnt edges to deal with. Just a few bowls and a blender.
This is my go-to when I want to impress guests without spending hours in the kitchen. It’s reliable, delicious, and utterly foolproof.
Key Ingredients for Your No-Bake Fall Pumpkin Pie with Gingersnap Crust
You don’t need a trip to a specialty store for this. I’ve used grocery store brands for everything in this recipe, and it turns out perfectly every time. However, there are a few things that matter more than others. Here’s what you need to get right:
Pumpkin Puree (15 oz / 425g) — Not pumpkin pie filling. I repeat: do not use pumpkin pie filling. You want plain, 100% pure pumpkin puree. Look for the can that says “pure pumpkin.” The pie filling already has sugar and spices in it, which will throw off the balance of your No-Bake Fall Pumpkin Pie with Gingersnap Crust. If you can find fresh pumpkin puree, use that, but the canned version works beautifully and is shelf-stable.
Heavy Cream (2 cups / 480ml) — This is non-negotiable for texture. You need heavy whipping cream (at least 36% fat) to get that stiff peak structure. Half-and-half or milk won’t hold the air you whip into it. If you’re using a non-dairy alternative, coconut cream works, but the flavor profile changes slightly. For the authentic creamy taste, stick to heavy cream.
Gingersnap Cookies (2.5 cups / approx. 150g crushed) — These are the star of the crust. You want cookies that are crisp and full of ginger, cinnamon, and molasses. I usually grab a standard brand from the cookie aisle. Avoid the soft, cake-like ginger snaps; they won’t make a good crust. You need the hard, crunchy kind that shatter when you press them.
Unsalted Butter (6 tbsp / 85g) — Melted butter binds the cookie crumbs together. I use unsalted so I can control the sodium, but if you only have salted, just reduce any added salt in the filling. Make sure it’s melted and cooled slightly before mixing with the crumbs.
Granulated Sugar (0.5 cup / 100g) — Pumpkin is earthy and slightly bitter. The sugar balances that out. I’ve tried reducing the sugar, but the pie tastes flat without it. If you prefer less sweetness, you can drop it to 0.25 cup, but don’t skip it entirely.
Pumpkin Pie Spice (1.5 tsp) — This blend usually contains cinnamon, ginger, nutmeg, and cloves. If you don’t have a pre-made blend, you can mix your own: 1 tsp cinnamon, 0.25 tsp ginger, 0.25 tsp nutmeg, and a pinch of cloves. The spice is what makes it taste like fall.
Vanilla Extract (1 tsp) — Pure vanilla adds depth. Skip the imitation stuff if you can; it tastes chemical. A good splash of vanilla rounds out the sharp edges of the ginger.
Tools Needed
You don’t need fancy equipment. Here’s what I use:
Food Processor or Blender — I use my food processor to crush the cookies and then to blend the filling. It’s the fastest way to get a smooth, consistent texture. If you don’t have one, you can crush the cookies in a zip-top bag with a rolling pin and whisk the filling by hand, but it takes more elbow grease.
9-Inch Pie Dish — A standard glass or ceramic pie plate works best. Glass helps you see the crust setting. I’ve used metal pans, but they can sometimes make the crust soggy if the filling is too wet.
Hand Mixer or Stand Mixer — Essential for whipping the cream. I use a hand mixer because it’s easy to clean. If you’re whipping by hand, be prepared for a good arm workout.
How to Make No-Bake Fall Pumpkin Pie with Gingersnap Crust
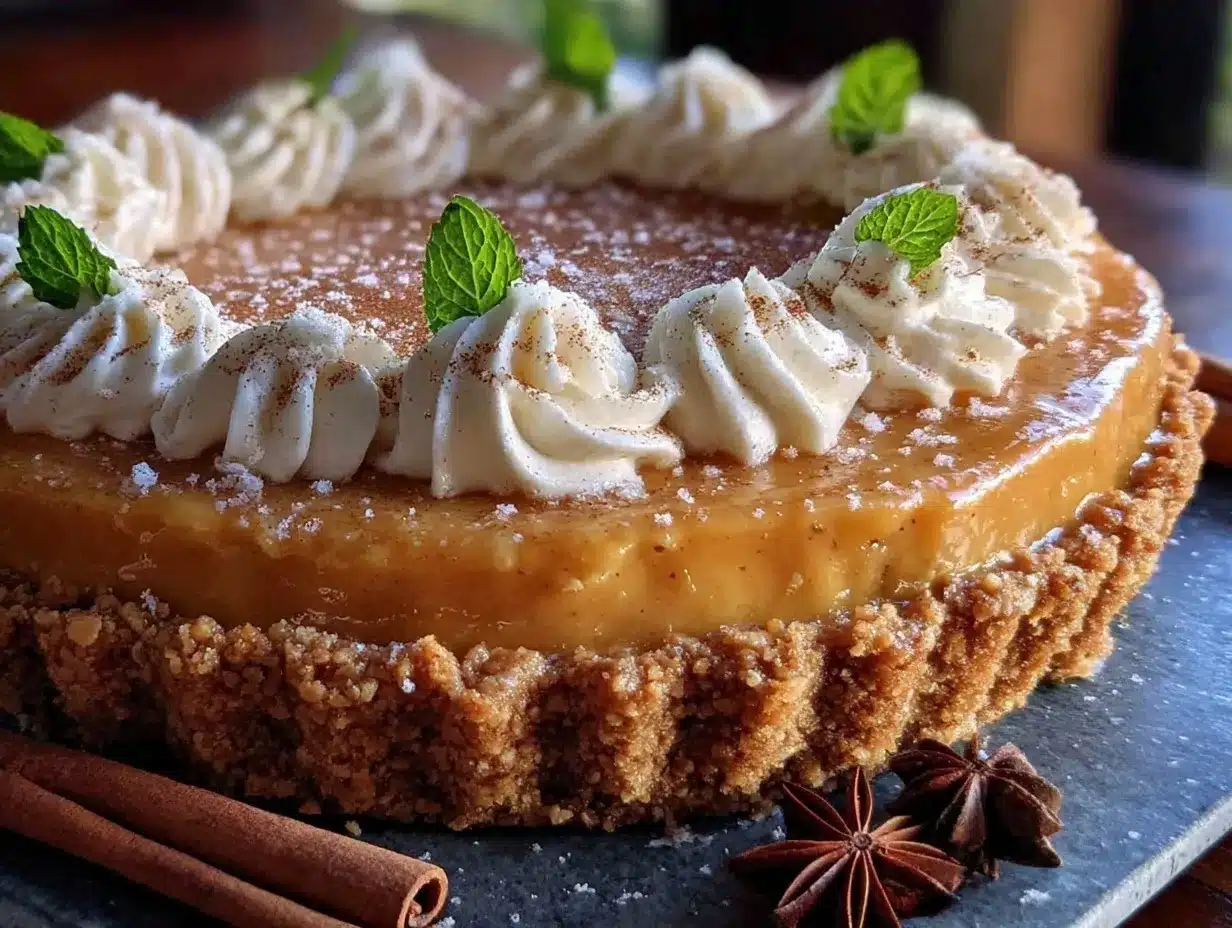
Let’s get into the actual making of it. This process is straightforward, but there are a few tricks to ensure it sets properly and tastes amazing.
Step 1: Prepare the Crust (10 minutes)
Start by crushing your gingersnap cookies. If you’re using a food processor, pulse them until they look like fine sand. You want small crumbs, not chunks. Transfer the crumbs to a medium bowl. Melt your butter in the microwave or a small saucepan. Pour the melted butter over the crumbs and stir until the mixture looks like wet sand. It should hold together when you pinch it. If it’s too dry, add another tablespoon of butter.
Pour the mixture into your 9-inch pie dish. Press it down firmly with the bottom of a measuring cup or your fingers. Make sure the crust goes up the sides slightly, about half an inch. This helps contain the filling. Pop the crust into the freezer while you make the filling. This helps it set faster.
Step 2: Whip the Cream (5 minutes)
This is the most critical step for texture. Take your heavy cream and pour it into a large mixing bowl. It needs to be cold, so if your kitchen is warm, chill your bowl in the fridge for 10 minutes first. Using a hand mixer or stand mixer, beat the cream on medium-high speed. Watch it closely. You want soft peaks first—when you lift the beaters, the cream should mound and droop slightly. Then, continue beating until you reach stiff peaks. The cream should hold its shape firmly when you lift the beaters. Do not over-whip, or it will turn into butter. This usually takes about 3-5 minutes.
Step 3: Mix the Filling (5 minutes)
In a separate large bowl, combine the pumpkin puree, sugar, pumpkin pie spice, and vanilla extract. Whisk these together until smooth. There should be no lumps of spice or sugar. Once smooth, gently fold in the whipped cream. Use a spatula and fold gently from the bottom up. You want to keep as much air in the cream as possible. If you stir too vigorously, you’ll deflate the mixture, and your No-Bake Fall Pumpkin Pie with Gingersnap Crust will be dense instead of fluffy. Fold until just combined and no white streaks remain.
Step 4: Assemble and Chill (4 hours minimum)
Take the pie crust out of the freezer. Spoon the pumpkin filling into the crust. Smooth the top with a spatula so it’s even. Cover the pie loosely with plastic wrap or aluminum foil. Place it in the refrigerator. You need to chill it for at least 4 hours, but overnight is best. The longer it chills, the firmer it gets and the better the flavors meld.
Total Time Breakdown:
Prep: 20 minutes
Cooking: 0 minutes (No-Bake!)
Chilling: 4+ hours
Total Active Time: 20 minutes
Expert Tips for the Perfect No-Bake Fall Pumpkin Pie with Gingersnap Crust
Here’s everything I learned from making this too many times. Some of these are hard-won lessons from my early attempts.
Don’t Skimp on the Chill Time
I know you want to eat it now. But if you take it out after an hour, it will slide off the spoon. The no-bake filling relies on the cold to set the fat in the cream and pumpkin. I learned this the hard way on my first attempt. I tried to slice it immediately, and it looked like a mess. Patience pays off. If you’re in a rush, put it in the freezer for 30 minutes to speed up the process, but move it to the fridge to finish setting so the crust doesn’t get too hard.
Room Temperature Ingredients
Make sure your pumpkin puree and sugar are at room temperature before mixing. If the pumpkin is ice cold from the fridge, it can seize up the whipped cream slightly, making it harder to fold. Let the pumpkin sit out for 15 minutes while you whip the cream.
Whip the Cream Correctly
This is the #1 mistake people make. If your cream is too warm, it won’t whip. If you over-whip it, it’s butter. Aim for stiff peaks, but stop as soon as they hold their shape. Also, make sure your mixing bowl is clean and dry. Any trace of water or oil will prevent the cream from whipping.
Common Problems & Solutions
Crust is too crumbly: You didn’t use enough butter. Add another tablespoon and press harder.
Filling is too runny: You over-folded the cream, deflating it, or you didn’t chill it long enough.
Crust is soggy: You didn’t freeze the crust before adding the filling. The cold crust creates a barrier.
Recipe Variations for No-Bake Fall Pumpkin Pie with Gingersnap Crust
Once you’ve nailed the basic version, here’s how to mix it up. I like to keep things interesting by swapping out spices or toppings.
Maple Bourbon Variation
Replace the granulated sugar with 0.5 cup of maple syrup. Add 1 tablespoon of bourbon to the filling. The bourbon cuts through the sweetness and adds a sophisticated depth. It’s perfect for adult gatherings. I served this version at a Halloween party, and it was a hit.
Coconut Cream Variation
For a dairy-free option, use full-fat coconut cream instead of heavy cream. The flavor will be more tropical, so reduce the pumpkin spice to 1 tsp and add 0.5 tsp of cardamom. It’s lighter and fres tasting.
Chocolate Drizzle
After the pie is set, melt some dark chocolate and drizzle it over the top in a zigzag pattern. The bitterness of the chocolate pairs beautifully with the sweet ginger crust. It looks elegant and adds a crunch.
Mini Pie Jars
Instead of a full pie, press the crust into mason jars or small glass ramekins. Fill them with the pumpkin mixture. These are perfect for gifts or individual servings. They look adorable on a dessert table and make serving easier.
Spiced Pecan Topping
Toast some pecans with a little brown sugar and cinnamon. Sprinkle them on top right before serving. It adds a nice textural contrast to the smooth filling.
Serving & Storage for No-Bake Fall Pumpkin Pie with Gingersnap Crust
Serving:
This pie is best served chilled. I like to slice it with a hot knife—dip the knife in hot water and wipe it dry before each cut. This gives you clean, professional-looking slices. Top each slice with a dollop of whipped cream and a sprinkle of extra pumpkin spice. I often serve this alongside my easy Labor Day berry trifle if I’m doing a large spread, but it stands well on its own.
Storage:
Keep this pie covered in the refrigerator. It will last for up to 5 days. In fact, it tastes better on day 2 and 3 as the flavors continue to meld. Do not leave it at room temperature for more than 2 hours.
Freezing:
This No-Bake Fall Pumpkin Pie with Gingersnap Crust does not freeze well. The whipped cream filling tends to separate and become grainy when thawed. It’s best enjoyed fresh from the fridge. If you need to make it ahead, stick to the refrigerator method.
Nutrition Information
I’m not a nutritionist, but here’s the breakdown. This is comfort food with cream and sugar. Not diet food. But it’s better than takeout and I know what’s in it.
| Nutrient | Per Serving (1/8th of pie) |
|---|---|
| Calories | 380 kcal |
| Protein | 4g |
| Carbohydrates | 32g |
| Fiber | 2g |
| Fat | 26g |
| Sodium | 180mg |
This is a rich dessert. A little goes a long way. I usually serve small slices with a cup of coffee.
Final Thoughts
This No-Bake Fall Pumpkin Pie with Gingersnap Crust is more than just a dessert; it’s a mood. It’s cozy, it’s easy, and it feels like a hug on a plate. I love that it allows me to participate in the holiday tradition of baking without the stress. Whether you’re hosting a dinner party or just treating yourself to a quiet night in, this pie will make you feel like a pro.
If you make this, drop a comment! I love hearing how it turns out in your kitchen. Did you add the bourbon? Did you use fresh pumpkin? Let me know. And if you need more easy dessert ideas, check out my soft chocolate chip lunchbox cookies for a sweet treat that’s kid-friendly.
Happy cooking!
FAQs
Can I use pumpkin pie filling instead of pure pumpkin puree?
A: I strongly advise against it. Pumpkin pie filling already contains sugar and spices. If you use it, your No-Bake Fall Pumpkin Pie with Gingersnap Crust will be overly sweet and the spice balance will be off. Stick to 100% pure pumpkin puree for the best results.
Can I make this pie ahead of time?
A: Yes! This is actually better when made ahead. You can make it up to 2 days in advance. Just keep it covered in the fridge. The crust will stay crisp, and the filling will firm up nicely.
What if I don’t have a food processor?
A: You can crush the gingersnaps in a zip-top bag using a rolling pin. It takes a bit more effort, but it works. For the filling, you’ll need to whisk the pumpkin mixture and fold in the whipped cream by hand. It’s possible, just requires more arm strength.
Can I use a different cookie for the crust?
A: You can! Graham crackers are the classic choice. Oreos make a chocolate version. Shortbread cookies work well too. But gingersnaps are my favorite because the spice complements the pumpkin so well.
Why did my whipped cream collapse?
A: This usually happens if the cream was too warm or if you over-whipped it. Make sure your bowl and beaters are cold. Also, when folding the cream into the pumpkin, be gentle. Over-mixing deflates the air bubbles you worked hard to create.
How do I slice this pie cleanly?
A: Use a sharp knife and dip it in hot water between each cut. Wipe it dry with a paper towel. This prevents the creamy filling from sticking to the blade and gives you clean, neat slices.
Pin This Recipe!
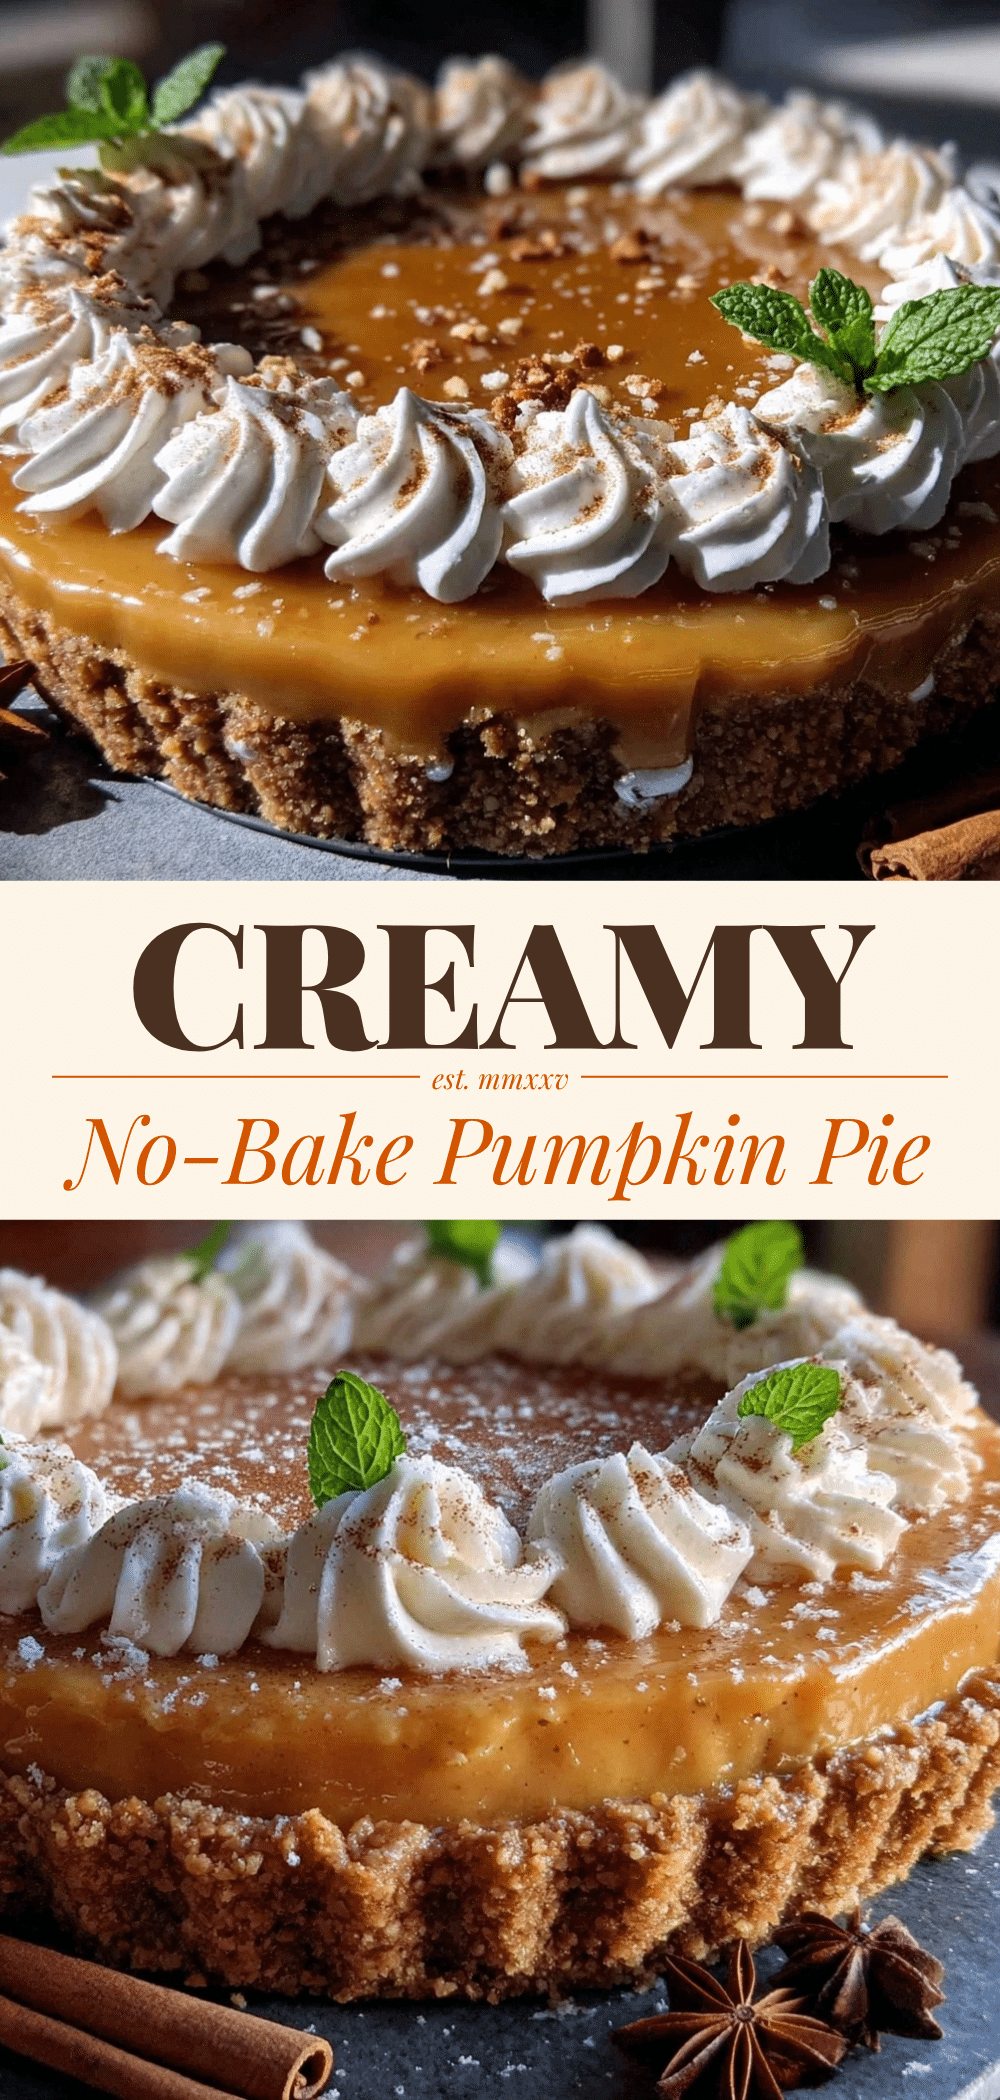
No-Bake Fall Pumpkin Pie with Gingersnap Crust
- Total Time: 4 hours 20 minutes
- Yield: 8 servings 1x
Description
An easy, no-bake dessert featuring a spiced gingersnap crust and a creamy pumpkin filling. This make-ahead friendly pie requires no oven and delivers rich, autumnal flavors perfect for holiday gatherings.
Ingredients
- 2.5 cups gingersnap cookies (crushed)
- 6 tbsp unsalted butter (melted)
- 2 cups heavy whipping cream (cold)
- 15 oz (425g) pure pumpkin puree
- 0.5 cup granulated sugar
- 1.5 tsp pumpkin pie spice
- 1 tsp vanilla extract
Instructions
- Crush the gingersnap cookies into fine crumbs using a food processor or by placing them in a zip-top bag and crushing with a rolling pin.
- Melt the butter and mix it with the cookie crumbs until the mixture resembles wet sand.
- Press the crumb mixture firmly into the bottom and up the sides of a 9-inch pie dish. Freeze the crust for 10-20 minutes to set.
- In a large mixing bowl, whip the cold heavy cream using a hand or stand mixer on medium-high speed until stiff peaks form. Be careful not to over-whip.
- In a separate bowl, whisk together the pumpkin puree, sugar, pumpkin pie spice, and vanilla extract until smooth.
- Gently fold the whipped cream into the pumpkin mixture using a spatula, lifting from the bottom up to maintain airiness.
- Remove the crust from the freezer and spoon the filling into the crust, smoothing the top.
- Cover the pie with plastic wrap or foil and refrigerate for at least 4 hours, preferably overnight, to set.
- Slice with a hot knife for clean cuts and serve chilled.
Notes
Ensure the heavy cream and mixing bowl are very cold for best whipping results. Do not use pumpkin pie filling; use 100% pure pumpkin puree. The pie does not freeze well as the whipped cream may separate upon thawing. For a dairy-free version, substitute heavy cream with full-fat coconut cream.
- Prep Time: 20 minutes
- Cook Time: 0 minutes
- Category: Dessert
- Cuisine: American
Nutrition
- Serving Size: 1/8th of pie
- Calories: 380
- Sugar: 24
- Sodium: 180
- Fat: 26
- Saturated Fat: 16
- Carbohydrates: 32
- Fiber: 2
- Protein: 4
Keywords: no-bake pumpkin pie, gingersnap crust, fall dessert, holiday dessert, easy pumpkin recipe, make-ahead dessert, gluten-free option


