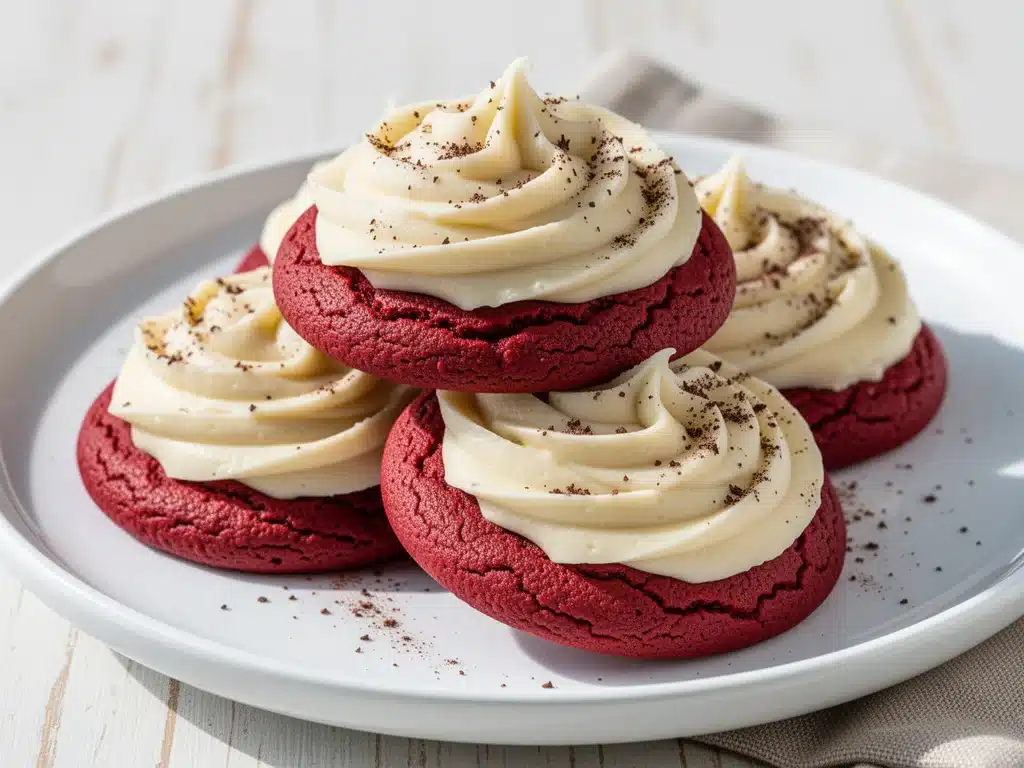
It was 11:30 PM on a Tuesday, and I was staring into the open oven like it owed me money. I had just pulled out a batch of cookies that were supposed to be chocolate chip, but something had gone terribly wrong—or right, depending on how you look at it. The dough had turned a deep, dramatic red, the cocoa powder I thought I was using was actually just expired red velvet cake mix I’d found in the back of the pantry, and my kitchen smelled like a bakery that just opened in New York City.
I took one bite. It was soft, chewy, tangy, and impossibly rich. My kids walked in, saw the bright red mess, and immediately asked for three more. That’s when I knew: I had stumbled onto something special. Those accidental cookies became the blueprint for what is now my most-requested recipe: Soft Red Velvet Cookies with Cream Cheese Frosting.
I’ve made these cookies at least twenty times since that late-night experiment. I’ve tested different flours, adjusted the baking powder, and even tried substituting the red food coloring with beet juice (don’t—trust me on this one). The version you’re about to make is the winner. It’s the kind of cookie that looks like it came from a high-end patisserie but tastes like pure comfort. And the best part? You probably have most of the ingredients already.
This isn’t just a cookie; it’s an experience. The contrast between the tender, cake-like red velvet base and the sharp, cool cream cheese frosting is what keeps me coming back. It’s sweet but not cloying, festive but not childish, and easy enough to make on a whim. Whether you’re baking for Valentine’s Day, a holiday party, or just because you need a hug in cookie form, these soft red velvet cookies are your answer.
Why You’ll Love This Red Velvet Cookie Recipe
There are a lot of cookie recipes out there. Some are crispy, some are dense, some require twelve different ingredients you can’t pronounce. But these soft red velvet cookies? They hit a sweet spot that’s hard to find. Here’s why they’ve become my go-to for every occasion:
- They’re Actually Soft — I’m not talking about “slightly underbaked” soft. I’m talking about cloud-like, melt-in-your-mouth soft. I’ve tried so many recipes that end up hard as rocks after a day, but these stay tender for days if stored properly. I keep a batch in my pantry just for late-night snacking.
- The Frosting is the Star — Most red velvet cookie recipes skimp on the frosting. Not here. This cream cheese frosting is tangy, smooth, and perfectly balanced. It’s not overly sweet, which is crucial because the cookie base is already rich. I’ve had friends tell me they’d eat the frosting with a spoon if I let them. (I don’t, but I appreciate the sentiment.)
- Perfect for Beginners — You don’t need to be a pastry chef to make these. The dough comes together quickly, and there’s no complex rolling or shaping. Just scoop, bake, and frost. I’ve made these with my teenage daughter over FaceTime when she was stuck in dorms, and she nailed it on the first try.
- Make-Ahead Friendly — I love that I can freeze the dough balls. When I need a last-minute gift or a surprise treat, I just pull them out, bake them, and frost them. They thaw and bake almost like fresh dough. This has saved me more than once during busy workweeks.
- Visually Stunning — Let’s be honest: these look incredible. The deep red color against the white frosting is a feast for the eyes. I’ve gotten more compliments on these cookies than any other dessert I’ve made. They’re perfect for Instagram, but honestly, they’re even better fresh out of the oven.
This recipe has completely changed how I think about red velvet. It’s not just for cakes anymore. It’s a cookie that brings joy, comfort, and a little bit of drama to your kitchen. Once you try them, you’ll understand why I make them so often.
Ingredients You’ll Need for Soft Red Velvet Cookies
Here’s the best part: the ingredient list isn’t scary. You likely have half of it in your pantry right now. I’m particular about a few things here, so pay attention to the notes below.
For the Cookies:
Unsalted butter (1 cup / 226g) — Softened to room temperature. This is crucial. If your butter is too cold, the dough won’t cream properly. If it’s too melted, the cookies will spread too much. I leave mine out for about an hour before starting.
Granulated sugar (1 cup / 200g) — Standard stuff. No need to get fancy.
Brown sugar (1 cup / 220g) — Light or dark, both work. I prefer dark for a deeper molasses flavor that complements the red velvet. Make sure it’s not clumpy—break it up with a fork if needed.
One large egg — Room temperature. Cold eggs can cause the butter to seize up when you mix them in.
Vanilla extract (1 teaspoon) — Use real vanilla, not imitation. It makes a noticeable difference in flavor depth.
All-purpose flour (2 ½ cups / 315g) — Spoon and level method, please. Don’t scoop directly from the bag, or you’ll end up with dry cookies. I use King Arthur Flour because it’s consistent, but any good AP flour works.
Cocoa powder (1 tablespoon / 5g) — Unsweetened, natural cocoa. Do not use Dutch-processed here; it changes the pH and can affect the rise. I use Hershey’s Natural Cocoa Powder.
Red food coloring (2 tablespoons) — Gel food coloring is best for vibrant color without adding extra liquid, but liquid works too. I use Americolor Super Red. If you skip this, you’ll just have chocolate cookies, which are still good, but not red velvet.
Baking soda (1 teaspoon) — Make sure it’s fresh! Old baking soda won’t give you that nice rise.
Baking powder (½ teaspoon) — Adds extra lift for that cake-like texture.
Salt (½ teaspoon) — Enhances all the flavors. Don’t skip it.
For the Cream Cheese Frosting:

Cream cheese (8 oz / 225g) — Full-fat, brick-style. Never use the spreadable tub kind; it has too much water and air. I use Philadelphia Cream Cheese.
Unsalted butter (½ cup / 113g) — Softened to room temperature.
Powdered sugar (2 cups / 240g) — Sifted if it’s lumpy. I sift it to ensure a silky smooth frosting.
Vanilla extract (1 teaspoon) — Same as above, real vanilla only.
Lemon juice (1 teaspoon) — This is my secret weapon. A tiny bit of acidity cuts the sweetness and highlights the tang of the cream cheese. You won’t taste lemon, I promise.
Equipment You’ll Need
You don’t need fancy gadgets for this. Here’s what I actually use:
Stand mixer or hand mixer — Creaming the butter and sugar takes effort. A mixer makes it easy, but you can do it by hand if you have strong arms (and patience).
Mixing bowls — One large bowl for the dough, one medium for the frosting.
Cooling racks — Essential for cooling cookies completely before frosting. If you frost warm cookies, the frosting will melt. I’ve learned this the hard way.
Baking sheets — I use half-sheet pans. Line them with parchment paper for easy cleanup and even baking.
Piping bag or ziplock bag — For decorating the frosting. I like a star tip for a classic look, but a spoon works fine if you’re lazy.
Measuring cups and spoons — Accuracy matters in baking. I use both cup measures for dry ingredients and a scale for precision.
How to Make Soft Red Velvet Cookies: Step-by-Step
Alright, let’s make these! I’m walking you through exactly how I do it, including the little tricks I’ve picked up over the years.
Step 1: Cream the Butter and Sugars (5 minutes)
In a large bowl, beat the softened unsalted butter, granulated sugar, and brown sugar together on medium-high speed until light and fluffy. This usually takes about 3-4 minutes. You want the mixture to pale in color and increase in volume. This step incorporates air, which helps the cookies stay soft. If you rush this, your cookies will be dense.
Step 2: Add Wet Ingredients (2 minutes)
Beat in the egg and vanilla extract until fully combined. Add the red food coloring now. Mix until the butter mixture is a vibrant red. Scrape down the sides of the bowl to ensure everything is evenly colored.
Step 3: Mix Dry Ingredients (2 minutes)
In a separate medium bowl, whisk together the flour, cocoa powder, baking soda, baking powder, and salt. Whisking ensures the leavening agents are evenly distributed, so you don’t get bitter spots of baking soda.
Step 4: Combine Wet and Dry (2 minutes)
Gradually add the dry ingredients to the wet ingredients, mixing on low speed. Stop as soon as the flour disappears. Overmixing develops gluten, which makes cookies tough. You want them tender, not chewy like bread. The dough will be thick and slightly sticky.
Step 5: Chill the Dough (30 minutes)
Cover the bowl and refrigerate for at least 30 minutes. This step is non-negotiable. Chilling firms up the butter, which prevents the cookies from spreading too thin. It also allows the flavors to meld. I often chill it overnight for even better flavor, but 30 minutes is the minimum.
Step 6: Scoop and Bake (12-14 minutes)
Preheat your oven to 350°F (175°C). Line baking sheets with parchment paper. Scoop dough into 2-tablespoon balls (about 30g each) and place them 2 inches apart on the sheets. Bake for 12-14 minutes. The cookies should look set on the edges but still soft in the center. They will continue to cook on the hot pan after you remove them. Do not overbake!
Step 7: Cool Completely (30 minutes)
Let the cookies cool on the baking sheet for 5 minutes, then transfer to a wire rack to cool completely. This is critical. If you frost them while warm, the frosting will melt into a puddle. I usually make the frosting while the cookies cool, so everything is ready at once.
Step 8: Make and Apply Frosting (10 minutes)
Beat the softened cream cheese and butter until smooth. Add powdered sugar, vanilla, and lemon juice. Beat on low until combined, then increase to high and beat until fluffy and smooth. Pipe or spread onto cooled cookies. I like to pipe a rosette on top for a professional look.
Total Time: About 1 hour 30 minutes (including chilling)
Expert Tips & Tricks
Here’s everything I’ve learned from making these dozens of times. These tips will save you from my mistakes.
Room Temperature is Key
Butter and cream cheese must be room temperature. If they’re cold, you’ll get lumps. If they’re melted, the texture will be greasy. I take them out of the fridge the morning I plan to bake. If I forget, I microwave the butter for 10-second bursts until it’s just soft.
Don’t Skip the Chill
I know it’s tempting to bake right away. But chilling the dough prevents spreading and ensures that perfect thick, soft texture. I’ve tested this, and unbaked dough cookies come out flat and crisp. Chilled dough cookies are soft and cake-like. Choose wisely.
Scoop, Don’t Roll
Use a cookie scoop for uniform size. This ensures even baking. If you roll them by hand, you might end up with some that burn and others that are raw. Consistency is king.
Underbake Slightly
Remove the cookies when the edges are just set but the centers still look soft. They will firm up as they cool. Overbaking is the number one reason these cookies turn out dry.
Frosting Consistency
If your frosting is too thick, add a teaspoon of milk. If it’s too thin, add more powdered sugar. Aim for a consistency that holds its shape but is still spreadable.
Variations & Substitutions
Once you’ve mastered the basic version, here’s how you can mix it up. I’ve tried all of these.
White Chocolate Chip
Add ½ cup white chocolate chips to the dough before baking. They melt into the red velvet for a classic combo.
Strawberry Red Velvet
Add 1 tablespoon freeze-dried strawberry powder to the dry ingredients. It boosts the flavor without changing the texture.
Gluten-Free
Use a 1:1 gluten-free flour blend. The texture will be slightly more crumbly, but still delicious. I’ve used Bob’s Red Mill and it works well.
Dairy-Free
Use vegan butter and dairy-free cream cheese. The frosting will be slightly different, but still tasty. I recommend Miyoko’s Creamery for the cream cheese.
Mini Cookies
Scoop smaller dough balls (1 tablespoon) and bake for 8-10 minutes. Perfect for parties and gift boxes.
Serving & Storage
How to Serve:
I serve these at room temperature. They’re best enjoyed within 24 hours of frosting, but they keep well for a few days. I often pair them with coffee or milk for a complete treat.
Storage:
Store in an airtight container at room temperature for up to 3 days. If your kitchen is hot, refrigerate them, but bring to room temperature before serving. They can be frozen unbaked for up to 3 months. Just bake from frozen, adding 1-2 minutes to the bake time.
Reheating:
If you want them warm, microwave for 10 seconds. Don’t overdo it, or the frosting will melt.
Nutrition Information
I’m not a nutritionist, but here’s the breakdown if you’re tracking. Per cookie (makes about 24 cookies):
| Nutrient | Amount |
|---|---|
| Calories | 220 |
| Fat | 12g |
| Carbs | 28g |
| Sugar | 20g |
| Protein | 3g |
Look, these are cookies. They’re supposed to be indulgent. But they’re also a treat, not a meal. Enjoy a couple and savor them. When I make these, I usually eat one with a cup of tea and enjoy every bite. It’s not about restriction; it’s about appreciation.
Final Thoughts
So that’s my go-to soft red velvet cookies recipe! I’ve probably talked your ear off at this point, but when you make a recipe this often, you have a lot to say about it.
These cookies have saved me more times than I can count. They’re my answer to “what do I bring to the potluck?” or “how do I impress my in-laws?” or simply “I need comfort food.” They’re reliable, delicious, and always a crowd-pleaser. My kids beg for them, my friends request them, and I’m happy to oblige.
Make them yours! Try different frostings, add different mix-ins, or adjust the sweetness. The best recipes are the ones you adapt to your tastes. And if you make these, drop a comment and let me know what you think! I love hearing how recipes turn out in your kitchen.
Happy baking! And I hope your kitchen smells as amazing as mine does right now.
Frequently Asked Questions
Can I use liquid food coloring instead of gel?
Yes, but you’ll need to use more to get the same vibrant color. Gel food coloring is more concentrated, so you need less. If you use liquid, the extra water can affect the dough consistency, so you might need to add a tiny bit more flour. I recommend gel for best results.
Why did my cookies spread too much?
Usually, this means the butter was too soft or you didn’t chill the dough. Make sure your butter is softened but not melted. Also, don’t skip the chilling step. It firms up the fat, which prevents spreading. If you’re baking on a warm day, chill the dough balls on the pan for 10 minutes before baking.
Can I freeze the dough?
Absolutely! Scoop the dough into balls and freeze them on a baking sheet until solid. Then transfer to a freezer bag. Bake from frozen, adding 1-2 minutes to the bake time. This is my favorite make-ahead strategy.
Why is my frosting runny?
Most likely, the butter or cream cheese was too warm. If they’re too soft, the frosting will be loose. Put it in the fridge for 15 minutes, then beat again. If it’s still too thin, add more powdered sugar. Conversely, if it’s too thick, add a teaspoon of milk.
Can I make these without red food coloring?
You can, but they’ll be chocolate cookies, not red velvet. If you want the flavor without the color, you can skip the coloring. But honestly, the red is part of the fun. It’s what makes them special.
How do I store these cookies?
Store in an airtight container at room temperature for up to 3 days. If your kitchen is hot, refrigerate them. They can also be frozen unbaked for up to 3 months.
Can I use a stand mixer for the frosting?
Yes, a stand mixer works great. Use the paddle attachment on medium speed. Beat until smooth and fluffy. It’s faster than hand mixing and gives a more consistent texture.
Pin This Recipe!


Soft Red Velvet Cookies with Cream Cheese Frosting
- Total Time: 1 hour 30 minutes
- Yield: 24 cookies 1x
Description
Soft, chewy, and cake-like red velvet cookies topped with a tangy, smooth cream cheese frosting. These cookies are easy to make, perfect for beginners, and stay tender for days.
Ingredients
- 1 cup (226g) unsalted butter, softened to room temperature
- 1 cup (200g) granulated sugar
- 1 cup (220g) brown sugar, light or dark
- 1 large egg, room temperature
- 1 teaspoon vanilla extract
- 2 ½ cups (315g) all-purpose flour
- 1 tablespoon (5g) unsweetened natural cocoa powder
- 2 tablespoons red food coloring (gel preferred)
- 1 teaspoon baking soda
- ½ teaspoon baking powder
- ½ teaspoon salt
- 8 oz (225g) full-fat brick-style cream cheese, softened
- ½ cup (113g) unsalted butter, softened
- 2 cups (240g) powdered sugar, sifted
- 1 teaspoon vanilla extract
- 1 teaspoon lemon juice
Instructions
- In a large bowl, beat the softened unsalted butter, granulated sugar, and brown sugar on medium-high speed until light and fluffy (3-4 minutes).
- Beat in the egg and vanilla extract until combined. Add the red food coloring and mix until the mixture is a vibrant red. Scrape down the sides of the bowl.
- In a separate medium bowl, whisk together the flour, cocoa powder, baking soda, baking powder, and salt.
- Gradually add the dry ingredients to the wet ingredients on low speed. Stop mixing as soon as the flour disappears to avoid tough cookies.
- Cover the bowl and refrigerate the dough for at least 30 minutes (or overnight) to prevent spreading and meld flavors.
- Preheat oven to 350°F (175°C). Line baking sheets with parchment paper.
- Scoop dough into 2-tablespoon balls (approx. 30g each) and place 2 inches apart on the sheets.
- Bake for 12-14 minutes. Cookies should look set on the edges but still soft in the center.
- Let cookies cool on the baking sheet for 5 minutes, then transfer to a wire rack to cool completely.
- While cookies cool, beat the cream cheese and ½ cup butter until smooth. Add powdered sugar, vanilla, and lemon juice. Beat on low until combined, then high until fluffy.
- Pipe or spread the frosting onto the completely cooled cookies.
Notes
Ensure butter and cream cheese are at room temperature for proper texture. Do not skip the chilling step as it prevents spreading. Use gel food coloring for vibrant color without altering dough consistency. Store in an airtight container at room temperature for up to 3 days.
- Prep Time: 30 minutes
- Cook Time: 12-14 minutes
- Category: Dessert
- Cuisine: American
Nutrition
- Serving Size: 1 cookie
- Calories: 220
- Sugar: 20
- Sodium: 150
- Fat: 12
- Saturated Fat: 7
- Carbohydrates: 28
- Fiber: 1
- Protein: 3
Keywords: red velvet cookies, cream cheese frosting, soft cookies, easy baking, holiday cookies, Valentine's Day treats


