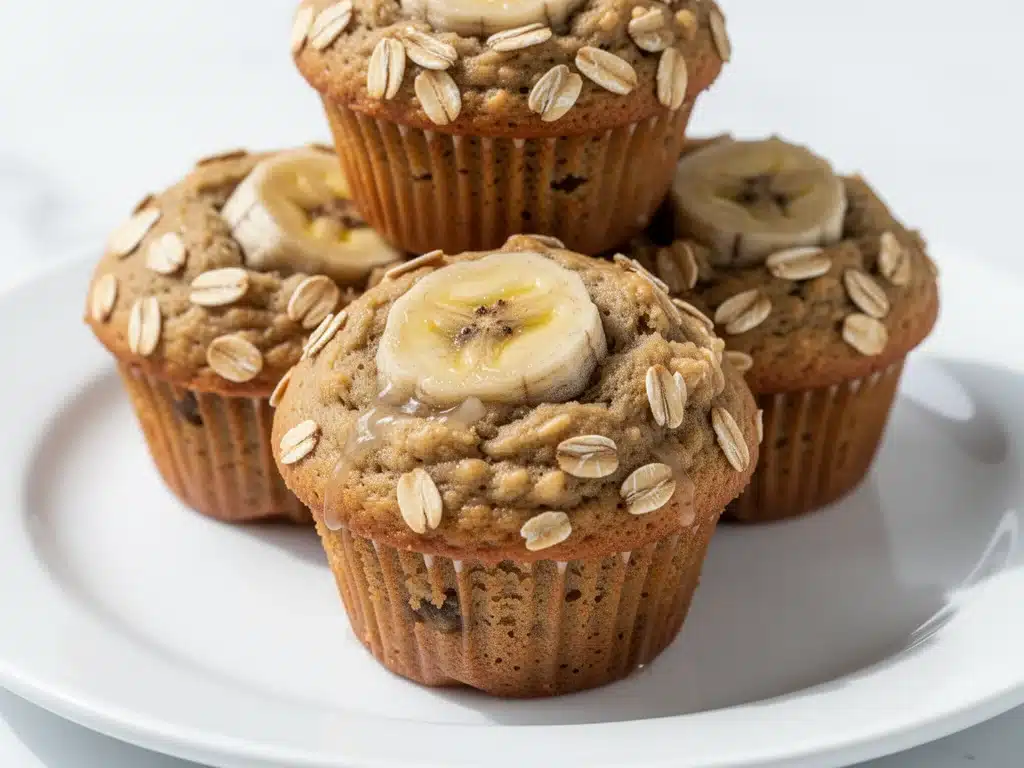
It was 6:45 AM on a Tuesday in September. The house was still dark, the coffee maker was hissing its usual angry protest, and I was staring at the empty pantry like it owed me money. My son’s backpack was by the door, his lunchbox was packed, and I realized with a sinking feeling that I had zero breakfast options for him. The cereal box was empty. The fruit bowl was just sad, bruised bananas. I was about to resort to dry toast and a prayer when I remembered the three overripe bananas hiding in the back of the fridge.
I didn’t have time to bake a proper cake. I didn’t have time to whisk batter from scratch. But I did have oats, flour, and a desperate need to keep my kid fueled before his 8 AM math test. So I threw everything into a bowl, mixed it with a wooden spoon, and shoved it into the oven. Fifteen minutes later, the kitchen smelled like a bakery, and my son ate two of these back-to-school banana oatmeal muffins before the bus even arrived.
That was three months ago. Now, these muffins are the holy grail of our morning routine. I’ve made them at least twenty times since that chaotic Tuesday. They’re soft, they’re sweet without being candy-coated, and they hold up surprisingly well in a lunchbox until 2 PM. If you’re drowning in the back-to-school rush and need a breakfast that actually works, this is your new best friend. It’s basically magic in a muffin tin.
Why You’ll Love These Back-to-School Banana Oatmeal Muffins
Look, I know you’re tired. Between packing lunches, finding lost shoes, and trying to get everyone out the door before 8 AM, you don’t need a recipe that requires a stand mixer or three hours of prep time. These muffins are different. They’re designed for real life. Here’s why they’ve earned a permanent spot in our weekly rotation:
- One-Bowl Wonder — Seriously. One bowl. One spoon. No fancy equipment needed. I’ve made these while holding a toddler on my hip. If you can mix pancake batter, you can make these.
- Meal-Prep Friendly — I bake a full batch on Sunday night. By Wednesday, they’re gone. They stay moist for days if stored properly, and they freeze beautifully. I keep a stash in the freezer for those “I forgot to thaw breakfast” emergencies.
- Healthy-ish Without Being Sad — We use whole oats and ripe bananas for natural sweetness. No one is complaining about the “healthy” part because, let’s be honest, they taste like dessert. My kids think they’re getting away with something.
- Picky Eater Approved — My daughter usually refuses anything with “oats” in the name. These muffins are so soft and banana-forward that she doesn’t even notice the texture. That’s a victory in our house.
- Fast Baking Time — 18 to 20 minutes. That’s it. You can start mixing at 6:30 and have warm muffins by 6:50. That’s 20 minutes of your morning saved.
These aren’t just muffins. They’re a peace treaty between you and the morning chaos. They’re reliable, they’re delicious, and they make getting out the door feel slightly less like a military operation.
Ingredients You’ll Need
Here’s the good news: you probably have 90% of these ingredients already. This isn’t a recipe that requires a special trip to the grocery store for obscure powders. It’s pantry-friendly comfort food.
For the Muffin Base
Ripe bananas (3 large / about 1.5 cups mashed) — The riper, the better. I’m talking spotty, brown, almost black peels. They’re sweeter and mash easier. If they’re green, they’ll make these muffins taste like raw potato. Don’t risk it.
Old-fashioned rolled oats (1 cup / 90g) — Not instant oats, not steel-cut. Rolled oats give that nice chewy texture. You can pulse them in a blender for 10 seconds if you want finer oat flour, but I like the texture of whole oats.
All-purpose flour (1 cup / 120g) — Standard stuff. If you want to make them gluten-free, swap this for a 1-to-1 gluten-free baking blend. I’ve tested King Arthur Measure for Measure and it works perfectly.
Brown sugar (½ cup / 100g) — Packed. Brown sugar adds moisture and a hint of caramel flavor. White sugar works too, but brown is better here. It keeps the muffins soft.
Neutral oil (⅓ cup / 80ml) — I use canola or vegetable oil. You can use melted coconut oil if you want a slight coconut flavor, but it’s not necessary. Oil keeps these muffins moister than butter does.
Large egg (1 / 50g) — Just one egg. It binds everything together. Room temperature is ideal, but cold works fine if you’re in a rush.
Milk (¼ cup / 60ml) — Any kind works. Dairy, almond, oat, soy. I usually just pour whatever is left in the carton. It adds moisture and helps the batter mix smoothly.
For the Flavor and Rise
Baking soda (1 teaspoon) — Essential for the rise. Make sure it’s not expired! I keep my baking soda in the fridge to test freshness (if it fizzes with vinegar, it’s good).
Baking powder (½ teaspoon) — A little extra lift. Helps them get that nice domed top.
Cinnamon (1 teaspoon) — The classic banana bread flavor. Don’t skip it. It makes the kitchen smell amazing while they bake.
Salt (½ teaspoon) — Crucial. It balances the sweetness. I know it sounds like a lot, but it’s necessary.
Optional Add-ins
Chopped walnuts or pecans (½ cup) — For crunch. I add these sometimes, but my kids are nut-free at school, so I usually skip them. Toasting the nuts first makes them way more flavorful.
Dark chocolate chips (½ cup) — Because why not? It’s a muffin. You can do what you want. I add these for the “treat” version.
Blueberries (½ cup, fresh or frozen) — Adds a nice burst of tartness. If using frozen, don’t thaw them first, or you’ll turn your batter purple.
Equipment Needed
You don’t need much. Here’s what I actually use:
Large mixing bowl — I use a 4-quart stainless steel bowl. It’s big enough to mix everything without making a mess. A glass bowl works too.
Fork or potato masher — For mashing the bananas. I prefer a fork because it’s faster and easier to clean. A masher is fine if you like things super smooth.
Muffin tin — Standard 12-cup tin. I use a non-stick one. Dark metal tins bake faster, so you might need to check them 1-2 minutes early.
Muffin liners — Paper or silicone. Paper is easier for cleanup. Silicone is reusable but sometimes hard to get the muffins out if they’re sticky.
Cooling rack — Essential. Letting them cool in the pan makes them soggy. I learned this the hard way. Always transfer to a rack.
Measuring cups and spoons — Standard stuff. Level off your dry ingredients for accuracy.
How to Make It: Step-by-Step
Alright, let’s make these! It’s incredibly simple. I’m walking you through exactly how I do it, including the little tricks that keep them moist.
Step 1: Prep Your Oven and Pan (2 minutes)
Preheat your oven to 350°F (175°C). Line your muffin tin with liners or grease them lightly with oil spray. I usually spray the sides too, just to be safe. This prevents sticking and makes cleanup a breeze.
Step 2: Mash the Bananas (2 minutes)
Peel your ripe bananas and put them in your large mixing bowl. Mash them with a fork until they’re mostly smooth with a few small lumps. You want about 1.5 cups of mashed banana. Don’t over-mash it into a paste; a little texture is nice.
Step 3: Mix Wet Ingredients (1 minute)
To the mashed bananas, add the brown sugar, oil, egg, and milk. Whisk this together with a fork or whisk until it’s well combined. It should look like a thick, sweet banana slurry. No lumps of sugar should remain.
Step 4: Add Dry Ingredients (1 minute)
Stir in the rolled oats, flour, baking soda, baking powder, cinnamon, and salt. Mix gently. Just until the dry ingredients are moistened. Do not overmix! Overmixing makes tough muffins. A few lumps are okay. In fact, they’re preferred.
Step 5: Fold in Add-ins (1 minute)
If you’re adding nuts, chocolate chips, or berries, fold them in now. Use a spatula and just gently distribute them evenly. Be careful not to crush the berries if you’re using them.
Step 6: Fill the Muffin Tin (2 minutes)
Divide the batter evenly among the 12 muffin cups. Fill each about ¾ full. You can use an ice cream scoop for even portions, but a large spoon works fine. If you want tall, bakery-style tops, fill them a bit more, but they might spill over.
Step 7: Bake (18-20 minutes)
Place the tin in the center of the oven. Bake for 18-20 minutes. They’re done when the tops are golden brown and a toothpick inserted into the center comes out clean or with just a few moist crumbs. Do not overbake, or they’ll be dry. The kitchen will smell incredible by minute 10.
Step 8: Cool (10 minutes)
Let the muffins cool in the pan for 5 minutes, then transfer them to a wire rack to cool completely. This step is crucial for texture. If you eat them hot, they’ll be gummy. Wait 10 minutes, and they’ll be perfect.
Expert Tips & Tricks
Here’s everything I’ve learned from making these dozens of times. These tips will save you from my mistakes.
The Banana Rule
I can’t stress this enough: use very ripe bananas. The brownest, spottiest ones you can find. They’re sweeter, easier to mash, and they infuse the batter with more banana flavor. If your bananas are yellow, add a tablespoon of extra sugar.
Don’t Overmix
This is the #1 mistake people make. Once you add the flour, mix until it’s *just* combined. Lumpy batter is good. Smooth, overworked batter leads to dense, tough muffins. Think “shaggy dough,” not “cake batter.”
Storage is Key
Store cooled muffins in an airtight container at room temperature for up to 3 days. If your kitchen is humid, keep them in the fridge for up to 5 days. For longer storage, freeze them in a freezer bag for up to 3 months. Thaw at room temperature or microwave for 30 seconds.
The Toothpick Test
Start checking at 16 minutes. Ovens vary. If the toothpick comes out with wet batter, give it 2 more minutes. If it comes out clean, pull them out immediately. Residual heat will continue cooking them slightly.
Make Them Gluten-Free
Simply swap the all-purpose flour for a 1-to-1 gluten-free blend. Make sure the blend contains xanthan gum, or add ½ teaspoon yourself. The texture will be slightly more tender, which is nice.
Variations & Substitutions
Once you’ve nailed the basic version, here’s how you can mix it up. I’ve tried all of these.
Apple Cinnamon Version
Swap the bananas for 1 cup of finely chopped apples (Granny Smith or Honeycrisp). Add ½ teaspoon nutmeg and ½ teaspoon allspice. It tastes like apple pie in muffin form. My kids love this variation.
Chocolate Chip Banana
Add ½ cup semi-sweet chocolate chips. It’s basically banana bread meets chocolate chip cookie. A crowd-pleaser for sure. Use dark chocolate for a less sweet version.
Protein-Packed
Add 1 scoop of vanilla protein powder. You might need to add an extra 2 tablespoons of milk because protein powder absorbs moisture. It makes them more filling and keeps my kids full longer.
Zucchini Banana
Grate ½ cup of zucchini and squeeze out excess moisture. Fold it in with the bananas. It adds moisture without changing the flavor much. Great way to sneak in veggies.
Dairy-Free
Use coconut oil instead of vegetable oil and almond milk instead of dairy milk. Everything else is naturally dairy-free. These work perfectly.
Vegan Option
Replace the egg with a “flax egg” (1 tablespoon ground flaxseed mixed with 3 tablespoons water, let sit for 5 minutes). Use maple syrup instead of brown sugar if you want, but brown sugar works fine too. They’re still delicious.
Serving & Storage
How to serve these babies?
Breakfast On-The-Go
Wrap them in foil or parchment paper and put them in a lunchbox. They’re sturdy and don’t crush easily. My son eats them cold from his backpack, and he doesn’t care. They’re still good.
With Coffee or Tea
Warm one up in the microwave for 20 seconds. It brings back that fresh-baked softness. Pair it with a hot coffee or tea. It’s my favorite way to enjoy them on weekends.
Side Dishes
These are complete on their own, but if you want to make it a meal, add a side of yogurt or a piece of fruit. For a savory balance, pair them with bacon or eggs.
Reheating
Microwave for 20-30 seconds. Or toast them lightly in a toaster oven. They taste best warm.
Freezing
These freeze beautifully. Cool them completely, then place them in a freezer-safe bag or container. They last up to 3 months. Thaw at room temperature or microwave. I keep a batch frozen at all times for emergencies.
Nutrition Information
I’m not a nutritionist, but here’s the breakdown if you’re tracking. This is per muffin, based on 12 servings, with no add-ins.
Per Muffin:
- Calories: 140
- Protein: 3g
- Carbs: 24g
- Fiber: 2g
- Sugar: 10g (natural from bananas)
- Fat: 4g
It’s not a diet food, but it’s not a sugar bomb either. The oats provide fiber, and the bananas provide natural energy. It’s a decent balance for a morning snack. If you add chocolate chips or nuts, the calories and fat will go up, but so will the satisfaction.
Final Thoughts
So that’s my go-to back-to-school banana oatmeal muffins! I’ve probably talked your ear off at this point, but when you make a recipe this often, you have a lot to say about it.
These muffins have saved my sanity during the school year. They’re my answer to “what’s for breakfast?” when I’m running on three hours of sleep. My kids are happy, I’m happy, and the house smells like heaven for 20 minutes. That’s a win in my book.
Make it yours! Try different add-ins, swap in your favorite milk, or adjust the cinnamon to your liking. The best recipes are the ones you adapt to your family’s tastes. If you make these, drop a comment and let me know what you think! I love hearing how recipes turn out in your kitchen. And if something doesn’t work, tell me that too—I’m here to help troubleshoot.
Happy baking! And I hope your mornings are a little less chaotic starting now.
Frequently Asked Questions
Can I use quick oats instead of rolled oats?
You can, but the texture will be different. Quick oats are finer and will make the muffins more dense and cake-like. Rolled oats give that nice chewy texture that I love. If you only have quick oats, it’ll still taste good, just not quite the same. I’d recommend sticking with rolled if you can.
Why did my muffins turn out dry?
Usually, this means they were overbaked. Check them at 16 minutes. Also, make sure you’re using ripe bananas. Under-ripe bananas have less moisture and sugar, which can lead to dry muffins. If you’re measuring flour, don’t pack it down. Spoon it into the cup and level it off. Too much flour = dry muffins.
Can I make these ahead of time?
Absolutely. This is what they’re best for! Bake them on Sunday, store them in an airtight container, and grab one each morning. They stay moist for 3-4 days at room temperature. If you want to prep even further, you can mix the dry ingredients and wet ingredients separately on Sunday, then combine and bake in the morning. But honestly, baking ahead is easier.
Can I freeze the batter?
I haven’t tried freezing the raw batter, and I wouldn’t recommend it. The baking soda might lose its leavening power, and the oats might get too soggy. It’s better to bake them first, then freeze the finished muffins. They freeze perfectly.
Are these muffins gluten-free?
Not as written, because they contain all-purpose flour. However, you can easily make them gluten-free by swapping the flour for a 1-to-1 gluten-free baking blend. Make sure the blend has xanthan gum, or add ½ teaspoon. The texture will be slightly more tender, but they’ll still be delicious.
Can I use honey or maple syrup instead of brown sugar?
You can, but you’ll need to adjust the amount. Honey and maple syrup are sweeter and wetter than brown sugar. Use about ⅓ cup of honey or maple syrup, and reduce the milk by 1 tablespoon. The texture will be slightly denser, but it’ll work. Brown sugar is still my preference for the best texture.
How do I keep these from sticking to the liners?
Use good quality paper liners. If you’re using silicone liners, grease them lightly with oil spray. Also, make sure the muffins are completely cool before trying to remove them. Warm muffins are stickier. If they’re still sticking, try placing the liner on a piece of parchment paper before putting it in the tin.
Pin This Recipe!
Back-to-School Banana Oatmeal Muffins
- Total Time: 30 minutes
- Yield: 12 servings 1x
Description
Soft, moist, and naturally sweetened banana oatmeal muffins that are perfect for busy mornings. Made in one bowl with simple pantry ingredients, these muffins are meal-prep friendly and freeze beautifully.
Ingredients
- 3 large ripe bananas (about 1.5 cups mashed)
- 1 cup old-fashioned rolled oats
- 1 cup all-purpose flour
- 1/2 cup packed brown sugar
- 1/3 cup neutral oil (canola, vegetable, or melted coconut oil)
- 1 large egg
- 1/4 cup milk (dairy or non-dairy)
- 1 teaspoon baking soda
- 1/2 teaspoon baking powder
- 1 teaspoon cinnamon
- 1/2 teaspoon salt
- Optional: 1/2 cup chopped walnuts or pecans, 1/2 cup dark chocolate chips, or 1/2 cup blueberries
Instructions
- Preheat oven to 350°F (175°C). Line a standard 12-cup muffin tin with liners or grease lightly with oil spray.
- In a large mixing bowl, mash the ripe bananas with a fork until mostly smooth with a few small lumps.
- Add the brown sugar, oil, egg, and milk to the mashed bananas. Whisk until well combined and smooth.
- Stir in the rolled oats, flour, baking soda, baking powder, cinnamon, and salt. Mix gently until just moistened; do not overmix.
- Fold in any optional add-ins like nuts, chocolate chips, or berries.
- Divide the batter evenly among the 12 muffin cups, filling each about 3/4 full.
- Bake for 18-20 minutes, or until the tops are golden brown and a toothpick inserted into the center comes out clean.
- Let the muffins cool in the pan for 5 minutes, then transfer to a wire rack to cool completely.
Notes
Use very ripe bananas for maximum sweetness and moisture. Do not overmix the batter to avoid tough muffins. Store in an airtight container at room temperature for up to 3 days, or freeze for up to 3 months. For gluten-free, swap all-purpose flour for a 1-to-1 gluten-free blend. For vegan, use a flax egg and maple syrup.
- Prep Time: 10 minutes
- Cook Time: 20 minutes
- Category: Breakfast
- Cuisine: American
Nutrition
- Serving Size: 1 muffin
- Calories: 140
- Sugar: 10
- Sodium: 150
- Fat: 4
- Saturated Fat: 0.5
- Carbohydrates: 24
- Fiber: 2
- Protein: 3
Keywords: banana oatmeal muffins, back-to-school breakfast, healthy muffins, one-bowl recipe, meal prep breakfast, gluten-free option, vegan option


