It was a Tuesday in November, the kind of day where the gray light outside matches the gray mood in your head. I had just dragged myself through a Zoom meeting that could have been an email, and the last thing I wanted to do was think about dinner. I opened the fridge, hoping for some inspiration, but found only a wilting bag of spinach and a can of chickpeas that had been sitting there since 2019. I was about to order overpriced takeout—again—when I remembered the mason jars sitting in my cupboard. They were dusty, forgotten relics from a brief “health kick” I’d undertaken three years prior.
I pulled one out, wiped off the lid, and started tossing things in. I didn’t have a recipe. I just had hunger and a desire to not feel sluggish by 3 PM. I threw in the chickpeas, some feta (because life is too short for low-fat cheese), a handful of olives, and whatever greens were left. I shook it up with some olive oil, lemon juice, and dried oregano. I ate it standing over the sink, and honestly? It was the best lunch I’d had in months. It was bright, crunchy, and didn’t leave me with that heavy, food-coma feeling that usually follows a bowl of hot soup or pasta.
That accidental lunch sparked a new obsession. I started making these chickpea Greek salad jars every single Sunday. What started as a lazy solution to “what’s for lunch” turned into my favorite meal prep routine. There is something deeply satisfying about opening your fridge on a random Wednesday and seeing a colorful, perfectly portioned jar waiting for you. It feels like your past self is taking care of your future self. And the best part? These jars actually get *better* after sitting in the fridge for a day or two. The flavors meld, the chickpeas absorb the dressing, and the veggies stay crisp. It’s not just meal prep; it’s self-care in a glass container.
I’ve tested this method with dozens of different vegetable combinations and dressing ratios. I’ve made these for my office, for hiking trips, and for days when I just don’t have the energy to cook. They are my go-to for chickpea Greek salad jars that travel well, taste fresh, and keep me full for hours. If you’re tired of soggy salads and boring sandwiches, you need to try this method. It’s simple, it’s affordable, and it tastes like a vacation every single day.
Why You’ll Love These Mason Jar Salads
I know, I know. “Meal prep” sounds like a chore. It sounds like spending your entire Sunday afternoon chopping vegetables while listening to a podcast you don’t even like. But here’s the thing: these chickpea Greek salad jars are different. They aren’t about rigid, boring routines. They’re about freedom. Freedom from the daily “what’s for lunch” panic. Freedom from spending $15 on a salad that goes bad in two days. Here’s why this specific method has completely changed my midweek routine:
- Zero Soggy Greens — This is the holy grail of meal prep. By layering the ingredients correctly, your leafy greens stay crisp for up to five days. I’ve had jars that looked fresh on Friday morning that I prepped on Sunday. The dressing stays at the bottom, separated from the leaves until you’re ready to eat. It’s a game-changer.
- Protein-Packed and Filling — Chickpeas are my secret weapon. They’re cheap, they’re shelf-stable, and they’re packed with fiber and protein. Unlike leafy greens alone, these jars keep you full until dinner. I’ve gone from 2 PM hunger pangs to being totally satisfied until 6 PM. No more raiding the vending machine.
- Flavor Gets Better with Time — Most salads taste best immediately. This one? It marries. The red onion softens just enough. The feta infuses the dressing. The chickpeas soak up that lemony oregano goodness. By day three, it tastes like a cohesive dish, not just a pile of ingredients.
- Portable and Mess-Free — I take these to the office, to the park, and even on road trips. The lid seals tight (if you use the right jar), and there’s no dripping dressing on your desk. It’s a one-handed meal. Perfect for busy days when you’re eating at your computer.
- Pantry-Friendly Ingredients — You probably have most of this already. Canned chickpeas, dried oregano, olive oil, lemon juice. The fresh stuff is just a bonus. This means I can make these even when my grocery budget is tight or I forgot to shop for the week.
This recipe has saved me more times than I can count. It’s my answer to “I’m too tired to cook but I don’t want to eat junk.” It’s reliable, it’s delicious, and it makes me feel like I’m being good to my body without putting in a ton of effort.
Ingredients You’ll Need
Here’s the best part: you probably have most of this already in your pantry. The beauty of a Greek salad is its simplicity. You don’t need fancy, obscure ingredients. You just need good basics and a few fresh additions. Here’s what I use to make my chickpea Greek salad jars:
For the Base
Canned chickpeas (2 cans, 15oz each / about 450g drained) — The star of the show. Rinse them well! This removes the starchy liquid (aquafaba) and improves the texture. I use the low-sodium version so I can control the salt myself. Garbanzo beans are the same thing, by the way.
Cherry tomatoes (1 pint / about 250g) — I love the burst of sweetness they add. Halve them. If you’re using large tomatoes, dice them, but cherry tomatoes hold up better in jars and don’t make the salad watery.
Cucumber (1 large English cucumber / about 300g) — English cucumbers are better because they have fewer seeds and thinner skin. Dice them into small cubes. If you use a regular cucumber, peel it first to avoid bitterness.
Red onion (1 small / about 100g) — Finely diced. If you’re sensitive to raw onion, soak the diced pieces in cold water for 10 minutes before using. This mellows the bite. I like a sharp kick, so I skip this step.
For the Flavor
Extra virgin olive oil (½ cup / 120ml) — Don’t skimp here. This is the carrier for the flavors. Use a good quality oil that you’d actually eat on toast. If it tastes bitter or grassy in the bottle, it’ll taste bitter in the salad.
Fresh lemon juice (¼ cup / 60ml) — About 2 lemons. Bottled lemon juice has a weird, metallic aftertaste that ruins the freshness. Squeeze your own. It’s worth the extra 30 seconds.
Dried oregano (2 teaspoons) — This is the scent of a Greek salad. Use dried, not fresh. Dried oregano is more potent and holds up better in the fridge. Fresh oregano turns slimy in jar salads.
Kosher salt (1 teaspoon) — Or to taste. Kosher salt dissolves evenly. Table salt can be too salty if you’re not careful.
Black pepper (½ teaspoon) — Freshly cracked is best. Pre-ground pepper loses its flavor quickly.
The Toppings
Feta cheese (1 cup / 150g, crumbled) — The salty, tangy element. I buy a block and crumble it myself. Pre-crumbled feta is often dusty and dry. If you’re lactose intolerant, a vegan feta or a sprinkle of nutritional yeast works, but the real thing is unbeatable.
Kalamata olives (½ cup / 75g, pitted) — Sliced or halved. They add that briny, savory punch. If you can’t find Kalamata, any black olive works, but Kalamata has the best flavor.
Croutons or pita chips (optional, for serving) — I keep these separate. Adding them to the jar too early makes them soggy. I add them right before I eat, or I just skip them for a lower-carb version.
Optional Add-ins — I love adding roasted red peppers (from a jar) for sweetness, or some artichoke hearts for a Mediterranean twist. If you have leftover grilled chicken or shrimp, toss them in for extra protein. But the classic version is perfect on its own.
Equipment Needed
You don’t need fancy gadgets for this. Here’s what I actually use in my kitchen:
Mason jars (16oz or 20oz) — I use standard wide-mouth mason jars. They’re cheap, durable, and the wide mouth makes it easy to get your fork in. Ball or Kerr brands work fine. You don’t need fancy reusable plastic containers, though those work too if you prefer them.
Sharp knife — For chopping cucumbers, tomatoes, and onions. A dull knife will crush your tomatoes and make a mess. Keep it sharp.
Cutting board — Any size works. I have a plastic one that I’ve had for years. It’s seen things.
Measuring cups and spoons — For the dressing. You can eyeball it, but measuring ensures consistency. I like knowing my ratios.
Colander — For rinsing the chickpeas. Or just use the sink and your hands if you’re feeling lazy.
Fork or whisk — For whisking the dressing together. A fork works fine. I don’t own a whisk for this specific task.
How to Make It: Step-by-Step
Alright, let’s make this! I’m walking you through exactly how I layer my chickpea Greek salad jars to keep everything fresh. The order matters more than you think.
Step 1: Prep the Chickpeas (5 minutes)
Open your cans of chickpeas and dump them into a colander. Rinse them thoroughly under cold water until the water runs clear. Shake off excess water. You want them damp, not soaking wet. If they’re too wet, they’ll dilute the dressing. Pat them dry with a paper towel if you’re feeling extra careful, but rinsing is the main thing.
Step 2: Make the Dressing (2 minutes)
In a small bowl or jar, whisk together the olive oil, lemon juice, dried oregano, salt, and black pepper. Whisk until it’s emulsified and looks creamy. This shouldn’t take more than a minute. Taste it. It should be bright and tangy. If it’s too sour, add a pinch more salt or a teaspoon of olive oil. If it’s too oily, add a squeeze more lemon.
Step 3: Prep the Vegetables
Wash and dry your greens if you’re using them. I usually use a mix of romaine and spinach. Romaine stays crunchier longer. Dice the cucumber, halve the cherry tomatoes, and finely dice the red onion. Keep everything in separate bowls for now. This makes the layering process easier.
Step 4: Layer the Jars
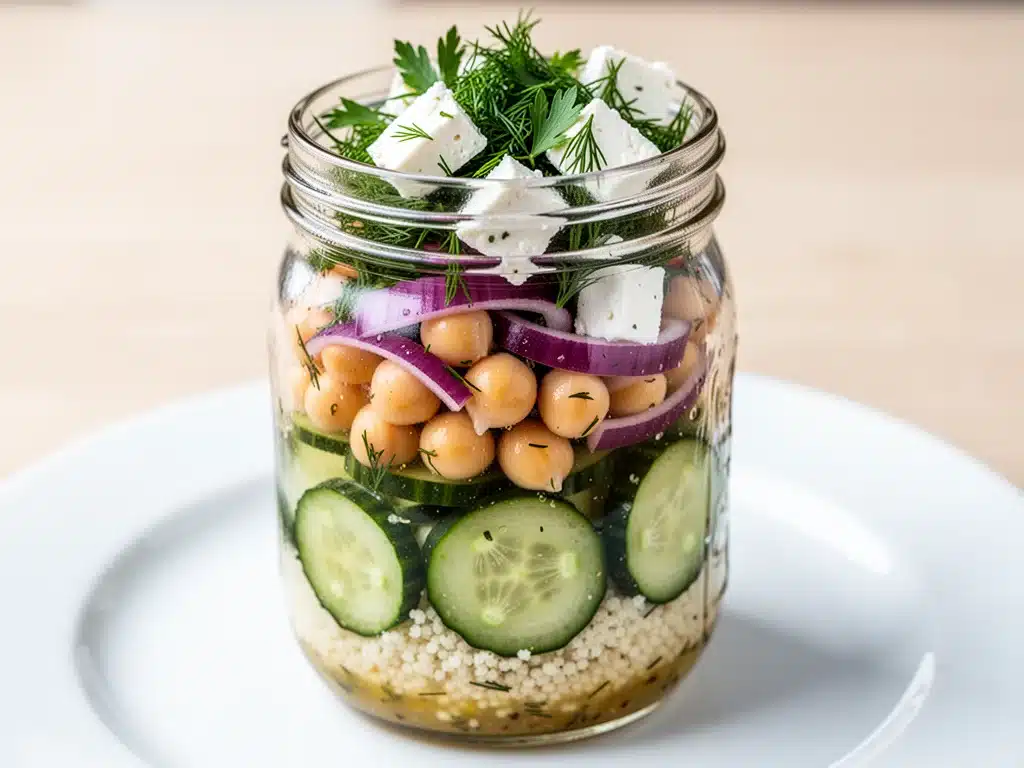
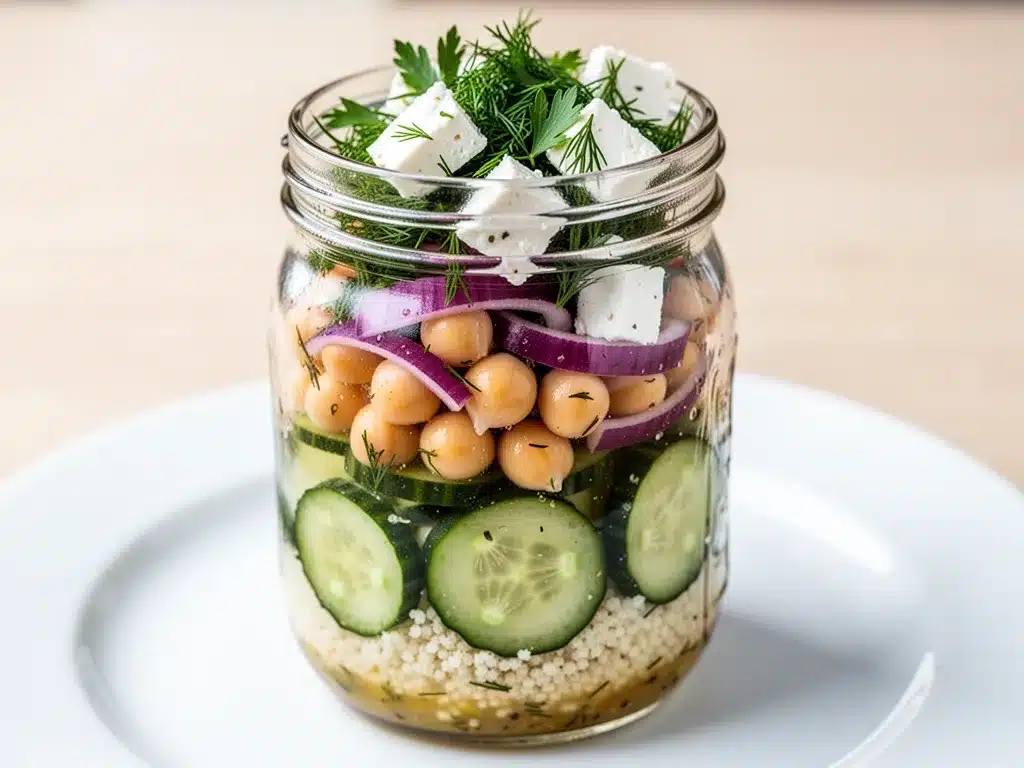
This is the crucial part. Start with the dressing at the very bottom of the jar. Pour about 2-3 tablespoons of dressing into each jar. Next, add the chickpeas. They’re dense and will sit on top of the dressing, absorbing the flavor. Then add the cucumber and red onion. These are sturdy veggies that won’t wilt. Add the tomatoes next. Finally, top it all off with the greens. The greens should be the top layer, furthest from the dressing. This keeps them crisp. If you’re adding feta and olives, you can sprinkle them in with the tomatoes or on top of the greens. I like them on top for visual appeal.
Step 5: Seal and Store
Close the lids tightly. Give the jar a gentle shake to distribute the dressing slightly, but not so much that you mix everything. Store the jars in the fridge. They’ll keep for up to 5 days. If you’re adding croutons or pita chips, keep them in a separate bag and add them right before eating.
Step 6: Serve
When you’re ready to eat, take the jar out of the fridge. Give it a good shake to mix the dressing with the veggies. If you’re using a fork, you can eat it straight from the jar. Or dump it into a bowl if you prefer. Top with extra feta or olives if you want. Enjoy!
Expert Tips & Tricks
Here’s everything I’ve learned from making these jars dozens of times. These tips will save you from my mistakes.
Layering is Key — I can’t stress this enough. Dressing at the bottom, sturdy veggies in the middle, delicate greens on top. If you mix it all up before storing, your salad will be soggy by day two. Respect the layers.
Don’t Skip the Rinse — Rinsing the chickpeas removes the slimy texture and excess sodium. It makes a huge difference in the final mouthfeel. Trust me on this.
Use Fresh Lemon — Bottled lemon juice tastes like chemicals. Fresh lemon juice tastes like sunshine. It’s worth the effort. If you’re in a rush, freeze lemon juice in ice cube trays for future use, but fresh is best.
Adjust for Your Jar Size — If you’re using smaller 12oz jars, reduce the dressing to 2 tablespoons per jar. If you’re using larger 32oz mason jars, you might need 4 tablespoons. Adjust based on your container size.
Add Crunch Later — I love adding toasted pine nuts or walnuts for extra crunch. But add them right before eating, not before storing. They’ll go stale or soft in the fridge.
Variations & Substitutions
Once you’ve nailed the basic version, here’s how you can mix it up. I’ve tried all of these.
Protein-Packed Version — Add grilled chicken, shrimp, or hard-boiled eggs. I love adding diced rotisserie chicken for a hearty lunch. It makes the meal more filling.
Low-Carb Version — Skip the chickpeas and add extra cucumbers and olives. Or use cauliflower rice as a base. It’s still delicious and keeps you in ketosis.
Vegan Version — Skip the feta and use a vegan feta or a sprinkle of nutritional yeast. The rest of the ingredients are already vegan. Simple swap.
Mediterranean Twist — Add roasted red peppers, artichoke hearts, and a dash of cumin. It changes the flavor profile completely but keeps the same texture.
Spicy Kick — Add some red pepper flakes to the dressing or slice in some fresh jalapeños. It adds a nice heat that balances the cool feta.
Serving & Storage
How to Serve: — I usually eat these straight from the jar at my desk. It’s easy and mess-free. But you can also dump them into a bowl and add some crusty bread on the side. It feels more like a “meal” that way.
Side Dishes: — These jars are complete meals, but if you want sides, try some pita bread, hummus, or a simple side of olives. I also love pairing them with a glass of iced tea or lemon water.
Storage Instructions: — Store in the fridge for up to 5 days. The greens will stay crisp if layered correctly. The dressing will separate, which is normal. Just shake before eating.
Reheating: — Do not reheat these. They are meant to be eaten cold or at room temperature. Heating will wilt the greens and make the chickpeas mushy. Eat them fresh!
Nutrition Information
I’m not a nutritionist, but here’s the breakdown if you’re tracking. Per jar (based on 4 servings):
- Calories: 380
- Protein: 12g
- Carbs: 25g
- Fiber: 6g
- Sugar: 5g
- Fat: 28g
- Sodium: 650mg
What’s Good: High in fiber, good source of plant-based protein, rich in healthy fats from olive oil and feta. What to Know: Higher in sodium if you don’t rinse the chickpeas or use low-sodium feta. But overall, it’s a balanced, nutrient-dense meal.
Final Thoughts
So that’s my chickpea Greek salad jars method! I’ve probably talked your ear off at this point, but when you make a recipe this often, you have a lot to say about it. This has saved my work weeks. It’s my answer to “I’m too tired to cook” when I still want something healthy and delicious. My coworkers are always asking for the recipe, and I love sharing it because it’s so simple.
Make it yours! Try different vegetables, swap in your favorite cheese, adjust the dressing to your taste. The best recipes are the ones you adapt to your life. If you make these, drop a comment and let me know what you think! I love hearing how recipes turn out in your kitchen. And if something doesn’t work, tell me that too—I’m here to help troubleshoot.
Happy meal prepping! And I hope your fridge looks as colorful as mine does right now.
Frequently Asked Questions
Can I use fresh chickpeas instead of canned?
You can, but canned is so much easier. If you use dry chickpeas, you’ll need to soak them overnight and then boil them for an hour or two until tender. Canned saves hours of time and still tastes great. Just rinse them well.
Why did my greens get soggy?
Usually, this happens if the dressing was too close to the greens. Make sure you’re layering the dressing at the very bottom, followed by sturdy veggies like chickpeas and cucumbers. The greens should be the top layer. Also, make sure your greens are completely dry before putting them in the jar.
Can I make these ahead for the whole week?
Yes! These jars are perfect for meal prepping. I make them on Sunday for Monday-Friday. They stay fresh for up to 5 days. Just keep an eye on the greens—if they start to look wilted on day 5, it’s time to eat them or compost them.
Can I freeze these jars?
No. The lettuce and other fresh veggies will turn to mush when thawed. These are meant to be eaten fresh. If you want to prep ahead, you can chop the veggies and store them in containers, but assemble the jars just before eating.
What kind of jars do I need?
Standard 16oz or 20oz mason jars with wide mouths work best. They’re easy to clean and easy to eat from. You can also use reusable plastic containers, but mason jars are cheaper and don’t stain from the turmeric or paprika if you add any.
Can I add meat to this?
Absolutely! Grilled chicken, shrimp, or even some crispy bacon bits make this a heartier meal. Just add them on top of the veggies or mix them in with the chickpeas. It’s a great way to use up leftovers.
Pin This Recipe!
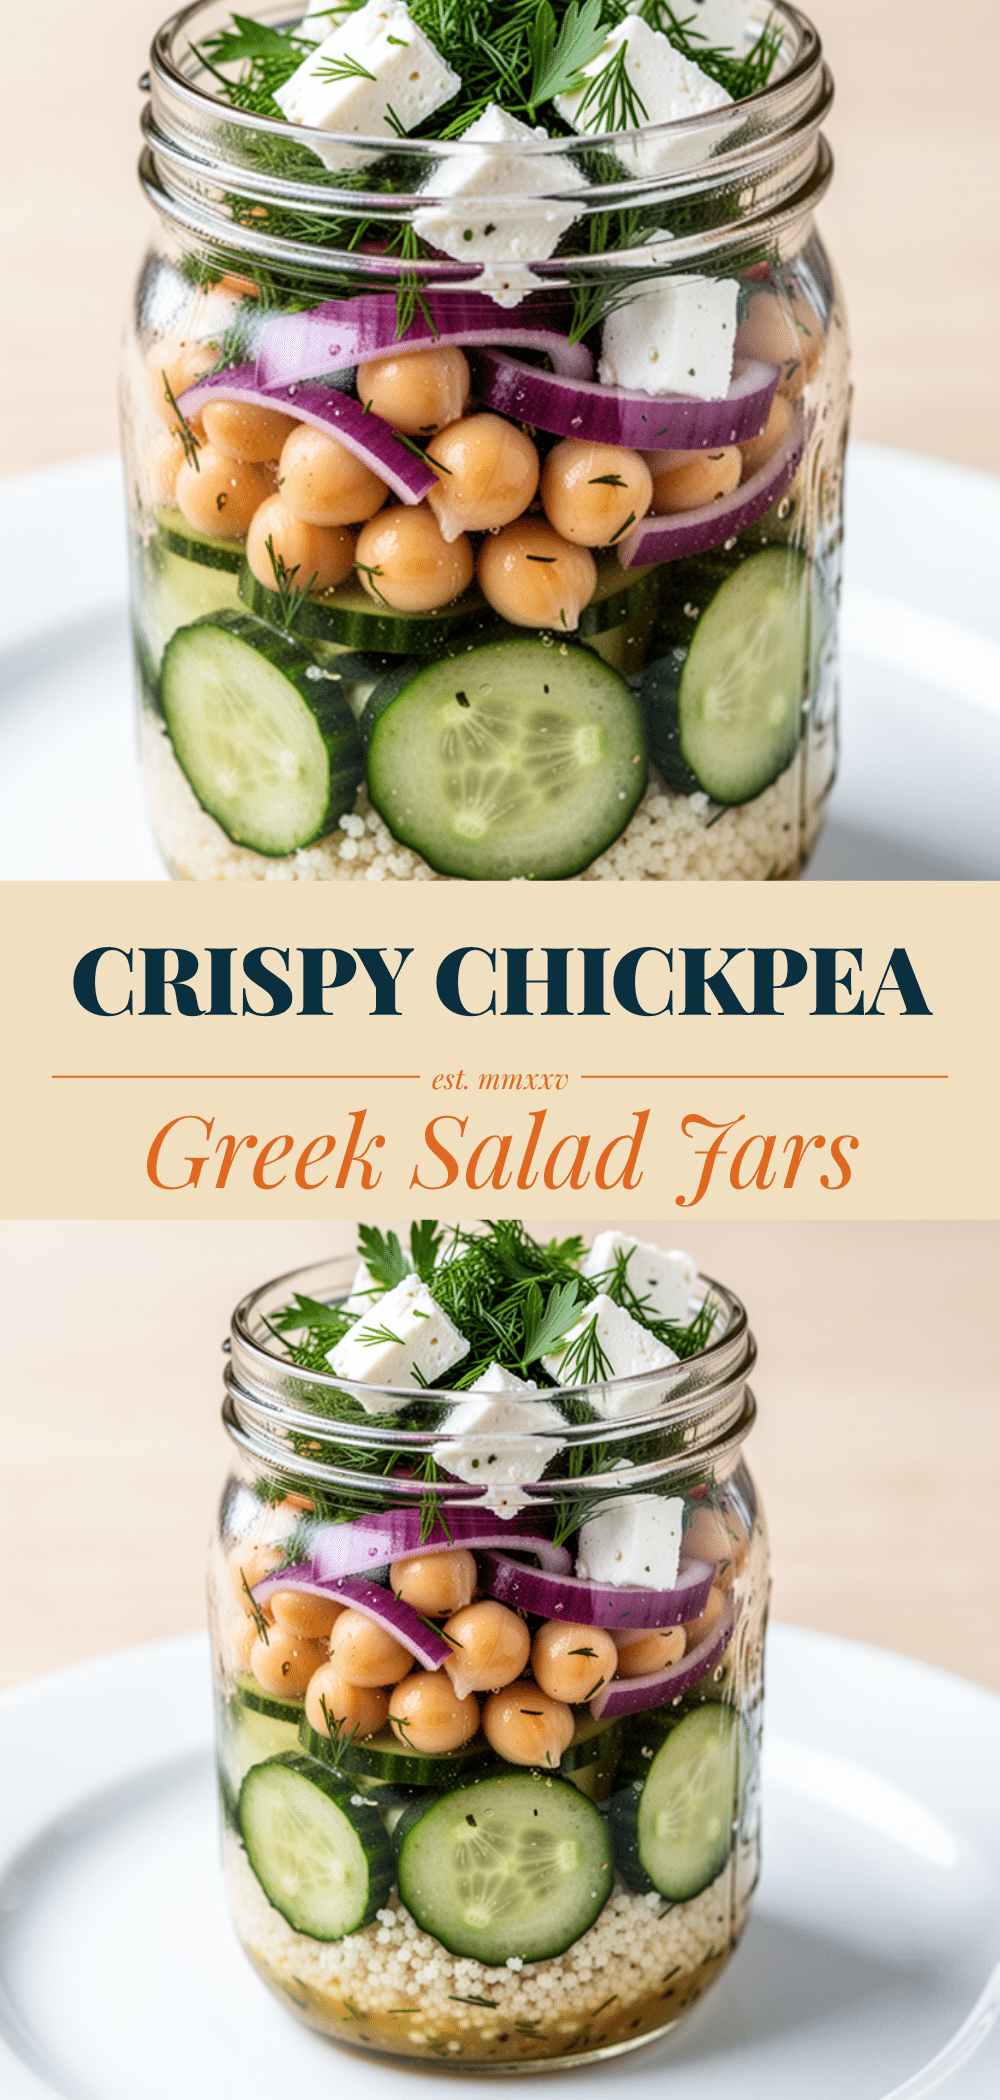
Chickpea Greek Salad Jars: 5 Easy Meal Prep Lunches
- Total Time: 15 minutes
- Yield: 4 servings 1x
Description
A simple, portable meal prep recipe for chickpea Greek salad jars that stay crisp for up to five days. Layered correctly to prevent sogginess, this healthy lunch is packed with protein and flavor.
Ingredients
- 2 cans (15oz each) chickpeas, drained and rinsed
- 1 pint cherry tomatoes, halved
- 1 large English cucumber, diced
- 1 small red onion, finely diced
- ½ cup extra virgin olive oil
- ¼ cup fresh lemon juice
- 2 teaspoons dried oregano
- 1 teaspoon kosher salt
- ½ teaspoon black pepper
- 1 cup feta cheese, crumbled
- ½ cup Kalamata olives, pitted and sliced
- Greens (romaine and/or spinach), washed and dried
Instructions
- Rinse the chickpeas thoroughly in a colander under cold water until the water runs clear. Shake off excess water.
- In a small bowl or jar, whisk together the olive oil, lemon juice, dried oregano, salt, and black pepper until emulsified.
- Wash and dry your greens. Dice the cucumber, halve the cherry tomatoes, and finely dice the red onion.
- Pour 2-3 tablespoons of the dressing into the bottom of each mason jar.
- Add the rinsed chickpeas on top of the dressing.
- Add the cucumber and red onion.
- Add the cherry tomatoes.
- Top with the greens, ensuring they are the furthest layer from the dressing to keep them crisp.
- Sprinkle feta cheese and olives on top or mix in with the tomatoes.
- Seal the jars tightly and store in the refrigerator for up to 5 days.
- To serve, shake the jar gently to mix the dressing, or dump into a bowl. Add croutons or pita chips just before eating if desired.
Notes
Layering is crucial: dressing at the bottom, sturdy veggies (chickpeas, cucumber, onion) in the middle, and delicate greens on top. This prevents the greens from getting soggy. Do not reheat; these are meant to be eaten cold or at room temperature. Croutons or pita chips should be added just before eating to maintain crunch.
- Prep Time: 15 minutes
- Cook Time: 0 minutes
- Category: Lunch
- Cuisine: Greek
Nutrition
- Serving Size: 1 jar
- Calories: 380
- Sugar: 5
- Sodium: 650
- Fat: 28
- Saturated Fat: 7
- Carbohydrates: 25
- Fiber: 6
- Protein: 12
Keywords: chickpea salad, meal prep, mason jar salad, greek salad, healthy lunch, vegetarian, gluten-free option, portable lunch


