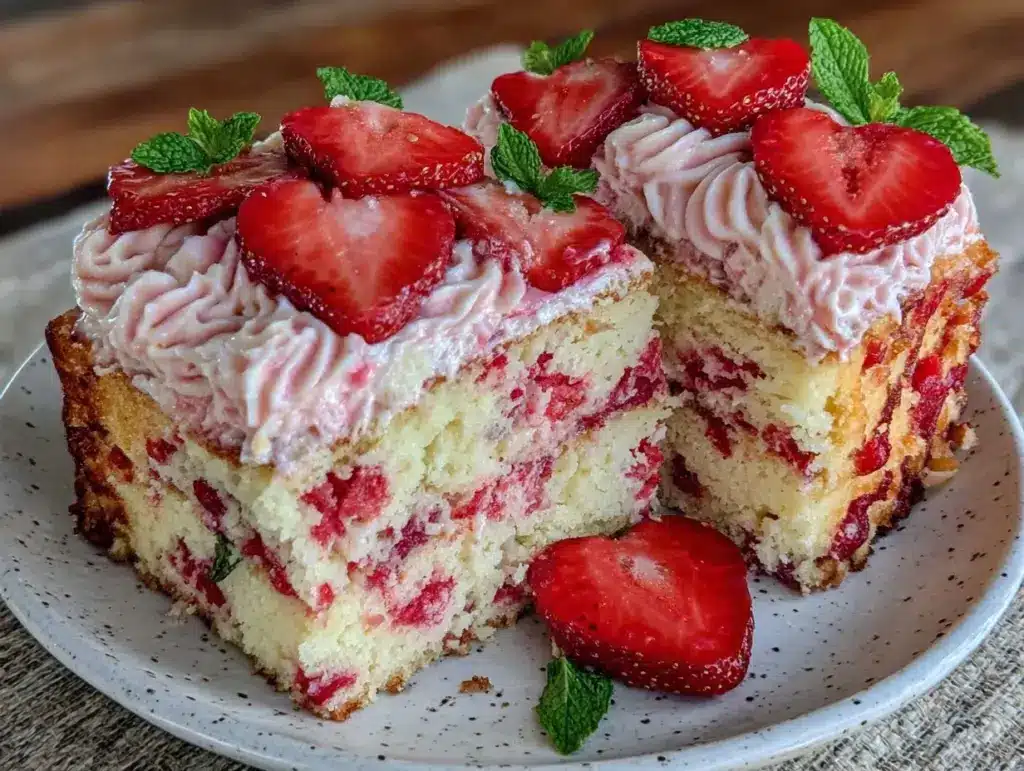
I still remember the specific smell of my grandmother’s kitchen on Sunday afternoons. It wasn’t just yeast or baking powder; it was the sharp, sweet scent of fresh strawberries simmering with sugar. She didn’t use boxes. She didn’t use artificial red dye. She made a Neapolitan cake from scratch, layer by layer, and she swore that the secret wasn’t in the flour—it was in the patience.
For years, I tried to replicate that magic. I used box mixes. I used canned frosting. I compromised. And honestly? It tasted like compromise. It was too sweet, the texture was gummy, and it lacked that bright, airy lift that makes a cake feel like a celebration. Then, about two years ago, I decided to stop playing it safe. I wanted to make the Best Homemade Neapolitan Layer Cake with Fresh Strawberry Frosting that actually tasted like my childhood, but with a twist: I needed it to be gluten-free. Not because I hate gluten, but because my partner has a sensitivity, and I wanted everyone at the table to feel included without tasting a difference.
I’ve tested this recipe more times than I care to admit. I’ve burned edges. I’ve undermixed batters. I’ve tried almond flour, which made it dense as a brick, and rice flour, which crumbled into dust. But after about fifteen attempts, I found the sweet spot. This isn’t just a gluten-free cake that “passes.” It’s a cake that stands on its own merits. The crumb is tender. The strawberry frosting is light and not cloyingly sweet. And the vanilla and chocolate layers? Fluffy, moist, and deeply flavorful.
If you’ve been avoiding baking because of dietary restrictions, or if you just want a cake that tastes homemade and real, this is your sign. This Neapolitan Layer Cake: Easy Gluten-Free Strawberry Frosting recipe is proof that substitutions don’t mean sacrifices. In fact, sometimes they make things better. Let me walk you through exactly how I make it, so you can bring that Sunday afternoon magic into your own kitchen.
Why You’ll Love This Gluten-Free Neapolitan Cake
Let’s be real for a second. Baking gluten-free can feel intimidating. You worry it’ll be dry. You worry it’ll taste like cardboard. I get it. I’ve been there. But this cake changes the narrative. Here’s why this Best Homemade Neapolitan Layer Cake with Fresh Strawberry Frosting has become the centerpiece of every birthday, holiday, and “just because” in my house:
- It’s Naturally Moist — Many gluten-free cakes rely heavily on oil to stay soft, which can make them greasy. This recipe uses a balanced ratio of butter and yogurt, keeping it tender without weighing you down. I tested it three days after baking, and it was still as soft as day one.
- The Frosting Isn’t Just Sweetness — Most strawberry frostings are just powdered sugar and red dye. Ours uses real, macerated strawberries. You get actual fruit flavor and a beautiful, natural pink color. It tastes like summer, not like a candy store.
- Three Layers, One Dough Base — You only need to make one batch of cake batter. You divide it into three bowls, add cocoa to one, and leave the others as is. It’s efficient. It’s clever. It saves you from washing a million bowls.
- Guest-Proof — I served this at a potluck where half the guests were gluten-free and half were not. The gluten-free guests asked for the recipe. The gluten-eating guests said it was the best cake they’d ever had. That’s the holy grail.
- Make-Ahead Friendly — This cake actually tastes better the next day. The flavors meld together overnight. I often bake it on Saturday and serve it Sunday, which makes it perfect for busy weekends.
This is my go-to when I want to impress without stress. It’s reliable, it’s delicious, and it proves that dietary needs don’t have to limit your joy.
Key Ingredients for the Perfect Crumb
You don’t need fancy, obscure ingredients to make this work. But you do need quality. Here’s what you’ll need, with exact measurements so you don’t have to guess.
For the Cake Batter
Gluten-Free All-Purpose Flour Blend (3 cups / 375g) — This is the most important part. Do not use just almond flour or just rice flour. You need a blend that contains xanthan gum. Brands like Bob’s Red Mill 1-to-1 or King Arthur Measure for Measure work perfectly. They mimic the structure of wheat flour. If your blend doesn’t have xanthan gum, add 1 teaspoon per cup of flour.
Unsalted Butter (1 cup / 226g) — Room temperature is non-negotiable. If it’s cold, it won’t cream properly with the sugar, and your cake won’t rise. I leave it out for at least two hours before starting. Salted butter works if you reduce the added salt in the recipe by half.
Granulated Sugar (2 cups / 400g) — Don’t skimp. The sugar isn’t just for sweetness; it helps tenderize the gluten-free flour. Brown sugar can be used for 1 cup of the granulated sugar for a deeper flavor, but pure white sugar gives that classic Neapolitan look.
Eggs (4 large / ~200g) — Room temperature eggs emulsify better. If your eggs are cold, crack them into a bowl and let them sit in warm water for 10 minutes. Cold eggs can cause your batter to curdle when mixed with butter.
Full-Fat Greek Yogurt (1/2 cup / 120g) — This is my secret weapon. It adds moisture and tang, which balances the sweetness. It also helps keep the gluten-free crumb soft. Sour cream works too, but yogurt gives a lighter texture.
Vanilla Extract (2 teaspoons / 10ml) — Use pure vanilla. The cheap imitation stuff tastes artificial and clashes with the natural strawberry flavor later on.
Dutch-Process Cocoa Powder (1/2 cup / 45g) — For the chocolate layer. Dutch-process is darker and less acidic, giving a richer chocolate flavor. Natural cocoa powder works but will be lighter in color and slightly more bitter.
Baking Powder & Baking Soda (1.5 tsp / 7.5g each) — Freshness matters. If your baking powder has been in the cabinet for two years, test it with vinegar. If it doesn’t fizz, toss it and buy new.
For the Fresh Strawberry Frosting
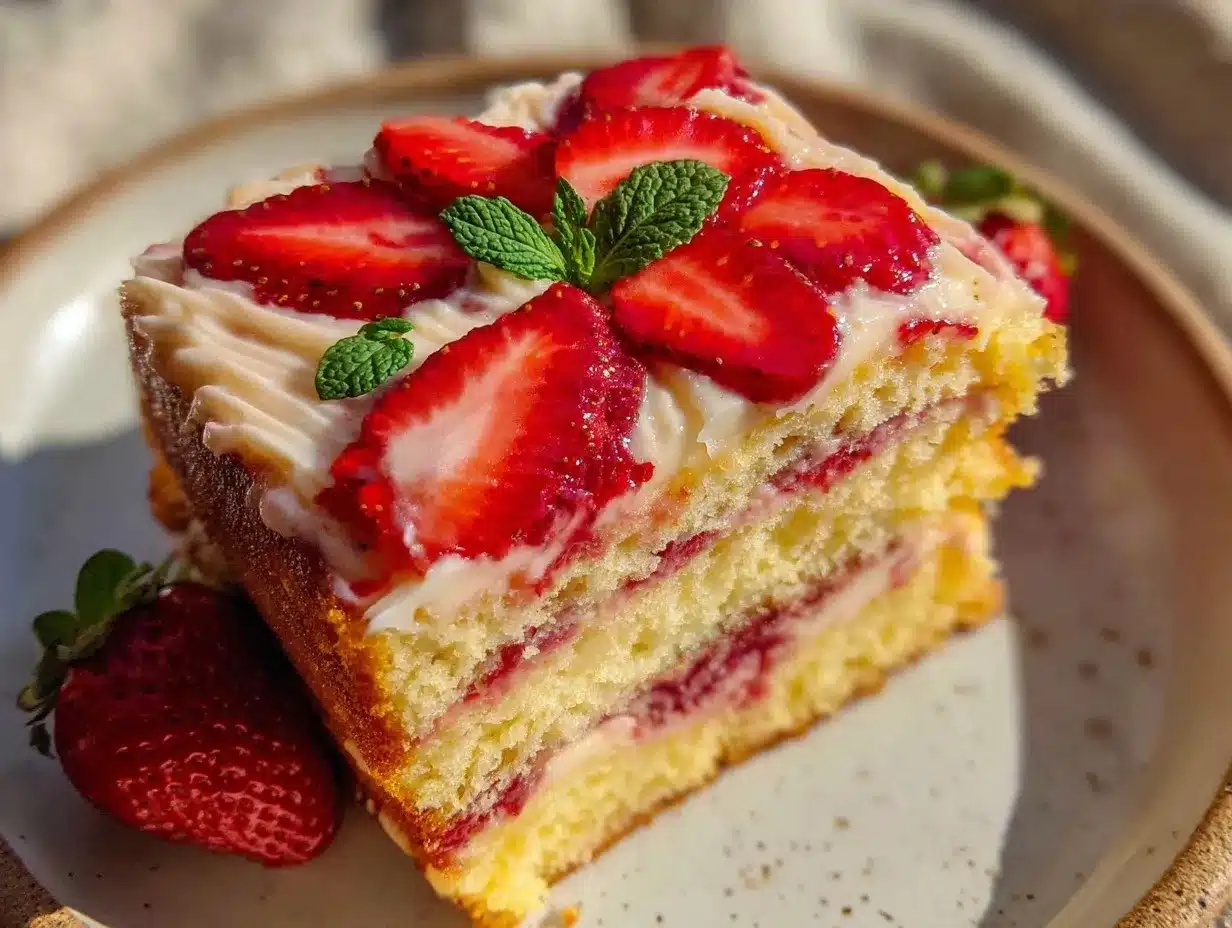
Fresh Strawberries (2 cups / 300g, hulled) — Use the ripest strawberries you can find. If they’re in season, buy local. If not, frozen strawberries work, but you must thaw them and drain ALL the liquid. Excess water ruins buttercream.
Butter (1 cup / 226g, softened) — Again, room temperature. Soft enough that you can press a finger into it easily.
Powdered Sugar (4 cups / 480g) — Sifted. Always sift. It prevents lumps in your frosting. I know it’s annoying, but nobody wants a chunk of sugar in their smooth frosting.
Heavy Cream (2-3 tablespoons / 30-45ml) — Added gradually to get the right consistency. Whole milk works if you’re out of heavy cream, but it will be slightly thinner.
Tools Needed
You don’t need fancy equipment. Here’s what I use, and what you can swap.
Three 8-inch Round Cake Pans — Grease them and line the bottoms with parchment paper. This is the #1 reason cakes stick. Parchment paper is your best friend. If you only have 9-inch pans, your layers will be thinner, so reduce baking time by 5-7 minutes.
Stand Mixer or Hand Mixer — Creaming the butter and sugar takes energy. A hand mixer works fine, but a stand mixer makes it easier. If you mix by hand, be prepared to arm yourself.
Wire Cooling Rack — Never frost a warm cake. It will melt the frosting and create crumbs. A wire rack allows air to circulate underneath.
Spatula — A flexible rubber spatula is essential for scraping down the sides of the bowl and folding in the flour gently.
How to Make the Best Homemade Neapolitan Layer Cake with Fresh Strawberry Frosting
Let’s get baking. This process is straightforward, but timing is everything.
Step 1: Prep Your Station (10 minutes)
Preheat your oven to 350°F (175°C). Grease three 8-inch cake pans with butter or non-stick spray. Cut circles of parchment paper to fit the bottom of each pan and press them in. Lightly flour the pans with your gluten-free flour blend. Tap out the excess. This prevents sticking and ensures your layers release cleanly.
Step 2: Cream Butter and Sugar (3-4 minutes)
In the bowl of your mixer, beat the softened butter and granulated sugar on medium-high speed. You’re looking for a pale, fluffy mixture. This takes about 3-4 minutes. If you rush this, your cake will be dense. Scrape down the sides of the bowl with a spatula halfway through. The mixture should look like it’s holding its shape but is still soft.
Step 3: Add Eggs and Yogurt (2 minutes)
Add the eggs one at a time, beating well after each addition. The mixture might look slightly curdled at first—this is normal. Add the vanilla extract and the Greek yogurt. Mix on medium speed until smooth and combined. The batter should be glossy.
Step 4: Combine Dry Ingredients (1 minute)
In a separate bowl, whisk together the gluten-free flour, baking powder, baking soda, and salt. Whisking ensures the leavening agents are distributed evenly, which prevents bitter spots in your cake.
Step 5: Mix Wet and Dry (2 minutes)
Reduce your mixer to low speed. Add the dry ingredients to the wet ingredients in three batches, alternating with a little extra milk or water if the batter seems too thick. Gluten-free flour absorbs liquid differently, so the batter should be thick but pourable. Do not overmix. Once the flour disappears, stop mixing. Overmixing develops the starches too much and makes the cake tough.
Step 6: Divide the Batter (5 minutes)
Divide the batter evenly among three bowls. About 1.5 cups per bowl. Leave two bowls as vanilla. To the third bowl, add the cocoa powder and mix until fully incorporated and dark chocolate in color. Pour each batter into a prepared pan. Tap the pans gently on the counter to release air bubbles.
Step 7: Bake (25-30 minutes)
Place the pans in the oven, rotating them halfway through for even browning. Bake for 25-30 minutes. The cakes are done when a toothpick inserted into the center comes out clean or with just a few moist crumbs. Do not overbake, or they will dry out. The edges should just begin to pull away from the pan.
Step 8: Cool Completely (2 hours)
Let the cakes cool in the pans for 10 minutes, then turn them out onto a wire rack. Let them cool completely to room temperature. This is crucial. If you try to frost warm cakes, the heat will melt the butter in the frosting, and you’ll end up with a messy, sliding disaster. I know it’s hard to wait, but patience pays off.
Step 9: Make the Frosting (15 minutes)
While the cakes cool, make the frosting. Hull and chop your strawberries. Toss them with 2 tablespoons of sugar and let them sit for 15 minutes to macerate. Drain the liquid (save it for smoothies!) and pulse the strawberries in a food processor until smooth. Strain through a fine-mesh sieve to remove seeds if you prefer a silky texture. Beat the butter until creamy, then gradually add the powdered sugar. Add the strawberry puree and heavy cream. Beat on high until fluffy and light pink. It should hold stiff peaks.
Step 10: Assemble (15 minutes)
Place one cake layer on your serving plate. Spread a generous layer of strawberry frosting on top. Add the second layer (vanilla or chocolate, your choice for the middle). Frost again. Add the third layer. Cover the entire cake with the remaining frosting. Use a spatula to smooth the sides. Decorate with fresh strawberry slices on top.
Total Time: 1 hour 45 minutes (including cooling). Yields: 12-14 generous slices.
Expert Tips from My Mistakes
Here’s everything I learned from making this too many times. Save this section for when you’re in the kitchen.
The Game-Changers
Room Temperature Ingredients Are Non-Negotiable
This is the #1 mistake home bakers make. Cold butter doesn’t cream. Cold eggs separate. Take the time to let everything come to room temperature. It changes the texture of the cake completely. I’ve made this cake with cold butter twice, and it was dense and heavy. Never again.
Don’t Skip the Parchment Paper
I once tried to grease a pan without paper, thinking I’d save a step. The cake stuck. I had to dig it out with a knife, and the bottom was ruined. Parchment paper costs pennies. It saves your cake. Use it.
Strain the Strawberry Seeds
If you want that professional, smooth look, strain your strawberry puree. The seeds are edible, but they look speckled and uneven. Straining gives you a vibrant, uniform pink frosting that looks like it came from a bakery.
Common Problems & Solutions
Problem: The cake sank in the middle.
Solution: You likely underbaked it or opened the oven door too early. Gluten-free cakes are more delicate. Wait until the toothpick test is clean before removing them. Also, ensure your oven temperature is accurate with a thermometer.
Problem: The frosting is too thin.
Solution: Your butter was too warm, or you added too much strawberry puree. Put the frosting in the fridge for 15 minutes to firm up, then beat it again. If it’s still runny, add more powdered sugar, one cup at a time.
Problem: The cake tastes gritty.
Solution: Your powdered sugar wasn’t sifted, or your gluten-free flour blend has large grains. Sift your sugar, and consider using a finer blend like King Arthur’s.
Recipe Variations
Once you’ve nailed the basic version, here’s how to mix it up. This Neapolitan Layer Cake: Easy Gluten-Free Strawberry Frosting is a canvas.
Lemon-Vanilla-Chocolate
Add 1 tablespoon of lemon zest to the vanilla batter. It adds a bright pop that cuts through the richness. Great for spring.
Red Velvet Twist
Add 1 tablespoon of cocoa powder and 1 teaspoon of red food coloring to one of the vanilla layers. It’s a fun variation that keeps the red theme but adds a different flavor profile.
Dairy-Free Option
Swap the butter for a high-quality vegan butter stick (like Miyoko’s or Earth Balance). Use coconut yogurt or soy yogurt instead of Greek yogurt. The texture will be slightly denser but still delicious.
Sugar-Free Option
Use a sugar substitute like Swerve or Lakanto that measures 1:1 like sugar. Note that sugar provides moisture, so the cake may be slightly drier. Add an extra tablespoon of yogurt to compensate.
Serving & Storage
Serving:
This cake is best served at room temperature. Cold buttercream can be hard. If you’ve refrigerated it, let it sit out for 30 minutes before slicing. Pair it with a cup of hot tea or coffee. It’s also amazing with a glass of cold milk. For a party, arrange fresh strawberry halves on top for a beautiful presentation.
Storage:
This cake does not freeze well before frosting because the strawberry frosting can separate and become watery upon thawing. However, the unfrosted cake layers freeze beautifully for up to 3 months. Wrap them tightly in plastic wrap and foil. Thaw overnight in the fridge before frosting.
Refrigerator:
Store leftover cake in an airtight container in the fridge for up to 4 days. The strawberry frosting is perishable. It will last, but the texture changes slightly. Bring to room temperature before eating for the best flavor.
Nutrition Information
I’m not a nutritionist, but here’s the breakdown. This is a rich cake. It’s meant to be a treat.
Per slice (1/12th of cake):
| Nutrient | Amount |
|---|---|
| Calories | 420 |
| Fat | 22g |
| Carbs | 55g |
| Fiber | 2g |
| Sugar | 40g |
| Protein | 5g |
| Sodium | 250mg |
My Take: This is comfort food. It’s sweet, it’s rich, and it’s made with real ingredients. It’s not a health food, but it’s better than store-bought alternatives loaded with preservatives. Enjoy it mindfully. It’s worth every calorie.
Final Thoughts
Making this Best Homemade Neapolitan Layer Cake with Fresh Strawberry Frosting is more than just baking. It’s about creating a memory. It’s about showing that dietary restrictions don’t have to stop you from enjoying the things you love. This cake is tender, flavorful, and beautiful. It’s proof that with a few simple swaps, you can have your cake and eat it too—gluten-free and delicious.
If you make this, I’d love to hear how it turns out. Drop a comment below with your results. Did you add extra strawberries? Did you use a specific flour blend? I read every comment and love hearing from you. Share this recipe with a friend who needs a gluten-free dessert inspiration. Happy cooking!
FAQs
Can I use almond flour instead of gluten-free blend?
I tried this, and it didn’t work for a layered cake. Almond flour lacks the structure to hold the layers together, resulting in a crumbly mess. Stick to a 1-to-1 gluten-free flour blend with xanthan gum for the best structure.
Why is my gluten-free cake dry?
Gluten-free flour absorbs more liquid than wheat flour. Make sure you’re measuring your flour correctly (spoon and level, don’t scoop). Also, don’t overbake. Check the cake 2 minutes before the timer goes off. The residual heat will finish cooking it.
Can I make this cake ahead of time?
Yes! In fact, it tastes better the next day. You can bake the layers up to 2 days in advance, wrap them tightly, and store at room temperature. Frost it the day you plan to serve it.
What if I don’t have a stand mixer?
You can mix by hand, but it will take more effort. Creaming the butter and sugar by hand takes about 5-7 minutes. You’ll need strong arms, but the result is the same.
Can I freeze the finished cake?
I don’t recommend it. The strawberry frosting can become grainy or watery when thawed. Freeze the unfrosted layers instead, and frost when ready to serve.
How do I get clean slices?
Wipe your knife with a warm, damp cloth between each cut. This removes any frosting residue and ensures a clean edge. For neat slices, chill the cake for 20 minutes before cutting.
For more easy, crowd-pleasing desserts that fit various dietary needs, check out my easy game day brownie footballs or my easy Labor Day berry trifle. Both are simple to make and perfect for sharing!
Pin This Recipe!
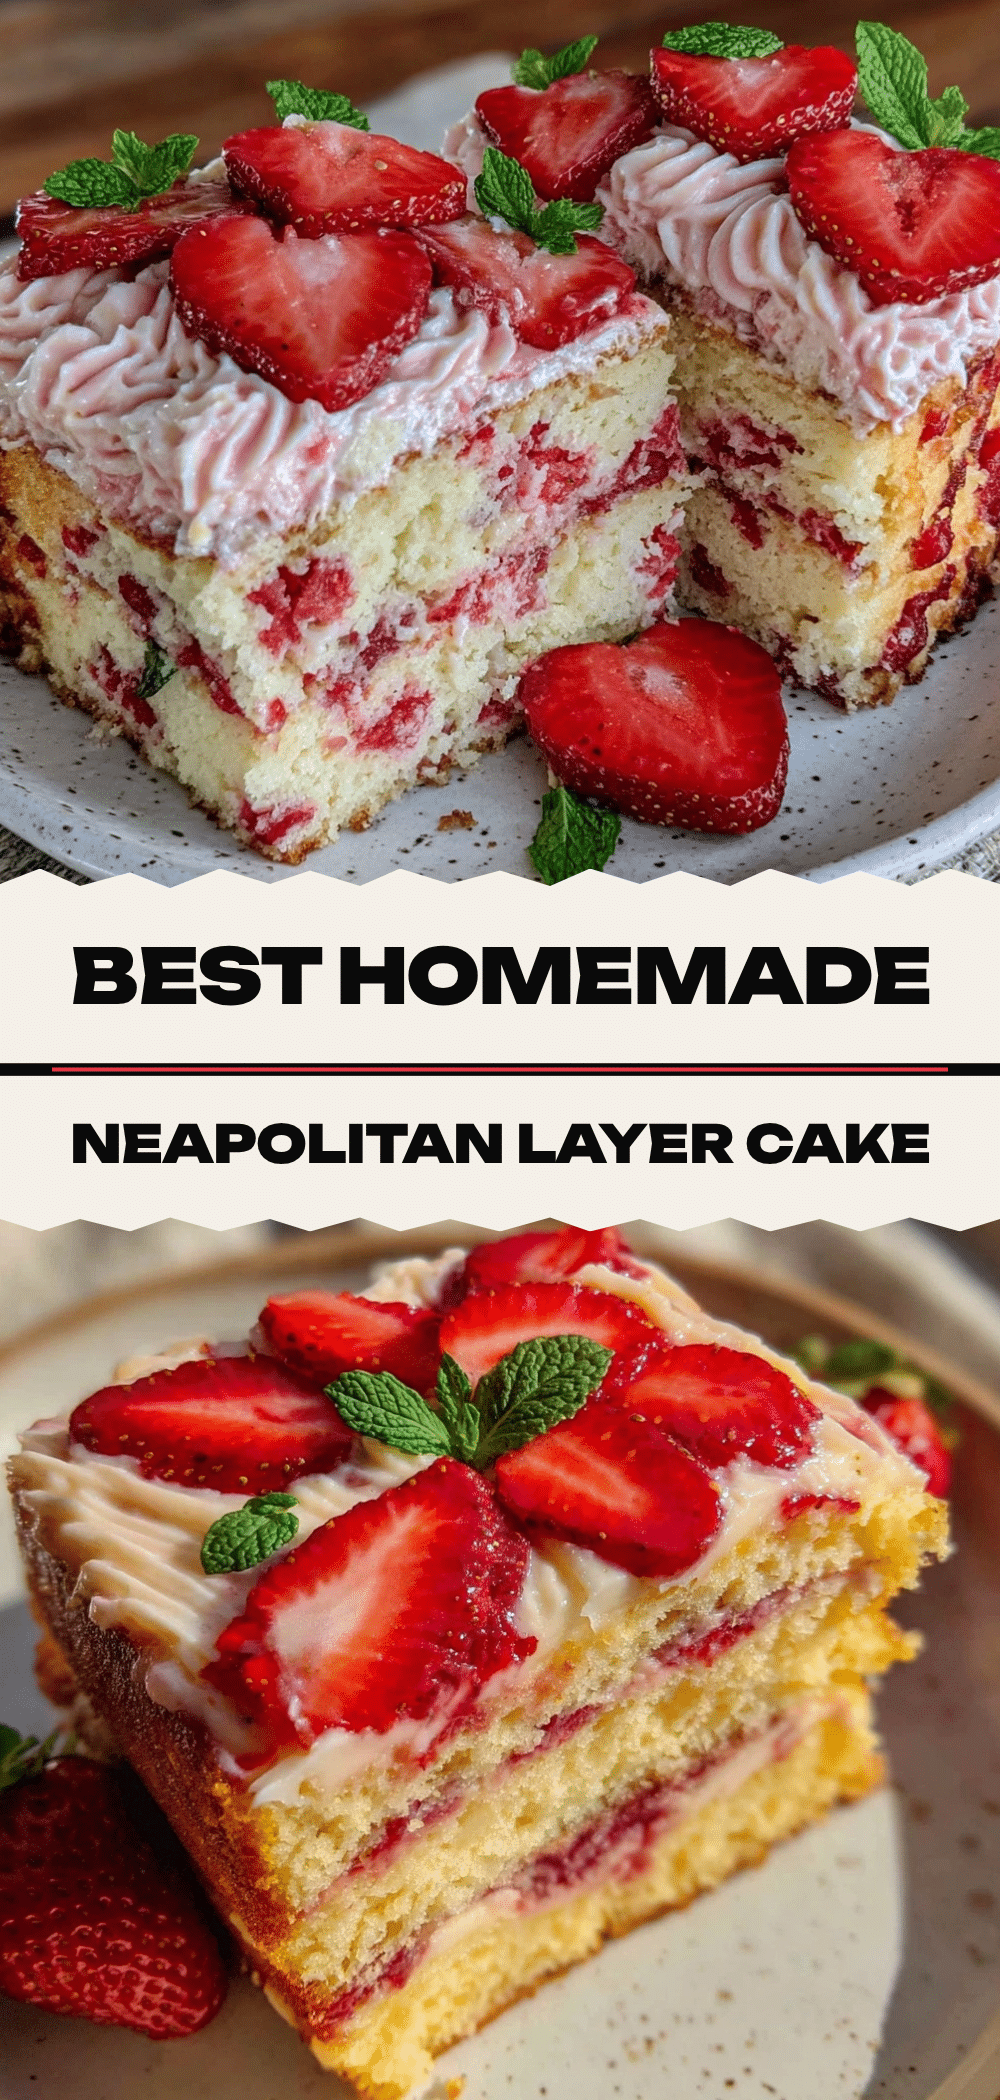
Neapolitan Layer Cake: Easy Gluten-Free Strawberry Frosting
- Total Time: 1 hour 45 minutes
- Yield: 12-14 servings 1x
Description
A tender, moist gluten-free Neapolitan layer cake featuring vanilla, chocolate, and strawberry layers, topped with a light and fluffy homemade fresh strawberry frosting.
Ingredients
- 3 cups (375g) Gluten-Free All-Purpose Flour Blend (with xanthan gum)
- 1 cup (226g) Unsalted Butter, room temperature
- 2 cups (400g) Granulated Sugar
- 4 large Eggs, room temperature
- 1/2 cup (120g) Full-Fat Greek Yogurt
- 2 teaspoons (10ml) Pure Vanilla Extract
- 1.5 teaspoons (7.5g) Baking Powder
- 1.5 teaspoons (7.5g) Baking Soda
- 1/2 cup (45g) Dutch-Process Cocoa Powder
- 2 cups (300g) Fresh Strawberries, hulled
- 4 cups (480g) Powdered Sugar, sifted
- 2–3 tablespoons (30-45ml) Heavy Cream
- 2 tablespoons Sugar (for macerating strawberries)
- Salt (to taste, if not in flour blend)
Instructions
- Preheat oven to 350°F (175°C). Grease three 8-inch round cake pans and line bottoms with parchment paper. Lightly flour pans with gluten-free flour blend.
- In a mixer bowl, beat softened butter and granulated sugar on medium-high speed for 3-4 minutes until pale and fluffy. Scrape down sides.
- Add eggs one at a time, beating well after each. Mix in vanilla extract and Greek yogurt until smooth and glossy.
- In a separate bowl, whisk together gluten-free flour, baking powder, baking soda, and salt.
- Reduce mixer to low. Add dry ingredients to wet ingredients in three batches, mixing until just combined. Do not overmix.
- Divide batter evenly among three bowls (approx. 1.5 cups each). Leave two as vanilla; add cocoa powder to the third and mix until dark.
- Pour batters into prepared pans. Tap gently to release air bubbles.
- Bake for 25-30 minutes, rotating pans halfway through. Cakes are done when a toothpick inserted comes out clean.
- Cool cakes in pans for 10 minutes, then turn out onto a wire rack to cool completely.
- While cakes cool, macerate chopped strawberries with 2 tablespoons sugar for 15 minutes. Drain liquid, then puree strawberries and strain to remove seeds.
- Beat butter until creamy. Gradually add powdered sugar, then add strawberry puree and heavy cream. Beat on high until fluffy and light pink.
- Assemble cake: Place one layer on plate, spread frosting, add second layer, frost again, add third layer. Cover entire cake with remaining frosting and decorate with fresh strawberries.
Notes
Ensure all ingredients are at room temperature for best texture. Parchment paper is essential to prevent sticking. The cake tastes better the next day as flavors meld. Do not freeze the finished cake with frosting as it may separate; freeze unfrosted layers instead.
- Prep Time: 45 minutes
- Cook Time: 30 minutes
- Category: Dessert
- Cuisine: American
Nutrition
- Serving Size: 1 slice (1/12th of c
- Calories: 420
- Sugar: 40
- Sodium: 250
- Fat: 22
- Saturated Fat: 13
- Carbohydrates: 55
- Fiber: 2
- Protein: 5
Keywords: gluten-free cake, neapolitan cake, strawberry frosting, homemade cake, gluten-free baking, layer cake, dairy-free option